On Windows 10, Microsoft introduced a new gaming feature known as Xbox Gaming Bar. Xbox Game Bar is a built-in tool of the Windows operating system that provides you with lots of gaming-related features.
With Xbox Game Bar, you can capture in-game screenshots, record gaming videos, check the FPS, check the resource consumption, and more. What’s more exciting is that the Xbox Game bar is also available on Windows 11 operating system.
So, if you are using Windows 11, you can utilize the Xbox game bar to record your computer screen. It’s pretty easy to record a screen on Windows 11 with Xbox Game Bar, and the more important thing is that it’s completely free.
Also Read: How to Install Windows 11 From USB (Full Guide)
Steps to Record Screen on Windows 11 Using Xbox Game Bar
So, in this article, we will share a step-by-step guide on using the Xbox Game bar to record screens on Windows 11. The steps are pretty straightforward; just follow some of the simple steps given below.
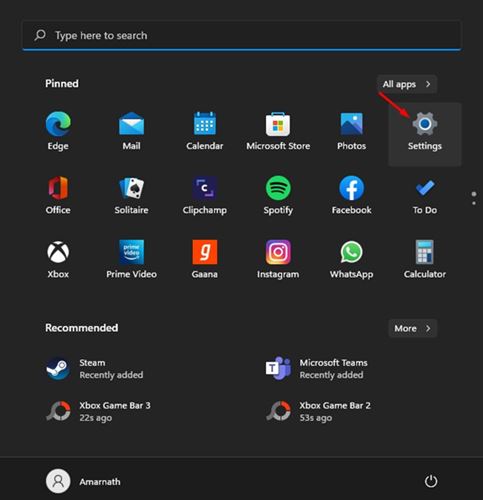
1. First of all, open the Windows 11 Start button and select Settings.
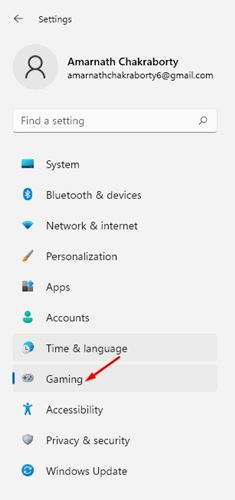
2. On the Settings, click on the Gaming Option.
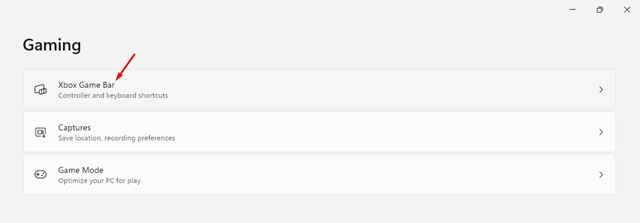
3. On the right pane, click on the Xbox Game Bar option, as shown in the screenshot below.
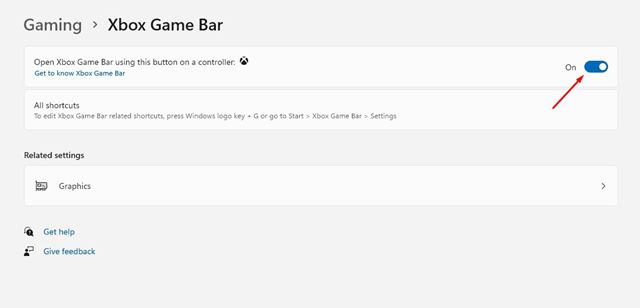
4. On the next screen, enable the option Open Xbox Game Bar using this button on a controller.
5. Now launch the game which you want to record. Press the Windows Key + G button to launch the Xbox Game Bar.
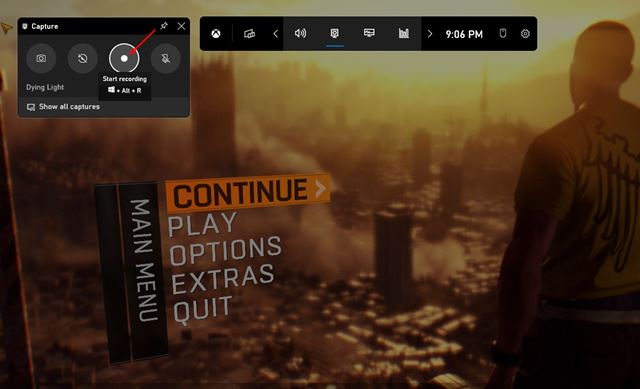
6. To record the screen, click on the Recording button, as shown below.
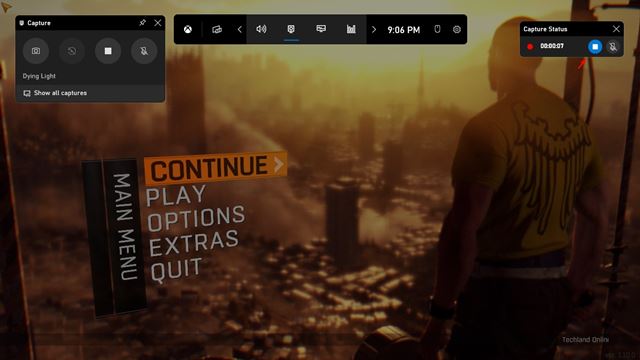
7. To stop the Recording, click on the Stop button as shown in the screenshot below.
8. The Recordings will be saved to the This PC > Videos > Captures folder.
That’s it! You are done. This is how you can use Xbox Game Bar to record screen on Windows 11.
So, this guide is all about using the Xbox game bar to record screens on Windows 11. I hope this article helped you! Please share it with your friends also. If you have any doubts related to this, let us know in the comment box below.
