You can manually check the Firewall settings and block/allow connections, but if everything is messed up, you should reset the Windows Firewall to its default settings.
1. Reset Windows Firewall Settings to Default
We will use the Windows Firewall’s settings page to reset the Firewall rules.
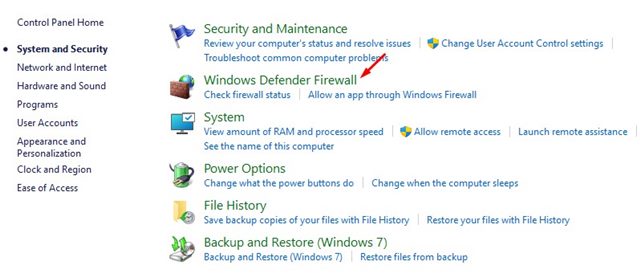
1. Open Control Panel from the Windows Search.

2. Click System and Security.

3. Click on Windows Defender Firewall.
4. Click on the Restore defaults link.

5. Click on Restore Defaults.
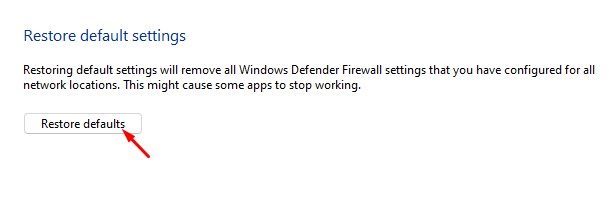
This will restore the default settings for Windows 11 Firewall and remove all the settings you have configured.
2. Reset Firewall Settings from the Command Prompt
We will use Windows 11’s Command Prompt utility to reset the firewall rules.
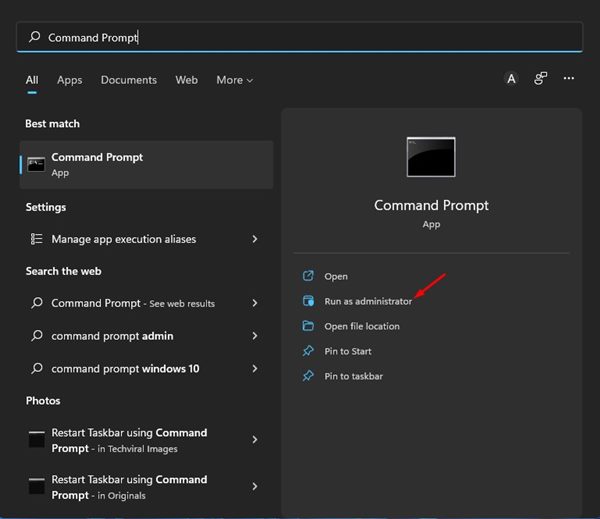
1. Open the Windows 11 search and type in Control Panel. Right-click on the Control Panel and select Run as Administrator.
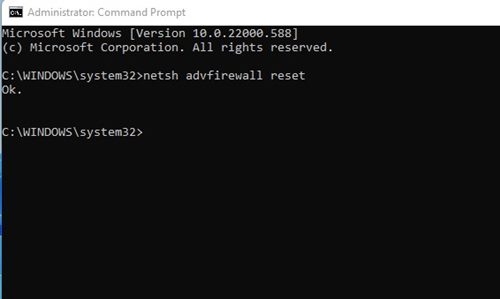
2. On the Command Prompt window, type in the command:
netsh advfirewall reset
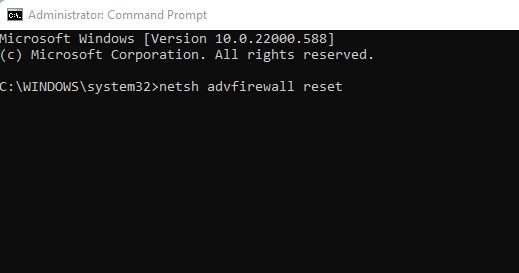
3. After executing the command, you will see an Ok message. This is the success message.
3. Reset Windows Firewall Settings using PowerShell
If the command prompt method fails, you can try PowerShell.
- Click on Windows search and type PowerShell.
- Right-click on PowerShell and select Run as administrator.
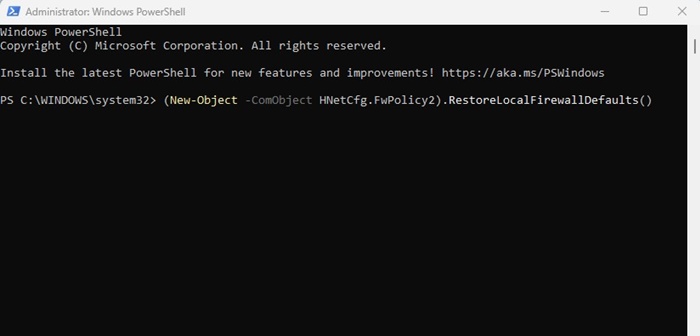
- Copy & paste the command into PowerShell and press Enter.
(New-Object -ComObject HNetCfg.FwPolicy2).RestoreLocalFirewallDefaults()
4. Restore Windows Firewall to Default via Windows Security
You can even rely on the Windows Security app to restore the Windows Firewall settings.
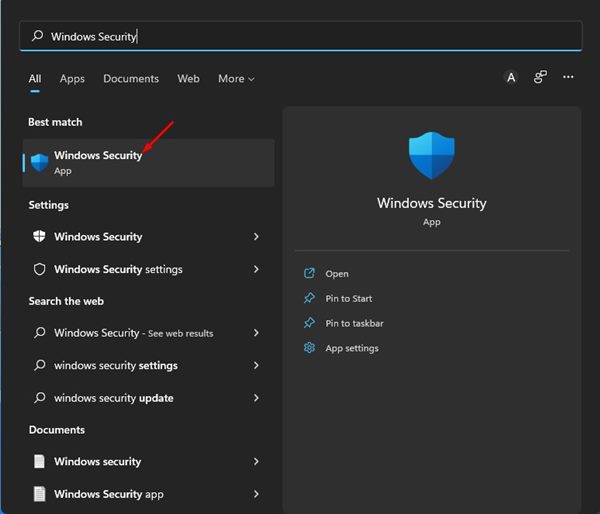
1. Open Windows Security from the Windows Search.
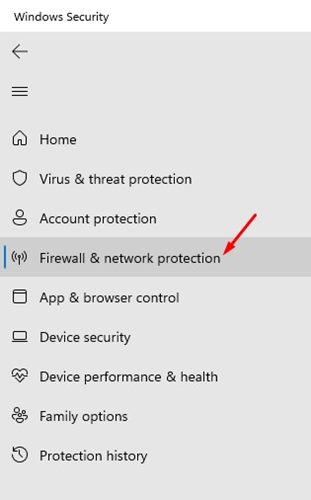
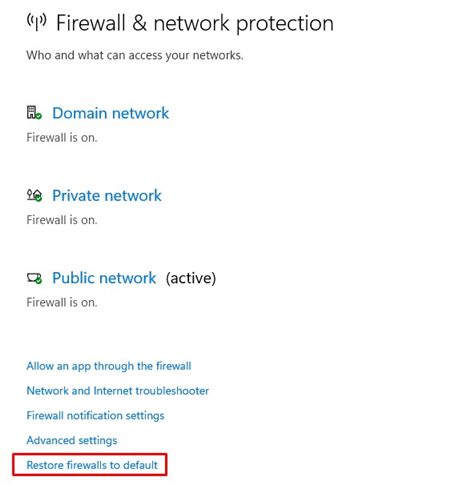
2. Click on Firewall & network protection.
3. Click the Restore firewalls to default link.
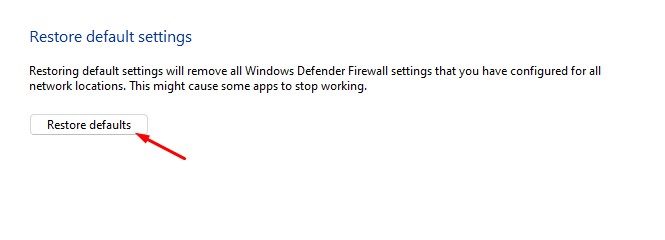
4. Click on Restore Defaults.
5. Reset Firewall Settings in Windows 11 Using the Advanced Security Tool
There’s another way to reset firewall settings in Windows 11 computers. You can use the Firewall with advanced security tools to reset all your Firewall settings to their default values.
1. Press the Windows Key + R button. On the RUN dialog box, type wf.msc and press Enter.
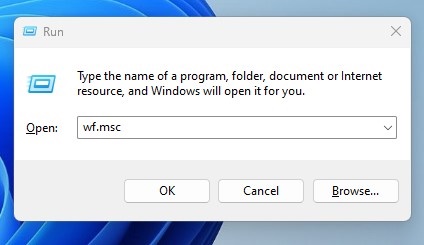
2. The RUN command will open Windows Defender Firewall with the Advanced Security tool.
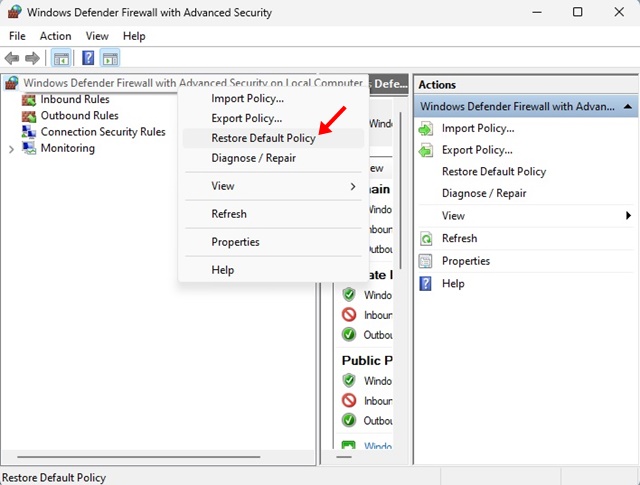
3. Right-click on the Windows Defender Firewall with Advanced Security on the Local computer and select Restore Default Policy.
Restoring the default settings of Windows Firewall is easy, but it will remove all Windows Defender firewall settings you have configured.


