Windows 10 is indeed a great desktop operating system for gaming. Windows 10 offers more gaming-related features like advanced graphics settings, an Xbox game bar, and more than any other desktop operating system.
On Windows 10, you can even select which GPU a game or application can use. If you are a gamer, you might know about the IGPU or Integrated Graphic Processing Unit. The integrated graphics chipset is built into the processor, and it ensures that your computer can use display even without a dedicated graphics card.
Generally, the integrated GPU is power efficient, whereas the discrete GPU is better for gaming and running graphics demanding applications. If your laptop or computer has both, and if you rarely play games, then it’s best to select the Integrated GPU for apps in Windows 10.
Also Read: 10 Best Games to Play On PC Without GPU
Steps to Set Default GPU for Apps & Games on Windows 10
Similarly, if you are a heavy gamer or used to run graphic demanding applications, you can always use the discrete GPU. Windows 10 allows users to manage the graphic performance according to the apps. This article will share a step-by-step guide on how to set default GPU for Apps and games in Windows 10. Let’s check out
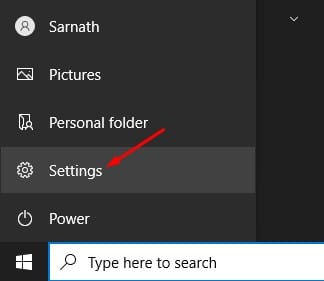
Step 1. First of all, click on the Start button and select ‘Settings.’
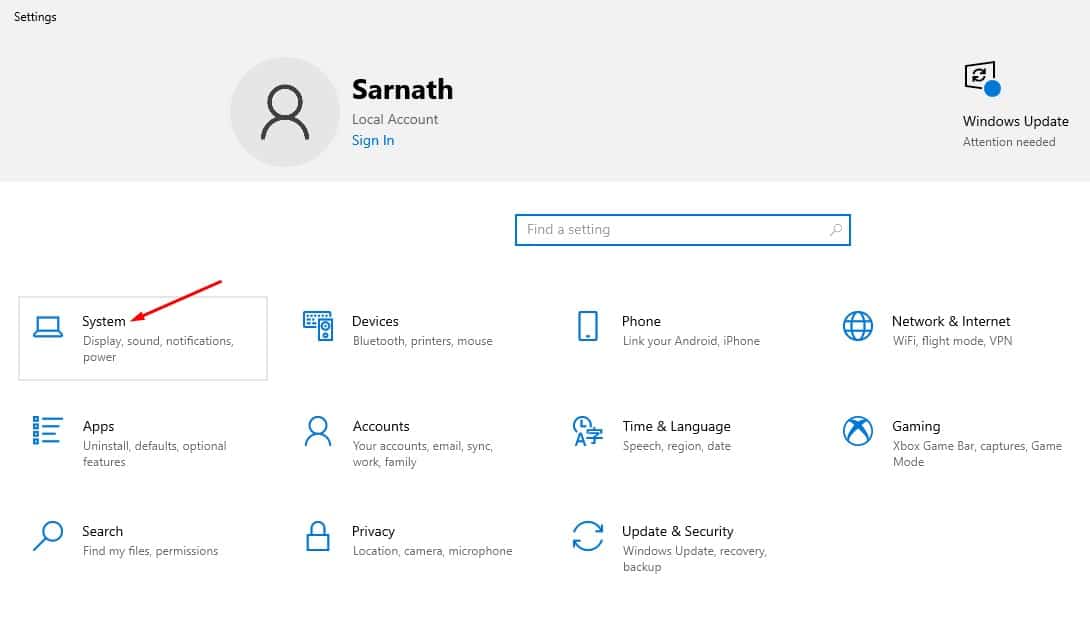
Step 2. On the Settings page, click on the ‘System.’
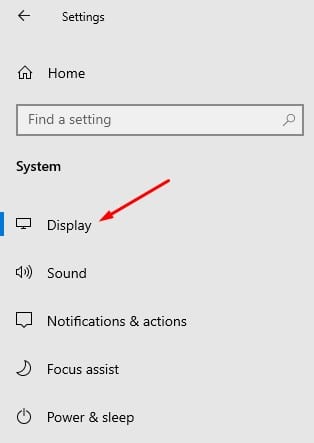
Step 3. Now on the left-hand pane, click on the ‘Display’ section.
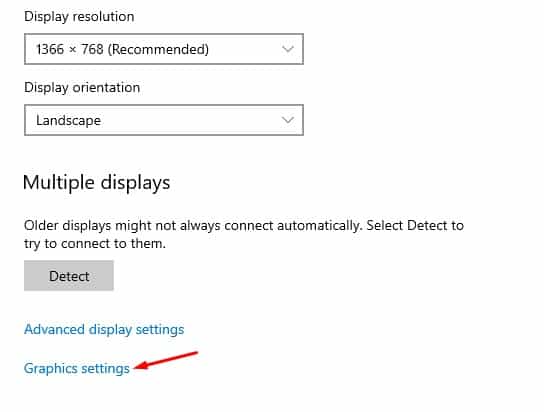
Step 4. Under the Display, click on the ‘Graphics Settings’ option.
Step 5. Under the Graphics performance preference, click on the ‘Desktop app’ and then on the ‘Browse.’
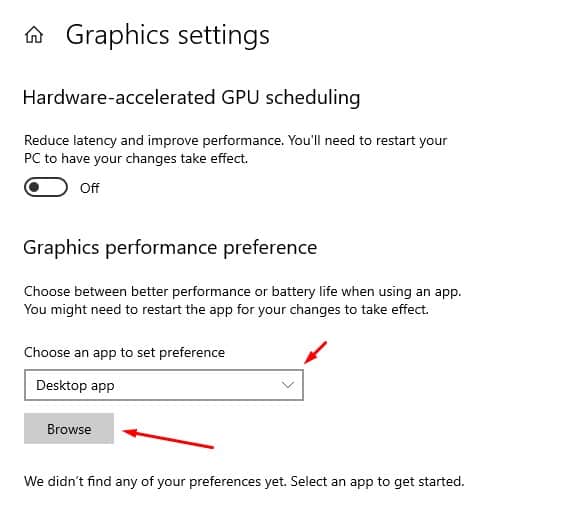
Step 6. You need to select the .exe files of the apps or games whose preference you want to set. Once done, click on the ‘Add’ button.
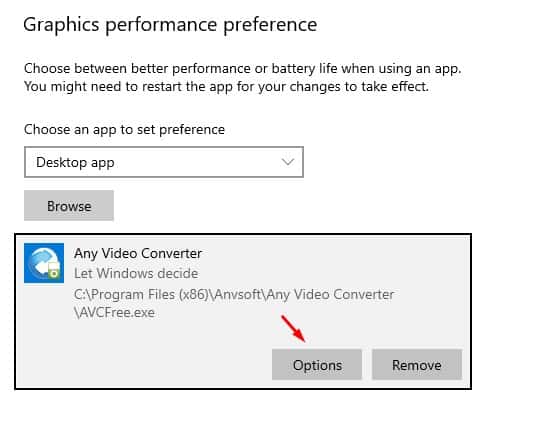
Step 7. Once added, click on the app and select ‘Options’
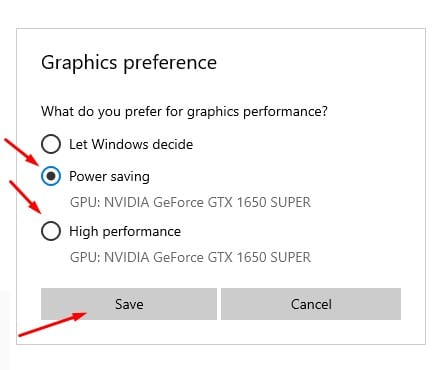
Step 8. Under the Graphics preference pop-up, select between ‘Power Saving’ or ‘High Performance.’ The Power saving mode will force the app to use the integrated GPU, whereas the High-performance option will use the dedicated graphics.
That’s it! You are done. This is how you can set the default GPU for apps on Windows 10 computer.
So, this article is all about how to set default GPU for apps on Windows 10 computers. I hope this article helped you! Please share it with your friends also. If you have any doubts related to this, let us know in the comment box below.

