If you are using the internet for a while, and have enough knowledge regarding the working of the internet, then you might know about the DNS. DNS or Domain Name System is basically a database consisting of different domain names and its IP Address. The ultimate role of DNS is to look at the IP Address that the domains are associated with.
For example, if you enter techviral.net on a web browser, the DNS servers look at the IP Address of that domain. Once matched with the IP Address, it comments on the web server of the visiting website. This is an automated process, but by default, this process is unencrypted.
Since the connection is encrypted, it makes you susceptible to man-in-the-middle attacks. To deal with such attacks, the industry created tools to secure the interaction process between your device and the DNS server.
What is Private DNS?
Private DNS is basically a security feature that was introduced with Android 9. The role of Private DNS on android is to let you manage DoT or DNS Over TLS usage while being connected to public DNS servers.
The Private DNS on Android 9 allows you to change the DNS used across all apps and networks, which wasn’t possible on the previous versions of Android. Apart from that, it also encrypts all DNS queries to make sure they can’t be read or modified by any middle man.
How To Set Up Private DNS on Android
Well, setting up Private DNS on Android is fairly an easy process. However, make sure that your phone is running on Android 9 or above operating system. Just follow some of the simple steps given below.
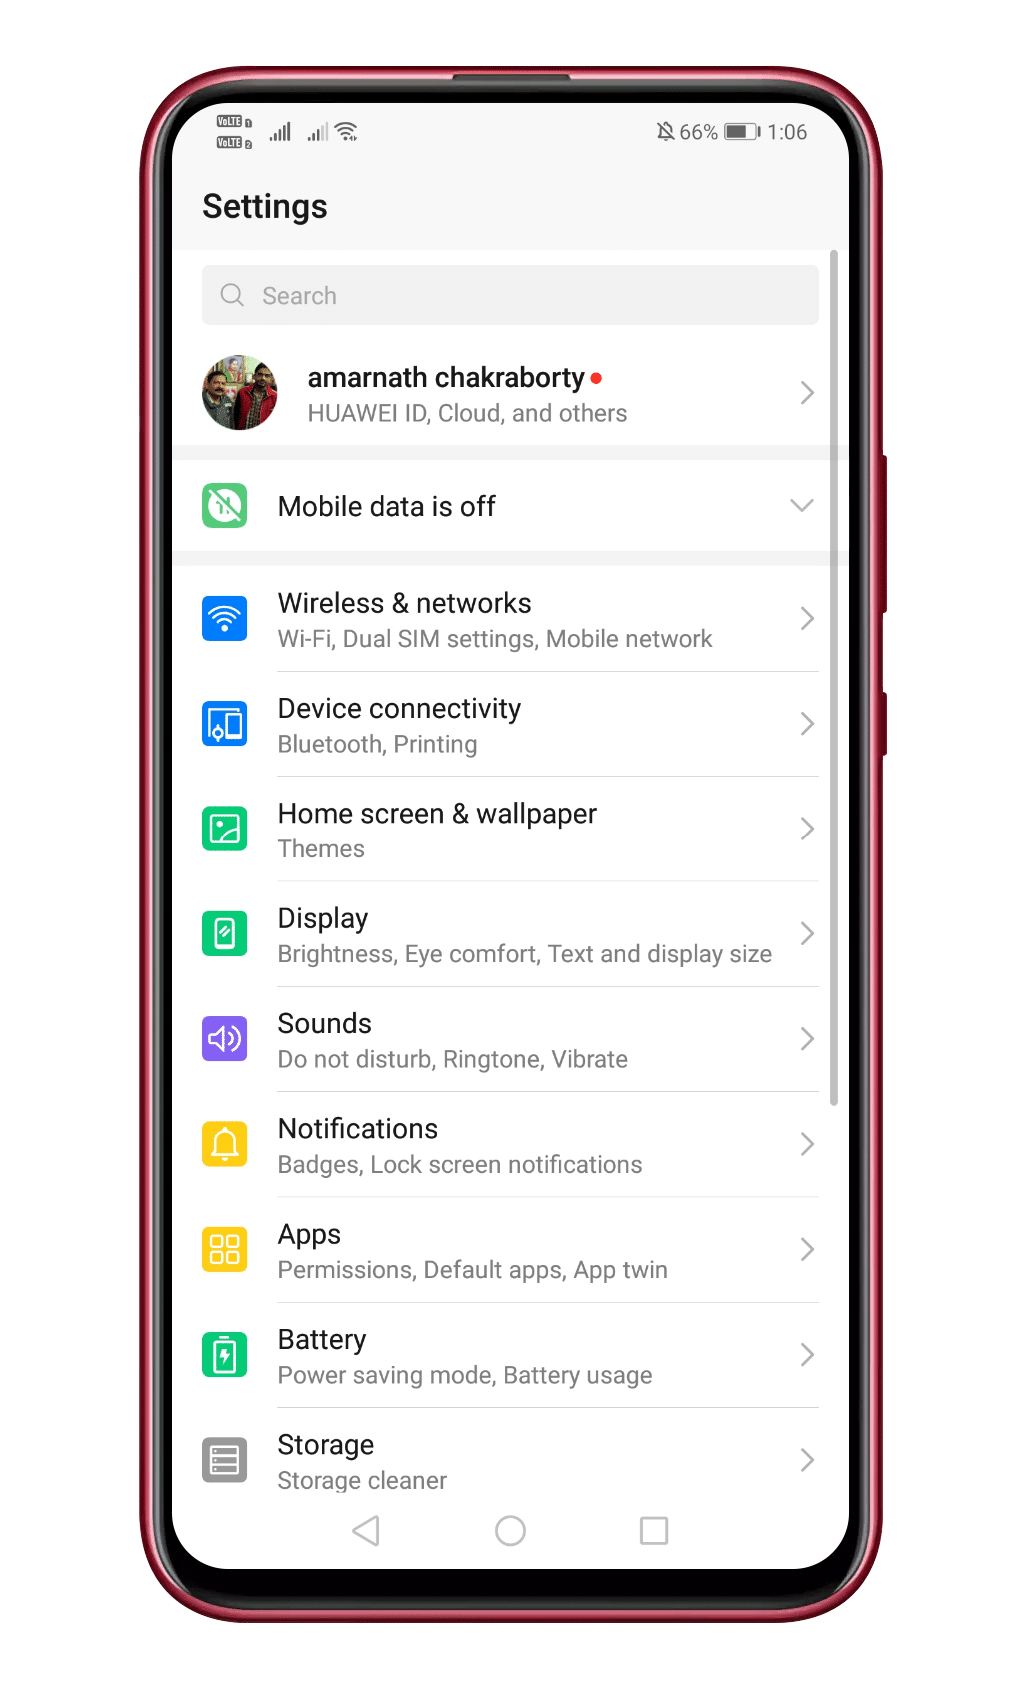
Step 1. First of all, open App Drawer and tap on ‘Settings’
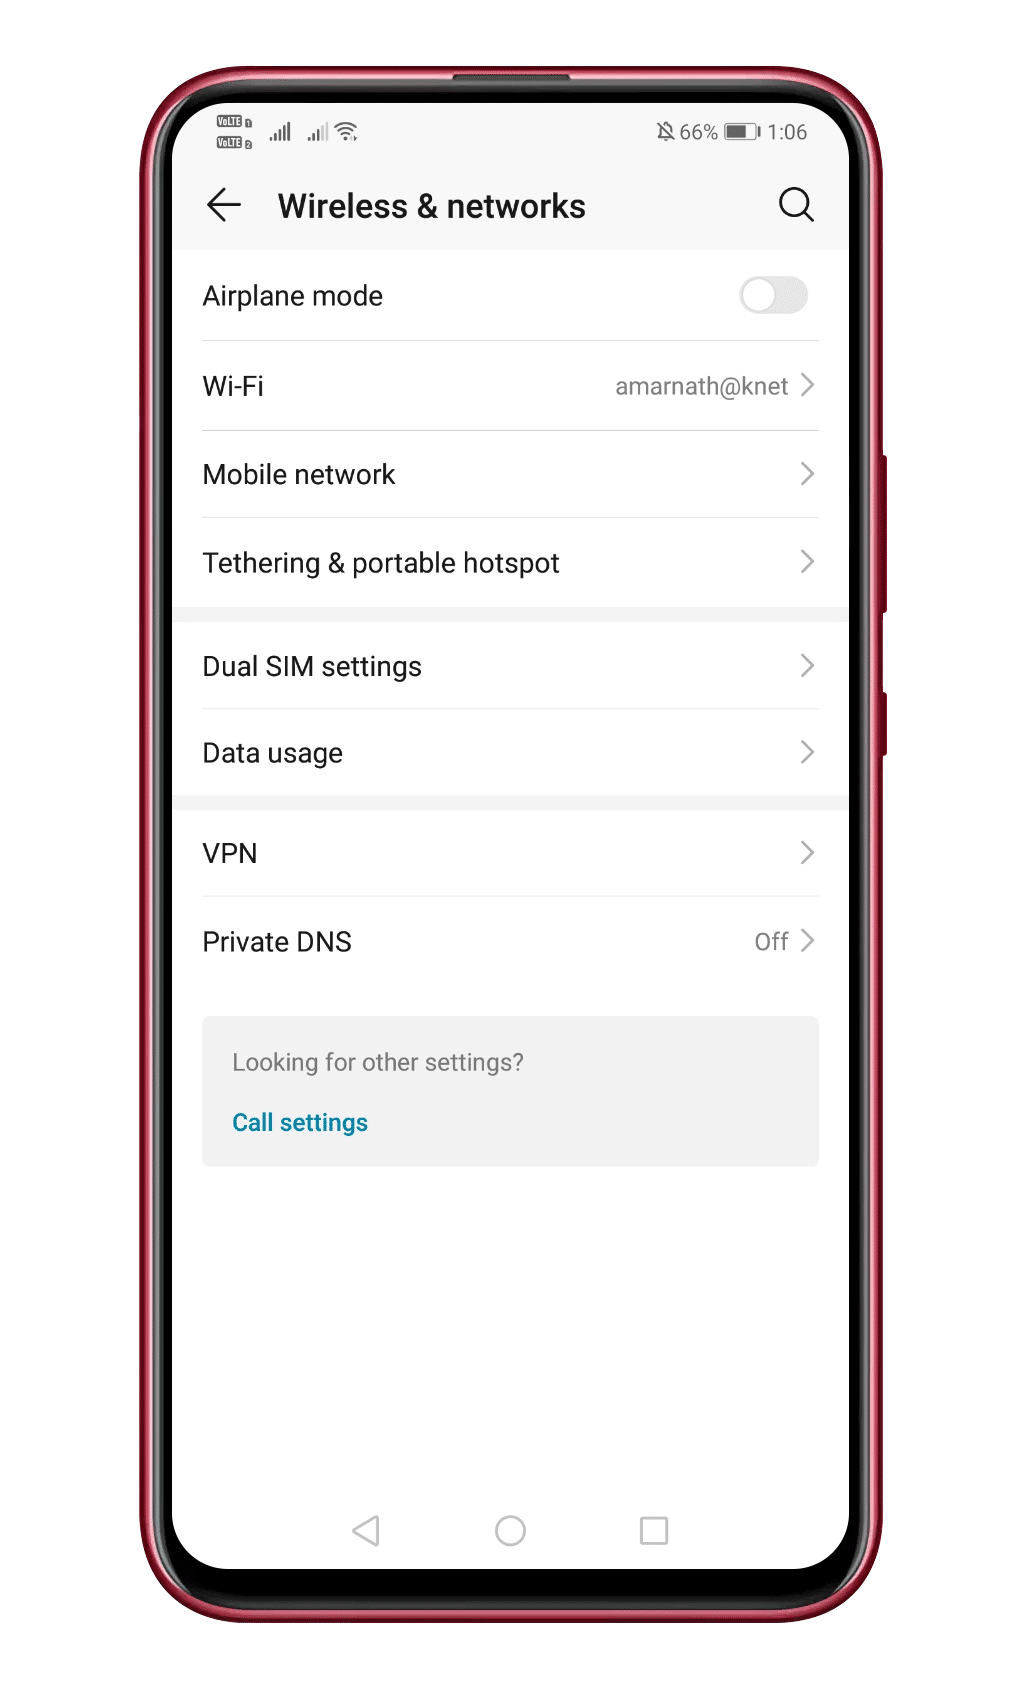
Step 2. Now under the Settings, tap on the ‘Network & Internet’ or ‘Wireless & Networks’
Step 3. Under the Network & internet, you need to tap on the ‘Private DNS’ option.
Step 4. Next, enable the ‘Configure Private DNS’ option and there enter the hostname of your private DNS service.
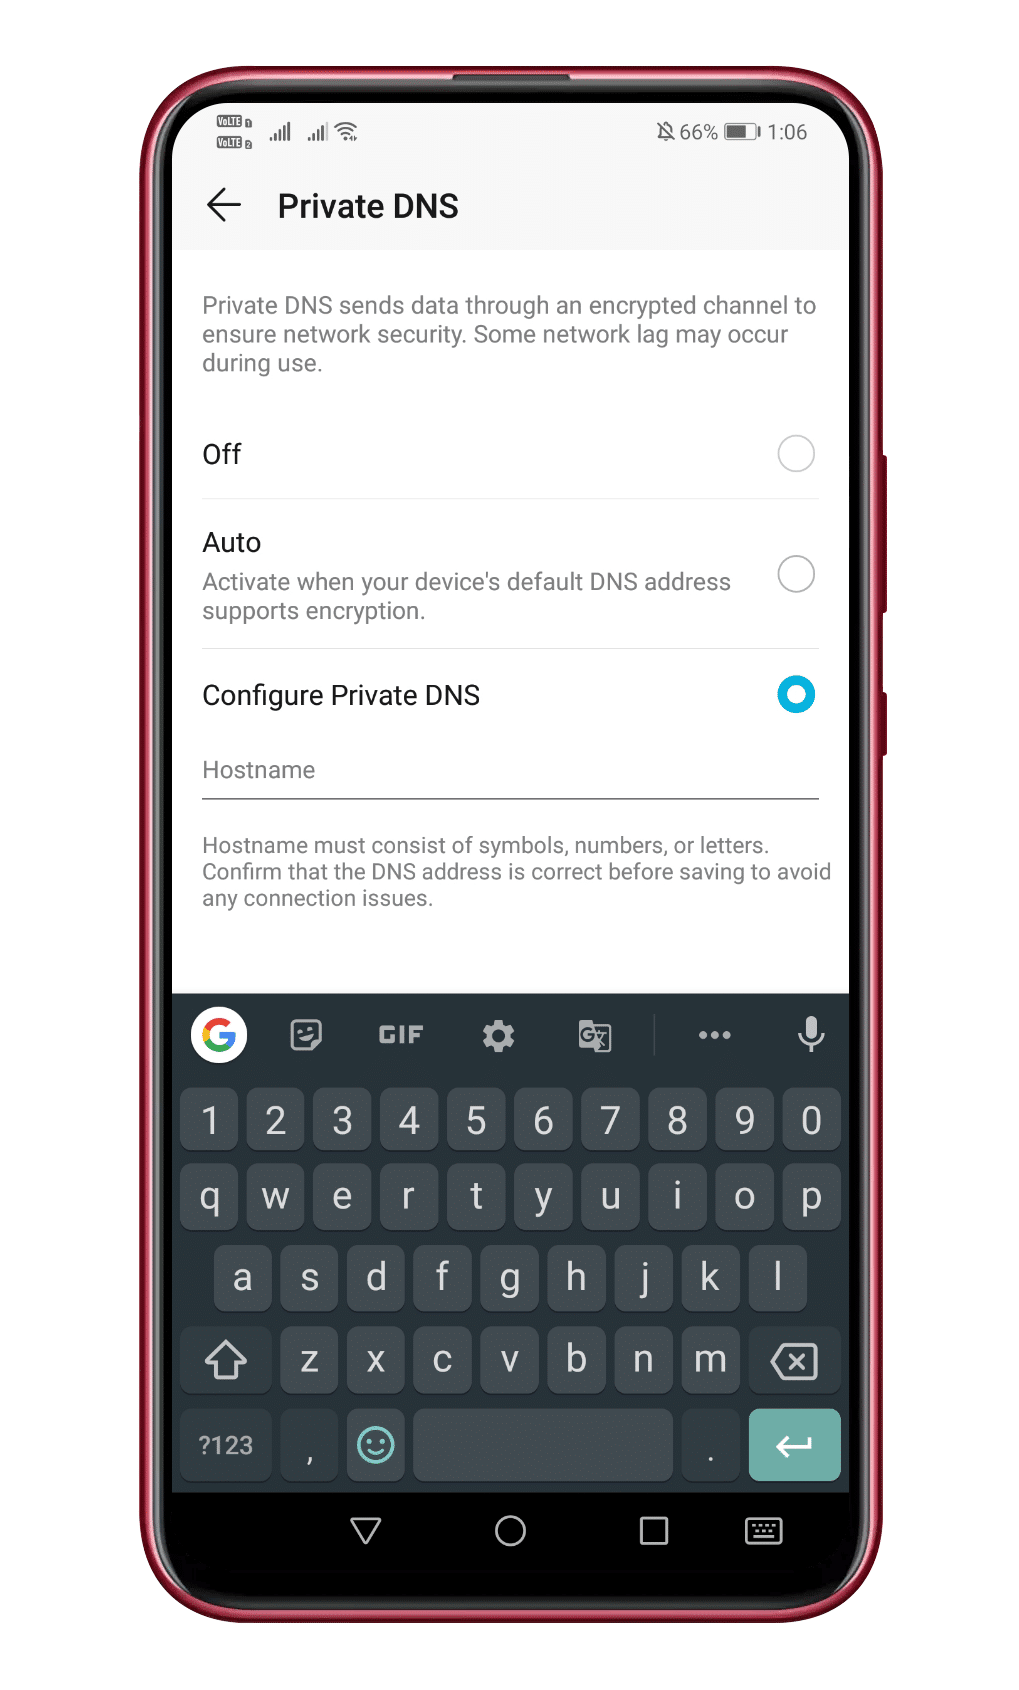
Note: You can search on google for Private DNS service. There are lots of free Private DNS service providers out there like Cloudflare. You need to copy and paste the hostname of DNS provider under the ‘Private DNS’
That’s it! You are done. Now just restart your smartphone, and the Private DNS will be ready.
So, this article is all about how to use Private DNS on your Android smartphone. If you have any other doubts related to this, let us know in the comment box below. I hope this article helped you! Share it with your friends also.


