Windows users can encounter many external speaker issues like speakers not showing on the computer, the sound being too low, speakers making weird sounds, etc. So, here in this article, we will share some of the best methods to fix speakers that stopped working on Windows 10 errors.
If you have been using Windows for a while, you might already know that the operating system is full of bugs. Windows users often get errors related to drivers, hardware, software, and BSOD. A few Windows users have recently reported encountering unusual speaker stopped working Windows 10 issue.
Many Windows users have messaged us about speakers stopping working on Windows 10/11. So, here in this article, we have discussed the speaker problems on Windows. Well, speaker problems on Windows 10 can ruin your computer experience because you won’t be able to hear anything.
Speakers Stopped Working On Windows 10? Here’s How You Can Fix it
Windows users can encounter many external speaker issues like speakers not showing on the computer, the sound being too low, speakers making weird sounds, etc. So, here in this article, we will share some of the best methods to fix speakers that stopped working on Windows errors. So, let’s check out how to fix speaker problems on Windows.
1) Check If the Audio Was Muted
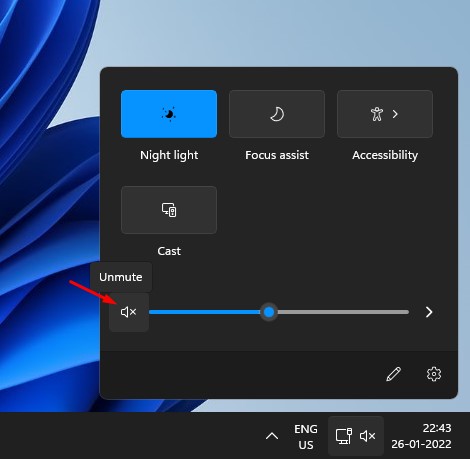
Before you try the other things, you must ensure that the audio on your computer/laptop is not muted. Audio can be muted by just hitting the wrong button or hotkey.
So, if speakers stopped working on your Windows 10/11, you should first check whether the audio has been muted. To unmute your audio, play an audio or video file and press the mute button on your keyboard.
You can also click the speaker icon on your system tray to mute/unmute the audio.
2) Check if Speakers are Properly connected to PC

The next best thing you need to do is to check if the speakers are properly connected to your PC/Laptop. You need to closely examine the speaker jack on your PC.
Unless you have a USB speaker or headphones, you must connect your audio device to a 3.5mm port. So, ensure that the 3.5mm jack of your headphone or speaker is plugged into the correct port.
3) Using Audio Troubleshooter
Windows 10 offers a troubleshooting tool to fix hardware and software-related problems for those who don’t know. You can use the Audio Troubleshooter tool to fix various audio-related errors from Windows 10 computers. Even if it fails to fix the problem, it will let you know the actual cause of the problem. So, here’s how to use Audio Troubleshooter to fix Speakers that stopped working on Windows 10.
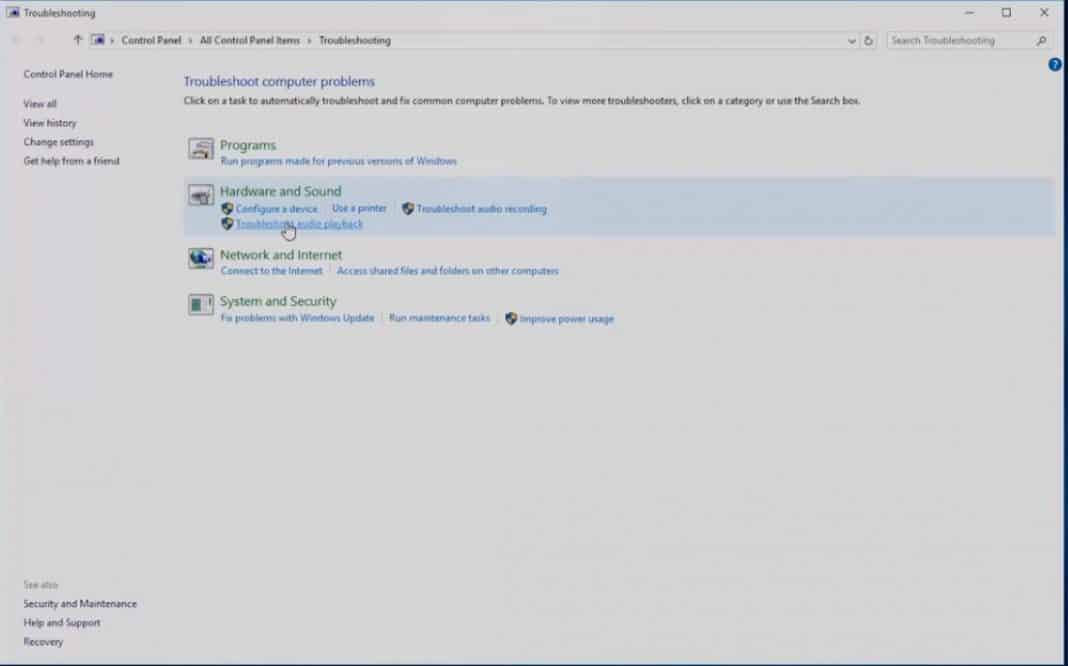
1. First, open the search box and search for Troubleshooting.

2. Open the Troubleshooting page and click on Troubleshoot audio playback.
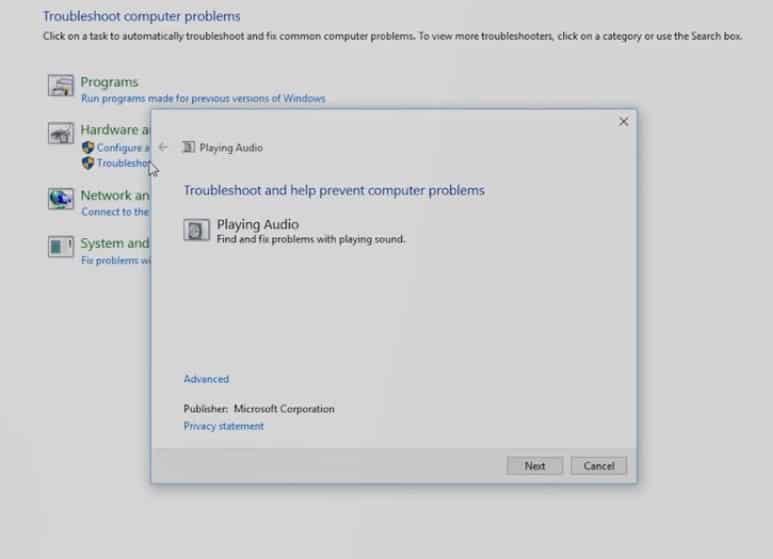
3. In the next step, you will see another page asking you to troubleshoot playing audio. Simply click on ‘Next’.
4. Now the Troubleshooting tool will scan and fix the audio-related problems. You need to wait for a few seconds.
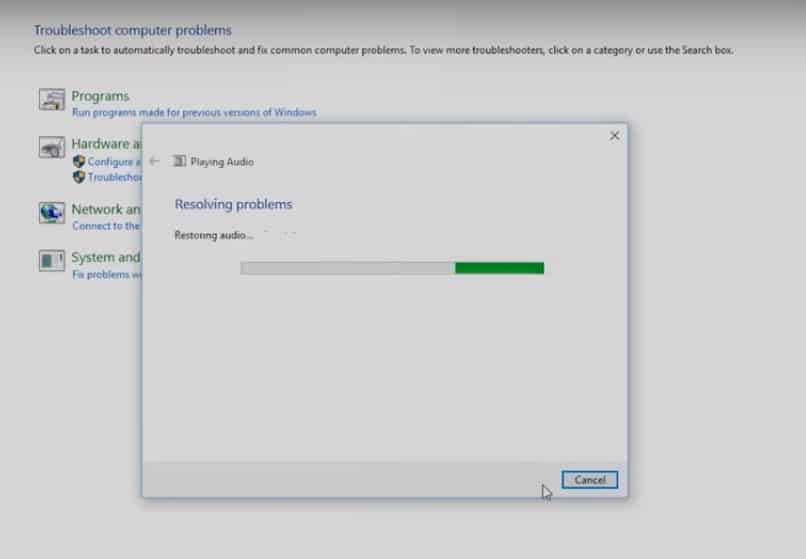
That’s it; you are done! The Audio Troubleshooter will either fix the problem or will let you know the actual cause of the problem.
4) Reinstall Drivers
If you are getting Speakers problems on Windows 10 computers, then reinstalling the drivers might be the best choice. So, in this method, we will reinstall Audio drivers to fix the speakers’ stopped working issue.
1. Search for Device Manager on the Windows 10 search box and open the first option.
2. On the Device Manager Page, you need to expand the Sound, video, and game controllers.
3. In the next step, right-click on the current sound card and select Properties. Under the Properties, head to the Driver tab and select ‘Uninstall’
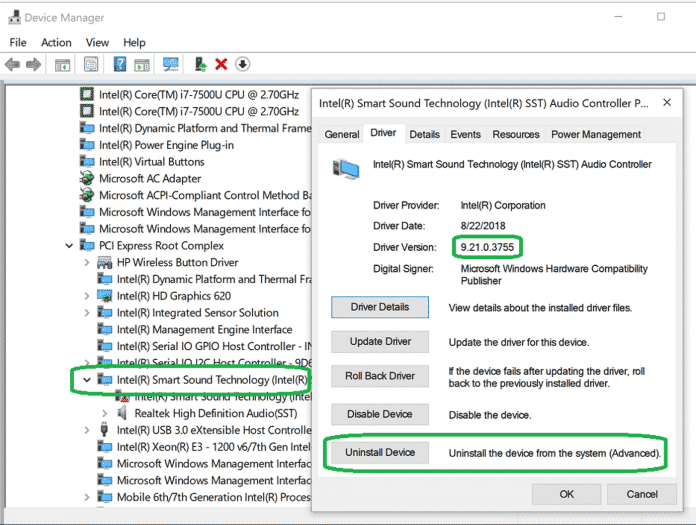
That’s it; you are done! Now click on ‘Apply’ and restart your computer. The operating system will automatically install the required audio drivers during the restart.
5) Update the Audio Driver
As we all know, outdated audio drivers also lead to several sound-related errors, including Speakers stopping working. So, in this method, we will update the Audio Driver through the Device Manager to fix the Speaker stopped working error message.
1. Search for Device Manager on the Windows Search bar and open the first option.
2. Now, you will see the Device Manager page. Here you need to expand the System Device menu

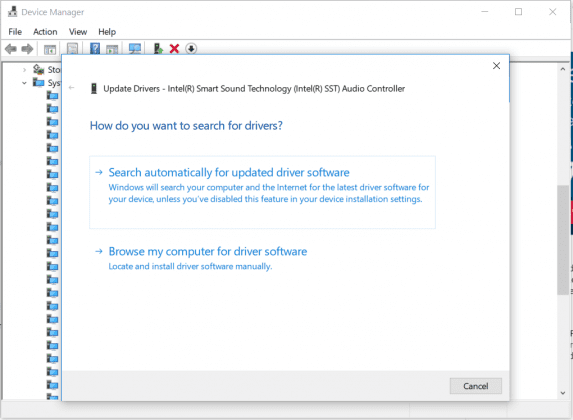
3. Now, on the System devices list, find the Audio driver. Right-click on the Audio driver and then select the option Update Driver.

4. On the next page, you will be asked to select whether you want to select the drive manually or search the web. Select the first option and click on ‘Next’
That’s it; you are done! This is how you can update audio drivers to fix speaker problems from Windows 10 computers.
6) Set the Speaker device
Well, in this method, we will set the default speaker device to fix the Speaker stopped working problem. Windows updates often change the default audio playback device leading to speaker problems. So, here’s how you can set the default speaker device on Windows 10.
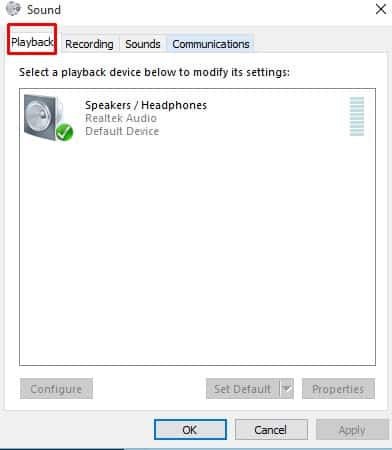
1. Click on the Start menu and search for Sound. Open the first option from the list.
2. In the sound menu, select the Playback tab.
3. Right-click on the device in which you want to set the audio playback and then click on ‘Properties’
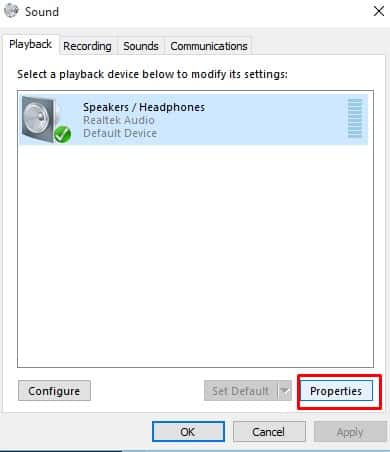
4. Under ‘Device Usage’, select Use this device (Enable).

That’s it; you are done! Now click on ‘Ok’ and then on ‘Apply’. Restart the computer, and your speaker will now work fine.
7) Change The Audio Format
If the above methods fail to fix the speaker problem, you could try changing the audio format. Some Windows 10 users have reported on Microsoft Forum that they have fixed the Speaker not responding or stopped working problem after changing the Audio format. So, to change the Audio format, follow some of the simple steps below.
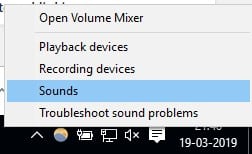
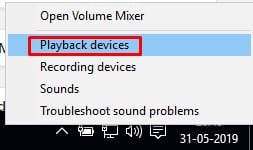
1. First, right-click on the Speaker icon from the notification bar and then click on Playback devices.
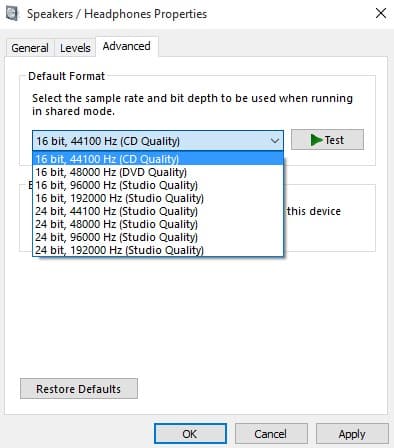
2. Now, double-click the default playback device on the Sound settings.

3. Select the audio format from the ‘Advanced’ tab. You need to try a different audio format to check which one works.
That’s it; you are done! This is how you can fix speakers that stopped working on Windows 10 computer problems.
So, these are the best methods to fix Speakers that stopped working on Windows 10 computer problems. If you know any other working methods to fix speaker problems on Windows, let us know in the comment box below.