On Windows 11, you can easily switch between user accounts without closing any open apps or files. Below, we have shared different ways to switch user accounts.
1. Switch Accounts from the Start Menu
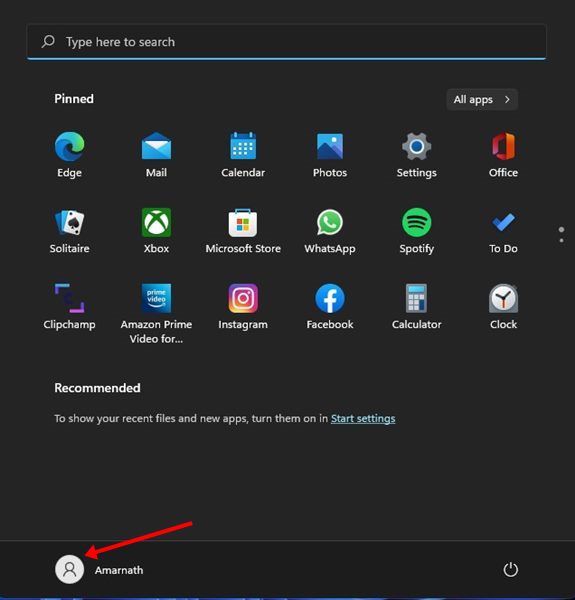
1. Click the Windows 11 Start button to open the Start menu.
2. Click on the user profile at the bottom left of the Start menu.
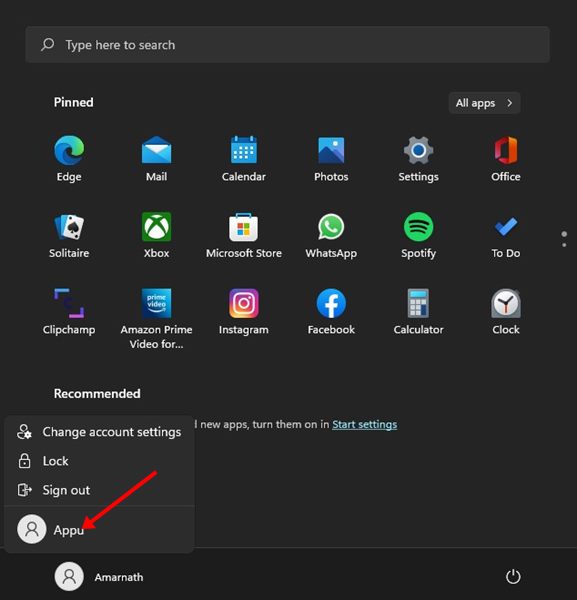
3. You will now see the other user accounts. Click on the user account name to switch accounts.
2. Switch User Account from the Lock Screen
1. Press the Windows Key + L button on your keyboard. This will open your PC’s lock screen.
2. In the bottom-left corner of the lock screen, click on your user account.
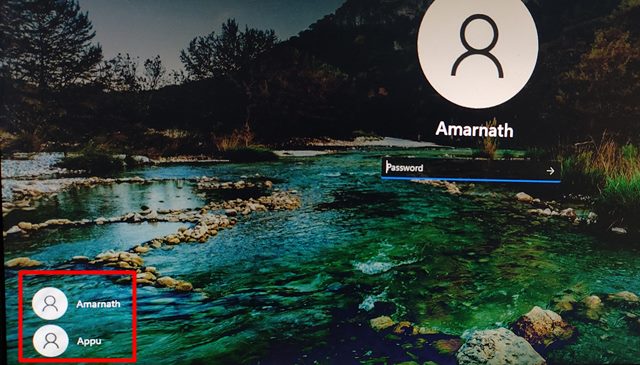
3. You will see all available user accounts. Click on the user profile name to switch to it.
3. Switch User Account in Windows 11 via Keyboard Shortcut
1. Press the ALT Key + F4 key on your keyboard. This will open the Shutdown Windows prompt.
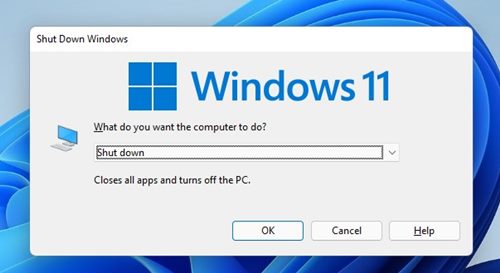
2. Click on the Drop-down menu and select Switch user.
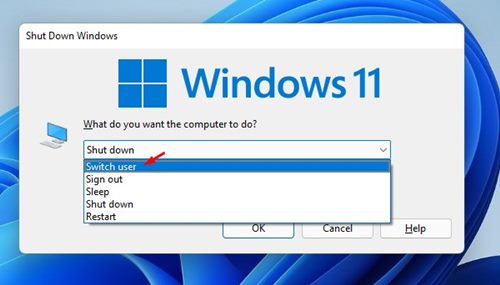
3. Click on Ok.
4. You will see the lock screen. Here, you need to select your user profile.
4. Switch User Account in Windows 11 via CTRL+ALT+Delete key
1. Press the CTRL+ALT+Delete key on your keyboard.
2. Click on Switch user.
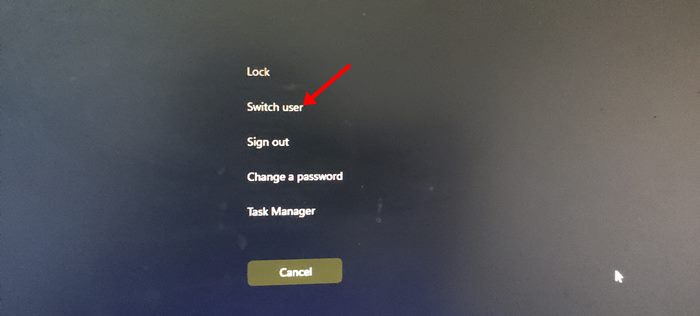
3. You will see the lock screen. Here, you need to select the user profile you want to use.
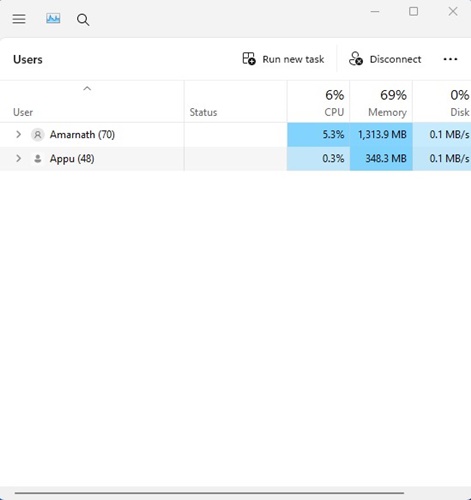
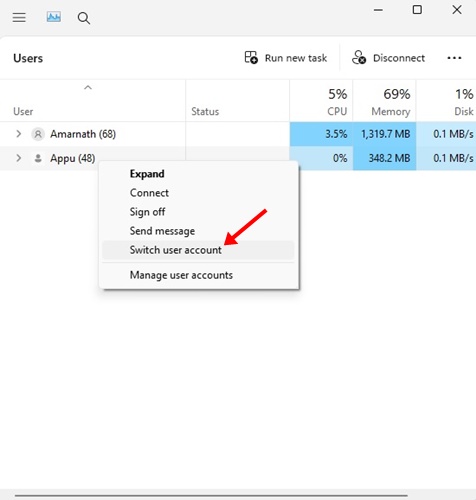
5. Switch User Accounts via Task Manager
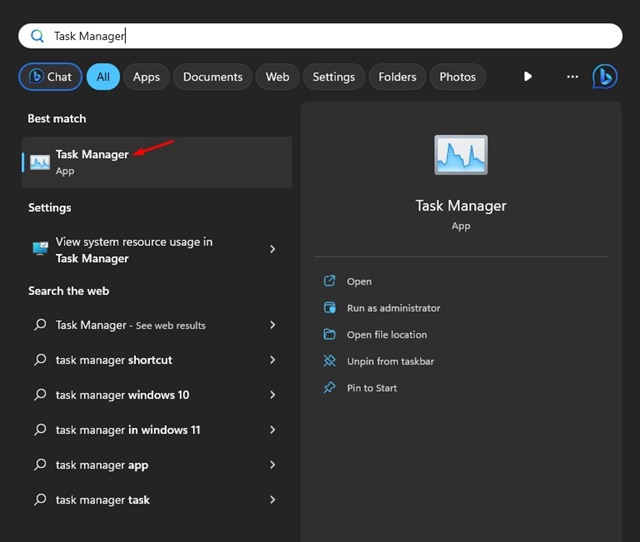
1. Open Task Manager from the Windows Search.
2. Click on the hamburger menu and switch to Users.
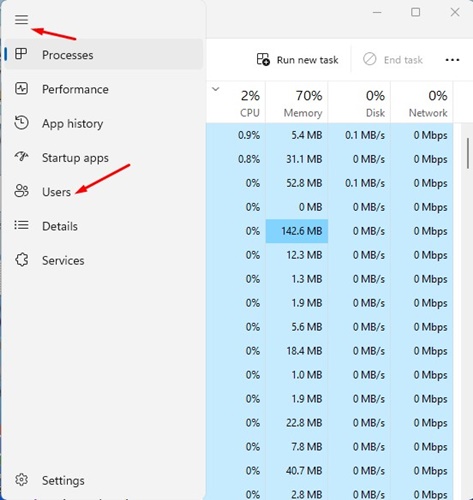
3. You will find all active user accounts that have been signed in.
4. Right-click on the user account you want to switch to and select Switch user account.
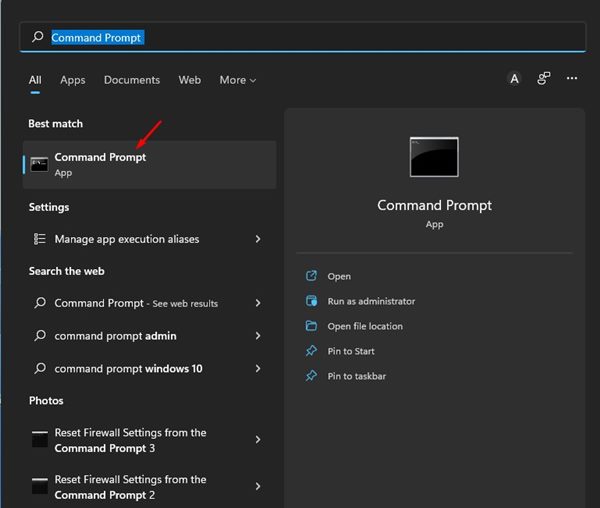
6. Switch user accounts in Windows 11 via CMD
1. Open Command Prompt from the Windows Search.
2. Execute the command:
tsdiscon
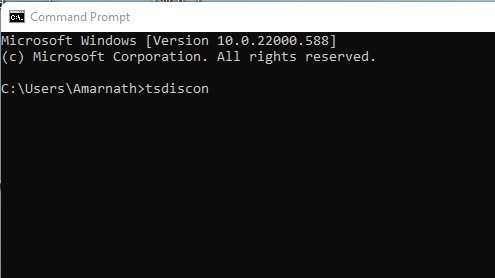
3. Executing this command will take you to the Lock Screen. Then, select the user you want to switch to.
You can rely on these methods to switch users in your Windows 11 operating system. If you have any doubts, let us know in the comment box below.


")