Microsoft introduced Delivery Optimization on Windows 10, which helps your PC download updates faster. The latest operating system from Microsoft – Windows 11, also uses the same feature to make the update process more quickly
What is Delivery Optimization in Windows 11?
Windows Update Delivery Optimization (WUDO) is a necessary process that allows your Windows 11 PC to receive updates from Microsoft’s servers and other sources. It can scan through other PCs on your local network or PCs on the internet that are downloading duplicate files and receiving updates from them.
Similarly, your Windows 11 PC can also send updates to other PCs on your local network or PCs on the internet if you have allowed it. While the feature is helpful, you may like to disable it f you have limited internet. This is because the Delivery optimization can update PCs on your network without your permission, which might raise your data usage.
So, suppose you don’t want your Windows 11 PC to update PCs on your local network and other PCs on the internet. In that case, it’s an excellent choice to disable the Delivery optimization feature.
How to Turn Off Delivery Optimization on Windows 11
Below, we have shared a step-by-step guide on disabling the Delivery optimization on Windows 11 computers. Let’s check out.
1. Disable Delivery Optimization on Windows 11
To disable the Delivery optimization on Windows 11, you need to follow some of the simple steps we have shared below. Here’s how you can disable Delivery optimization on Windows 11. Let’s check out.
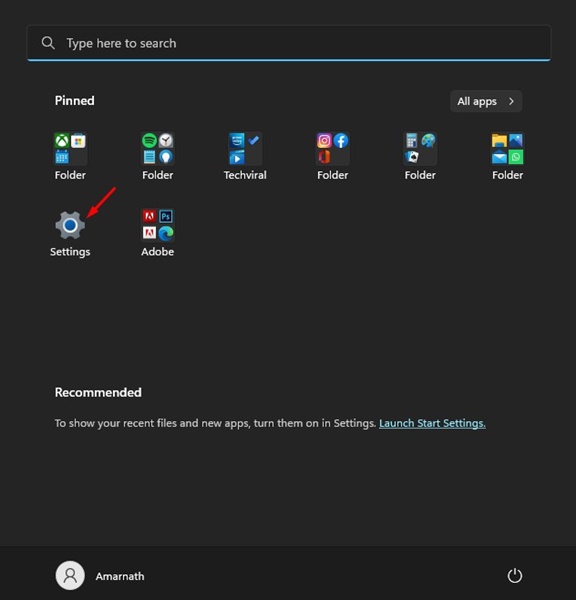
1. First, click the Windows 11 Start button and select Settings.
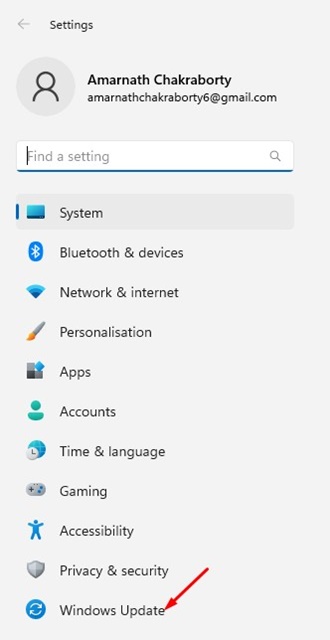
2. On the Settings page, click the Windows Update button on the left pane.
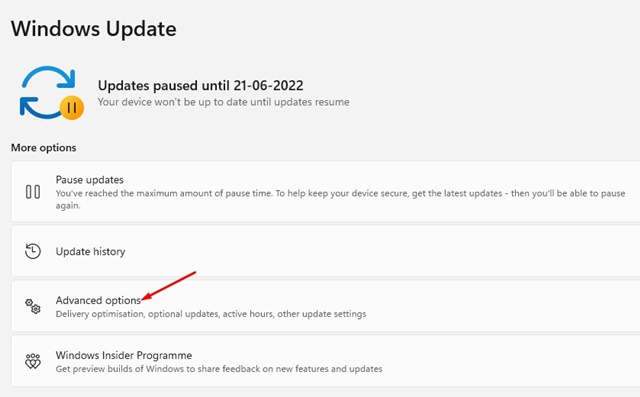
3. On the right pane, click the Advanced options, as shown in the screenshot below.
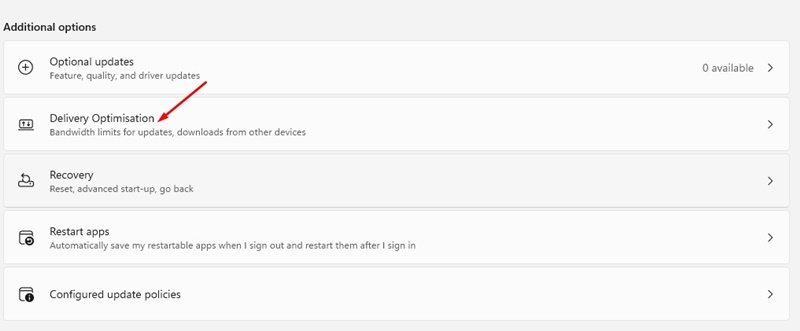
4. Under the Advanced options, scroll down and click on Delivery Optimization.
5. On the next screen, turn off the toggle for ‘Allow downloads from other PCs’
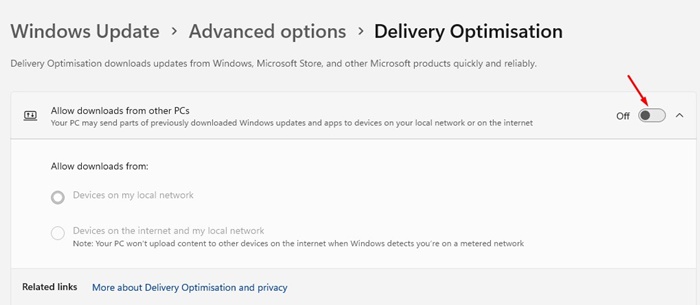
That’s it! This will disable the Delivery optimization on your Windows 11. From now on, your Windows 11 PC won’t send parts of previously downloaded Windows updates and apps to devices on your local network or the internet.
2. Disable Delivery Optimization from Windows Services
You can turn off delivery optimization from the Windows Services manager as well. Here’s what you need to do.
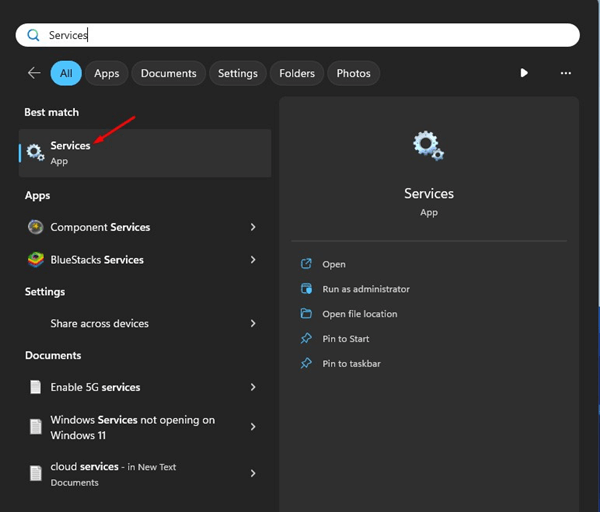
1. Type in Services on the Windows 11 Search. Next, open the Services app from the list of best match results.
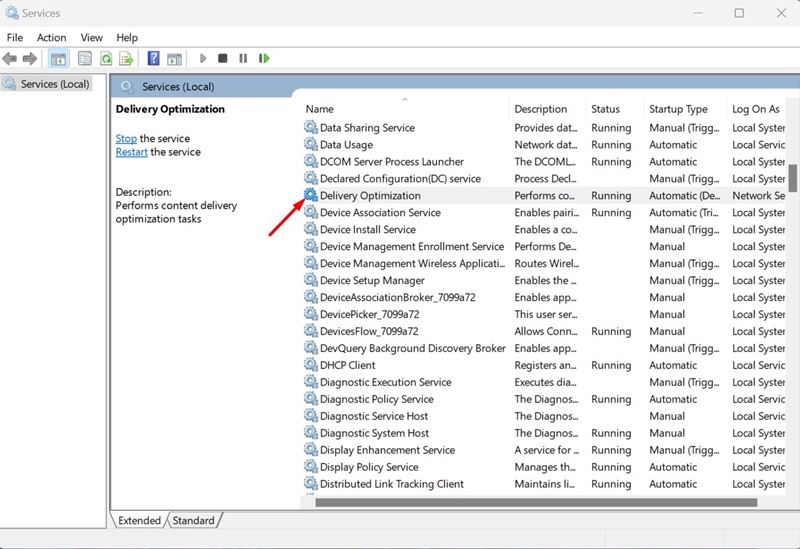
2. When the Services app opens, find the Delivery Optimization. Next, double-click on the service to open its Properties.
3. On the Delivery Optimization Properties, click on the drop-down next to Startup type and select Disable.
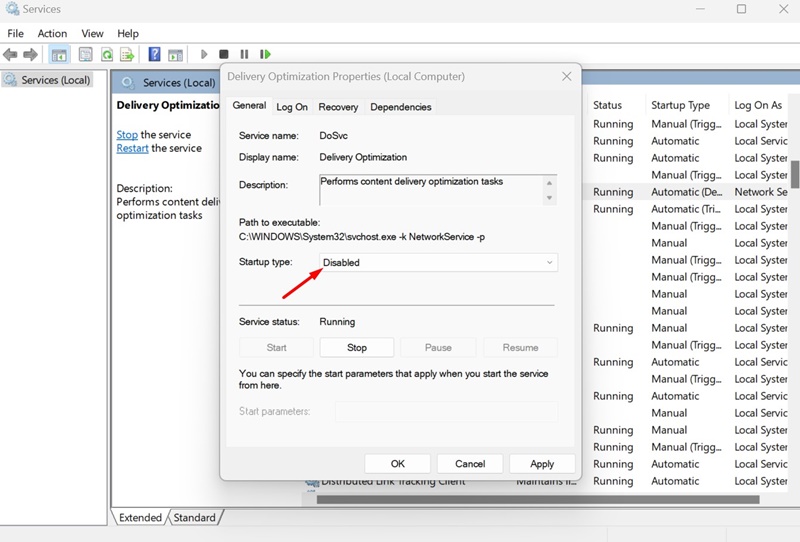
4. Once done, click Apply and then OK.
That’s it! This will disable the Delivery Optimization on your Windows 11 PC.
3. Disable Windows Update Delivery Optimization via Registry
This method will use the Registry Editor to disable the Windows Update Delivery optimization. Follow some of the simple steps we have shared below.
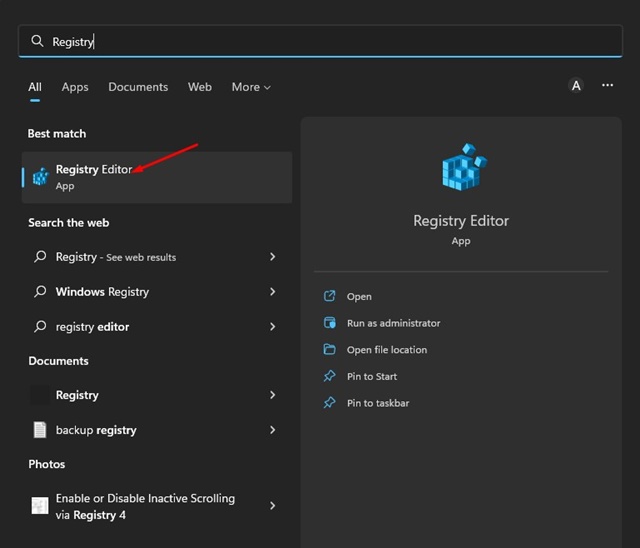
1. First, click on the Windows 11 search and type Registry. Next, open the Registry Editor from the list.
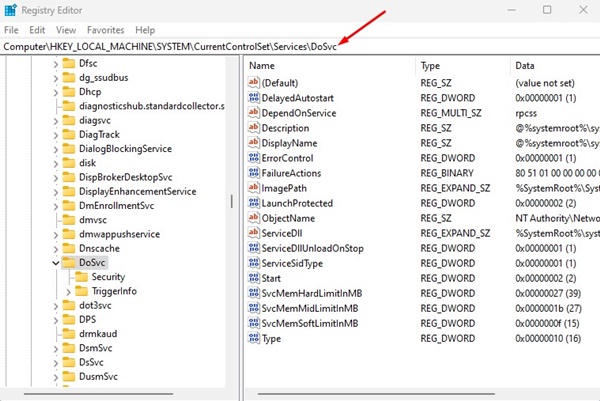
2. Now, on the Registry Editor, navigate to the following path:
HKEY_LOCAL_MACHINE\SYSTEM\CurrentControlSet\Services\DoSvc
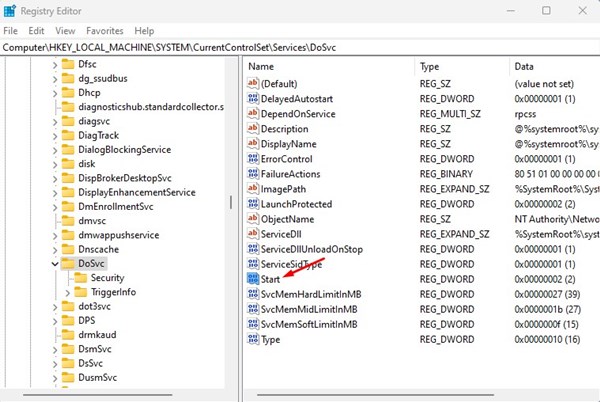
3. On the right pane, find and double click on the Start REG_DWORD key.
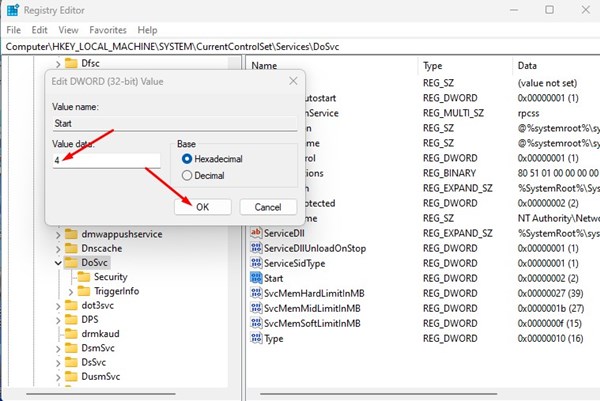
4. Next, on the Value data field, enter 4 and click the OK button.
That’s it! This will disable the Windows Update Delivery Optimization on your Windows 11 PC.
Frequently Asked Questions
Yes! It’s safe to delete the Delivery optimization files from your system. Deleting these files won’t affect your PC’s performance because they only help users with system updates.
Yes! It’s completely safe to disable the delivery optimization feature. If you turn off the Delivery optimization feature, you will be able to reduce the data usage.
Deleting the delivery optimization files won’t affect your PC’s speed, but it will free up some storage space leading to better performance. The boost in speed will be minimal.
So, these are the two best ways to turn off update delivery optimization on Windows 11. If you have limited internet bandwidth and want to rule out security issues, you should turn off the Delivery Optimization on Windows 11. If you have any doubts about this, let us know in the comments.