Compared to the previous versions of Windows, Windows 10 offers more features. Also, the operating system receives new updates, almost two or three times every year. However, most of the new features were kept hidden from everyday users. One such feature is ‘Spatial Sound.’
Spatial Sound is a new format included on the Windows 10 operating system. The spatial sound enables a more immersive audio experience on a desktop. In short and simple words, Spatial Sound offers what Microsoft calls 3D sound. With Spatial sound enabled, the audio will feel that it’s playing around you, instead of through speakers or headphones.
If you are into gaming, then you will surely love this hidden Windows 10 feature. Few games, movies, or TV Shows natively support spatial sound, which provides the highest level of 3D audio experience.
However, if you choose to enable spatial sound on Windows 10, then all your games and movies will sound better.
Steps to Turn on Spatial Sound (3D Sound) on Windows 10
In this article, we will share a detailed guide on how to enable spatial sound on Windows 10 computer. Let’s check out.
Step 1. First of all, click on the Start button and select ‘Settings.’
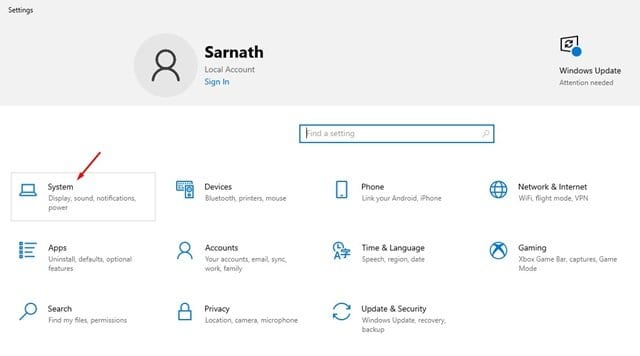
Step 2. On the Settings page, click on the ‘System.’
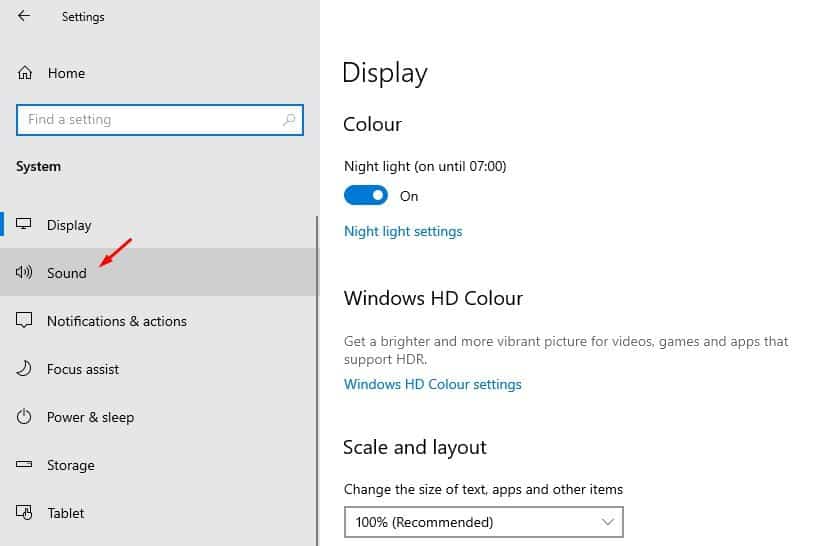
Step 3. From the left-hand side panel, select ‘Sound.’
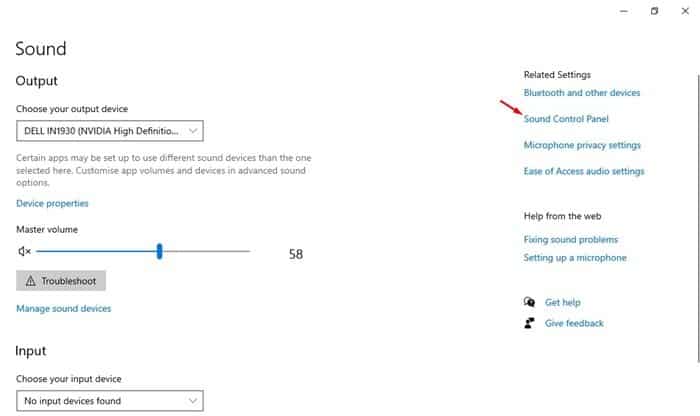
Step 4. Now scroll down and find the Related Settings section. Under the Related settings, click on the ‘Sound Control Panel.’
Step 5. Now select the playback device and click on ‘Properties.’
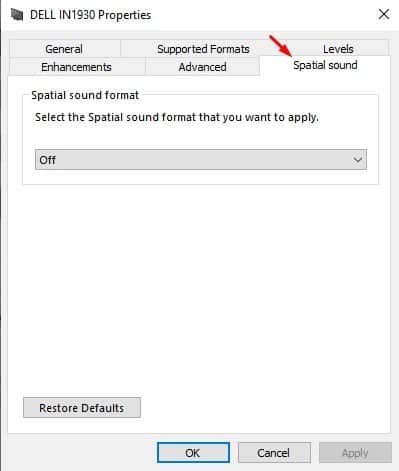
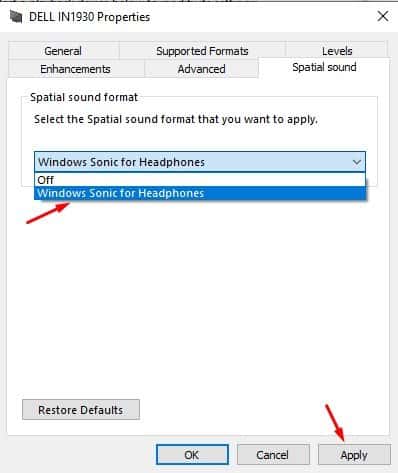
Step 6. In the new Window that opens, select ‘Spatial Sound.’
Step 7. In the Spatial sound format, select ‘Windows Sonic for headphones’ and click on ‘Apply.’
That’s it! You are done. If you want to improve the Spatial sound experience, install the Dolby Access app from the Microsoft Store.
So, this article is all about how to turn on Spatial Sound in Windows 10. I hope this article helped you! Please share it with your friends also. If you have any doubts related to this, let us know in the comment box below.

