Using Windows 11, you might already know about the Microsoft OneDrive. It’s a cloud storage app built on Windows 11 operating system. The good thing about Microsoft OneDrive is that it can be configured to backup your photos & essential files to the cloud.
The best thing about OneDrive is that it syncs your data across all devices linked to your Microsoft Account, which means you can access the data stored on your desktop computer via the mobile app.
Although OneDrive is a great tool, many users don’t like to use it. Users with limited internet bandwidth may not prefer to upload their files to the cloud storage platforms to preserve internet data. So, if you are among those who don’t choose to save their files & folders on cloud storage services, you may like to disable or uninstall the OneDrive app completely.
How to Unlink & Uninstall OneDrive From Windows 11 (2 Methods)
Hence, if you are looking for ways to uninstall OneDrive from Windows 11, you have landed on the right webpage. In this article, we will share a step-by-step guide on uninstalling OneDrive entirely from Windows 11. Let’s check out.
1) How to Unlink OneDrive from Windows 11
If you don’t want to use Microsoft OneDrive, the best and the easiest way to get rid of it is to unlink your account. When you unlink your OneDrive account from the Windows 11 PC, it will sign you out from the PC, but keep the app. It won’t sync any new files or folders. Here’s how to unlink OneDrive from Windows 11.
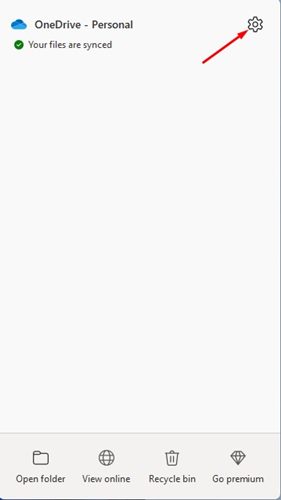
1. First, right-click on the OneDrive icon on the taskbar and open it. Next, click on the Settings Gear icon, as shown in the screenshot below.
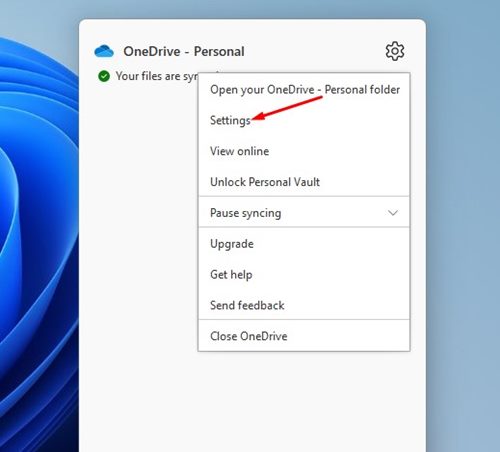
2. From the list of options, click on Settings.
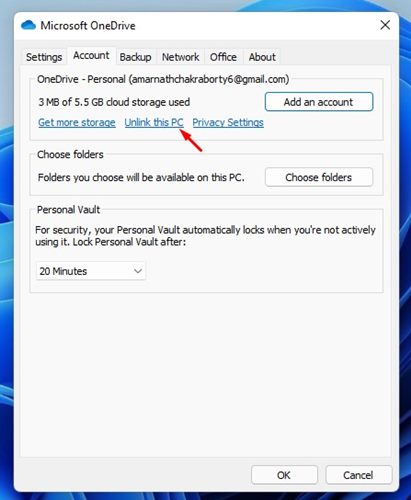
3. On the Settings pop-up window, switch to the Account tab. Under the Account, click on the Unlink this PC link.
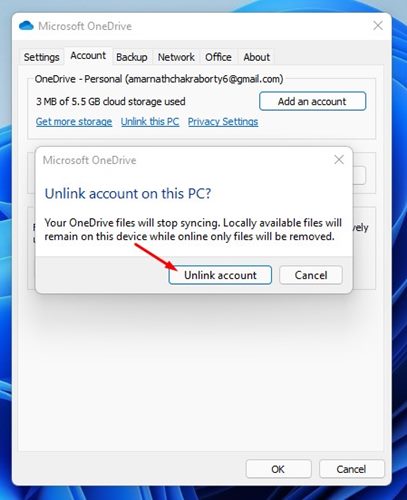
4. Now, click on the Unlink Account button again on the confirmation prompt.
That’s it! You are done. This will Unlink the OneDrive account from your Windows 11 PC.
2) How to Uninstall OneDrive App from Windows 11
It’s pretty easy to uninstall the OneDrive app on Windows 11. You need to follow some of the simple steps we have mentioned below. Here’s how you can uninstall the OneDrive app from Windows 11.
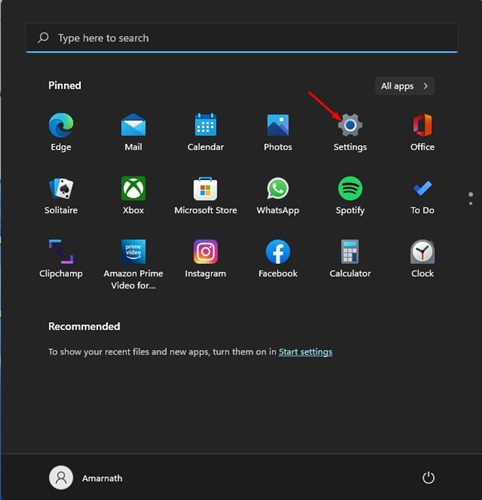
1. First of all, click on the Windows 11 Start button and select Settings.
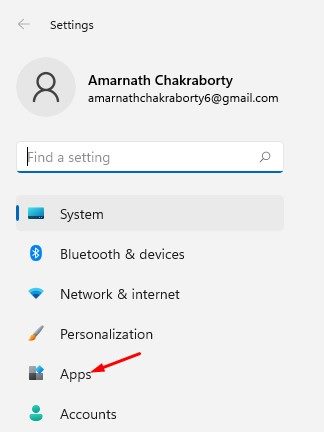
2. On the Settings page, click on the Apps option below.
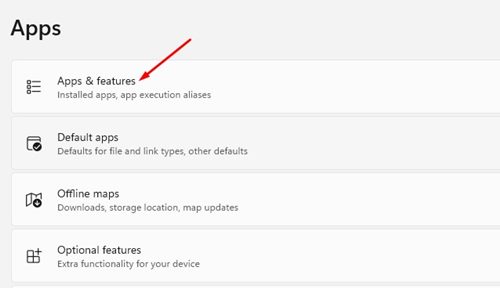
3. On the right pane, click on the Apps & features option below.
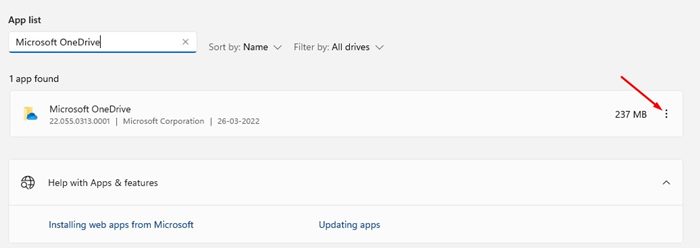
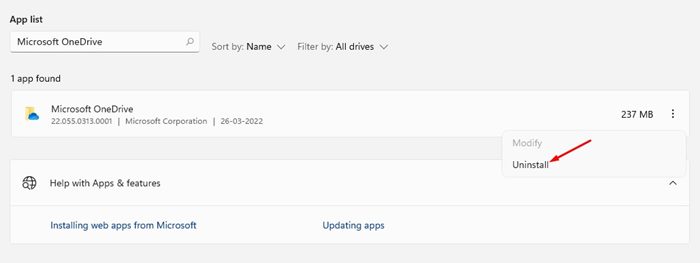
4. Under the Apps & Features, scroll down and find the Microsoft OneDrive app. Next, click on the three dots beside the app name.
5. From the list of options, click on Uninstall.
6. On the confirmation prompt, click on the Uninstall button again.

That’s it! You are done. This is how you can uninstall Microsoft OneDrive from Windows 11.
These are some of the simple steps to disable or uninstall OneDrive from the Windows 11 operating system. I hope this article helped you! Please share it with your friends also. If you have any doubts related to this, let us know in the comment box below.


