Android is a highly customizable mobile operating system. With proper apps, you can customize almost all parts of your Android. Not only that, some apps can even help you expand the functionalities of the operating system.
Until now, we have shared many tips and tricks on Android. Today, we are back again with another trick that will let you unlock Windows PC from an Android fingerprint scanner. This might sound impossible, but it’s possible with a third-party app.
Steps To Unlock Windows PC From Android Fingerprint Scanner
Hence, if you are interested in unlocking Windows PC from an Android fingerprint scanner, read the article till the end. Below, we have shared a step-by-step guide on unlocking Windows from Android’s Fingerprint scanner. Let’s get started.
1. First, on your Windows PC, you need to download and install Unified Remote for Windows, the tool that lets you control your PC settings remotely.
2. Now, on your Android, you need to download and install the app tasker, the app that going to allow you to trigger functionality.
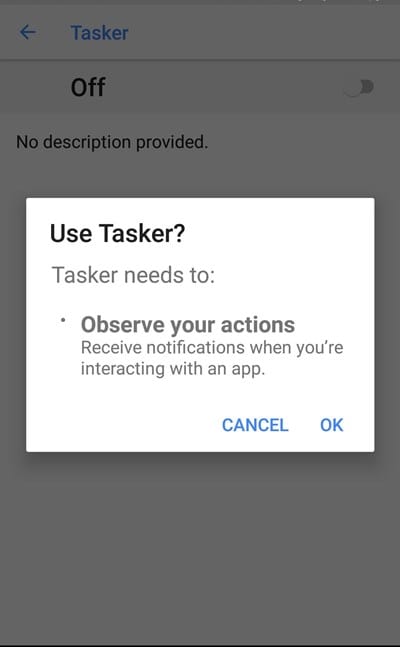
3. Now, you need to import some settings in the tasker that will allow you to implement this method. For that, download this file, and then you need to import the file.
4. Now, you will see a new entry on the Tasks tab that will be named Fingerprint Unlock. You need to tap on it and tap on the Unknown Plugin error option. You need to tap the Ok button and get the free app from the play store.
5. Now, tap on the ActionTools, and then tap on the edit pencil icon. Now tap on Encryption, and under encrypt or decrypt, choose Decrypt, and then you need to enter the password in the password section.
6. Now, in the URLs, you need to replace MMR with your Windows PC name.
7. Now you need to go back and click on the + button and add a new task with the name techviral PC Unlock and save it.
8. Now, in the next section inside the finder Task, you must add actions. For that, tap on the + button, select Variables, and tap on Variable set. In Name, you need to type EncryptedPassword, and in the below field, type %pass.
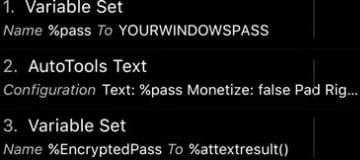
9. Now go back and tap on the + button, click on the Plugin option, and then tap on Auto Tool’s scroll and select Text.
10. Now edit the Autotools Text by clicking on the pencil icon there and then tapping on the text and typing %pass. Then look for encryption; inside encryption, tap on Encrypt or Decrypt and select Encrypt this time.
11. Now, you need to tap on the password and enter the password we choose while editing Finger Unlock Task, i.e., 54328.
12. Now, the last thing is to choose variables and the variable set, and this time, enter the pass in the NAME field and into the field; enter the password of your Windows PC, and you can use the PIN here.

13. Click the play button to start the task, and there you will see the green dots on all three actions reflecting successful implementation.
14. Now, go back and delete the task you have created, as we don’t need that anymore. Now go to the Fingerprint Unlock task and add an icon to our task so that we can create and add a Tasker widget to the home screen.
15. Now, on the home screen, add the widget by selecting tasker, tap on task, and under task, choose Fingerprint Unlock. Now you will have a fingerprint unlock action tab there.
So this was all about how to unlock Windows PC with Android’s fingerprint scanner. If you need more help, let us know in the comments below.


")