Microsoft recently launched its new desktop operating system – Windows 11. Users who have joined the Windows Insider Program can now install the Preview Build of Windows 11 through the System Settings.
However, the problem with the Release Preview builds is that they are full of bugs and glitches. Windows 11 is still under testing, and Microsoft is constantly trying the improve the operating system.
Due to this, it becomes important to keep your operating system updated. New Windows 11 updates fix bugs, add new features, and protect your computer from new malware by patching security vulnerabilities.
Also read: Download Official Windows 11 ISO Files
Steps to Update Windows 11 Operating System
Hence in this article, we will share a detailed guide on how to update Windows 11 operating system. The process is going to be very easy; just follow some of the simple steps given below.
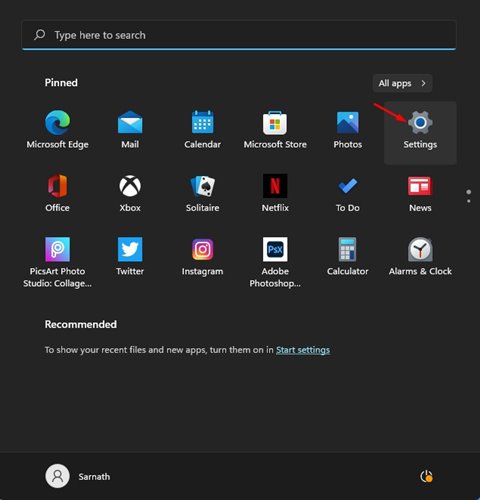
Step 1. First of all, click on the Start button and select ‘Settings.’
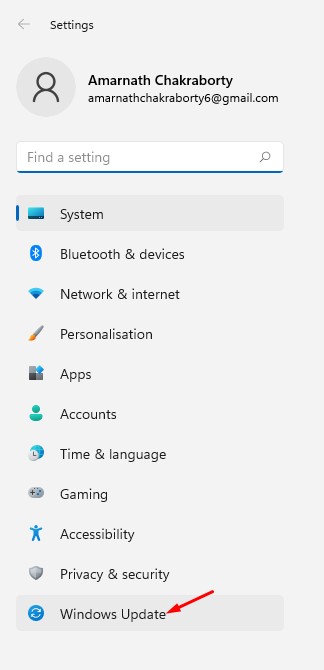
Step 2. On the settings page, click on the Windows Update option. Windows Update icon is located in the left pane of the screen.
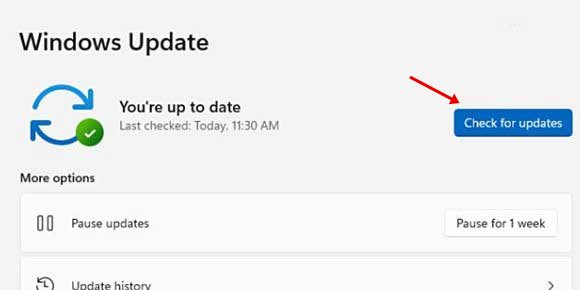
Step 3. Now on the right pane, click on the ‘Check for Updates’ button.
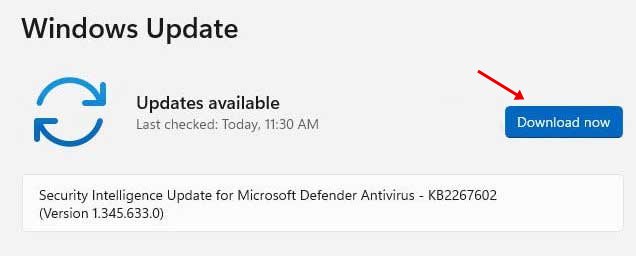
Step 4. Now Windows 11 will automatically search for the available updates. If any update is found, you will get the option to download. Just click on the ‘Download Now’ button.
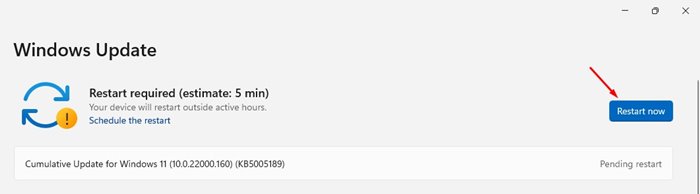
Step 5. Now, wait until the update downloads on your system. Once downloaded, click on the ‘Restart now’ button.
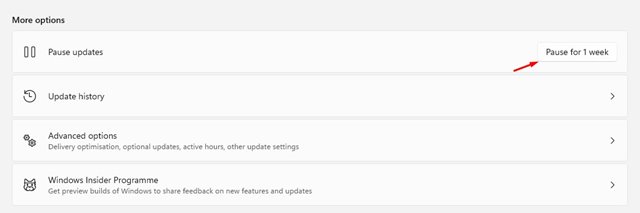
Step 6. If you want to turn off the update notification, click on the ‘Pause for 1 week’ button on the Pause updates section.
That’s it! You are done. This is how you can update Windows 11 operating system.
So, this guide is all about how to update Windows 11. I hope this article helped you! Please share it with your friends also. If you have any doubts related to this, let us know in the comment box below.


