If you are experiencing performance issues while using your computer or have low storage space left, you should immediately run the Disk Cleanup utility. Here’s how you can use the Disk Cleanup Utility on Windows 11.
1. Run the Disk Cleanup Utility from Windows Search
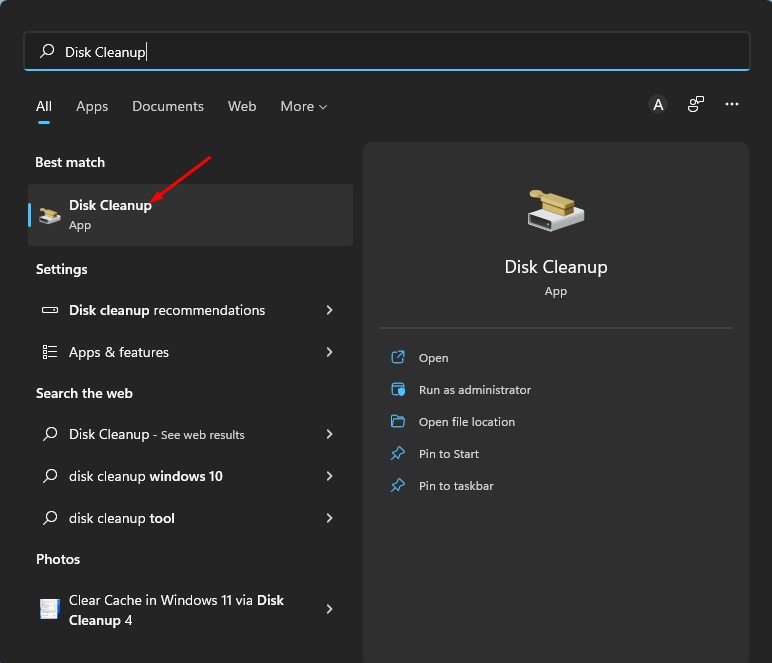
1. Open the Disk Cleanup app from the Windows Search.
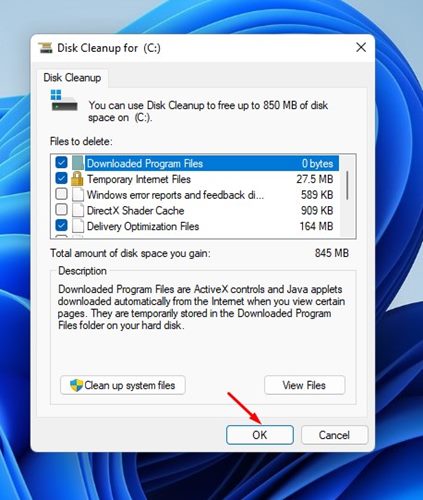
2. Select the drive you want to clean.
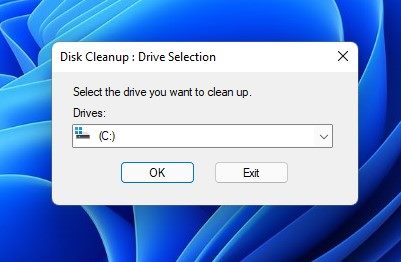
3. Once done, click on Ok. Now you will see all the files that were available to delete.
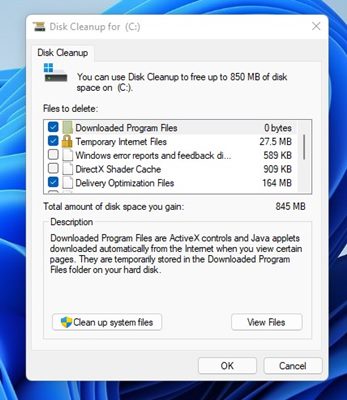
4. Scroll the list to view all the files. Select the files you don’t use, and uncheck the files you don’t know about.
5. As you select multiple categories, you will also be notified of the amount of space you will gain.
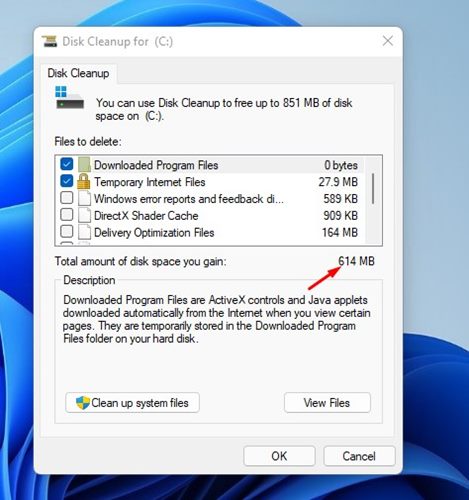
6. After selecting the files, you need to click OK.
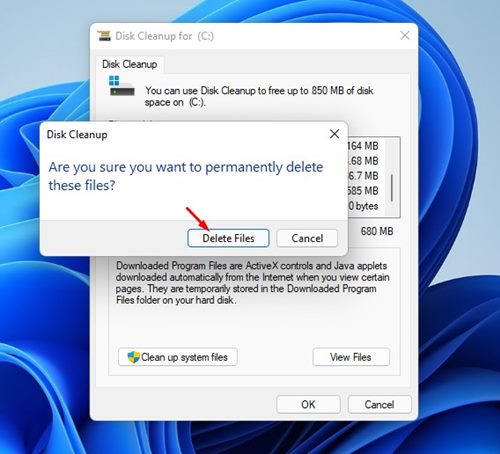
7. On the Disk Cleanup confirmation prompt, click the Delete Files.
2. Use Disk Cleaning Utility through Windows RUN
If you’re comfortable handling the Windows RUN, you can open the Disk Cleaning utility through a RUN command.

Press the Windows Key + R button on your keyboard to open the RUN dialog box. When the RUN Dialog box opens, type cleanmgr and press Enter.
This will instantly open the Disk Cleaning utility on your Windows 11. Then, follow the steps shared in the above method to clean the storage space.
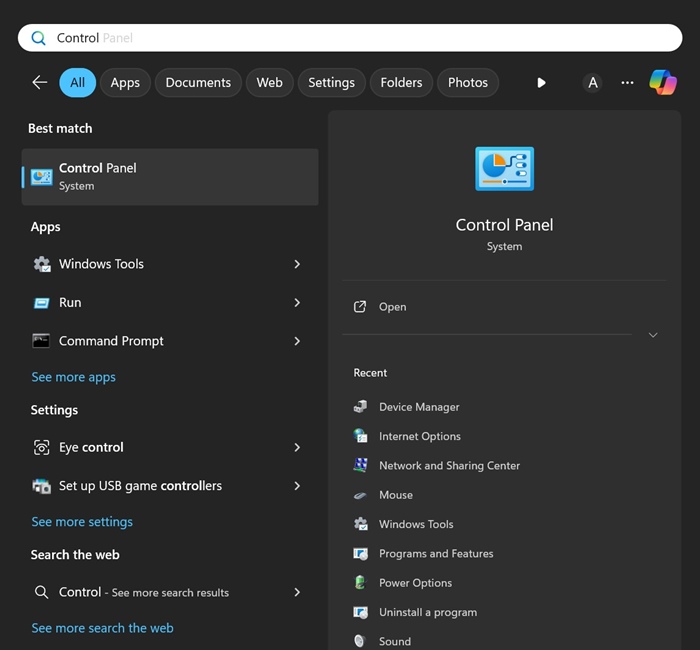
3. Open Disk Cleanup on Windows 11 via Control Panel
If you’re unable to access the Start Menu or RUN dialog box for any reason, you can use the Control Panel to launch the Disk Cleaning utility.
1. Open Control Panel from the Windows Search.
2. Click on Windows Tools.

3. Find the Disk Cleanup tool and double-click on it.

4. Run Disk Cleanup Utility via Storage Sense
You can also configure the Storage Sense feature on your Windows 11 computer to automatically run the Disk Cleanup utility.
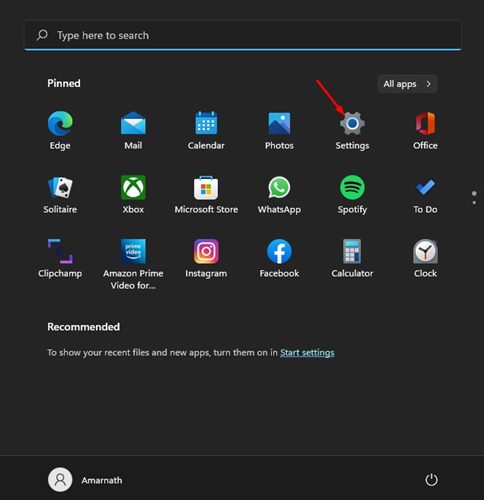
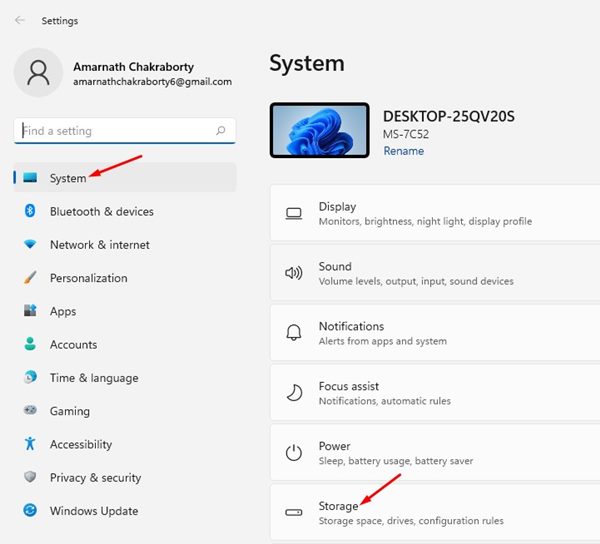
1. Click the Windows 11 Start button and select Settings.
2. Click on the System. On the right, click on the Storage option.
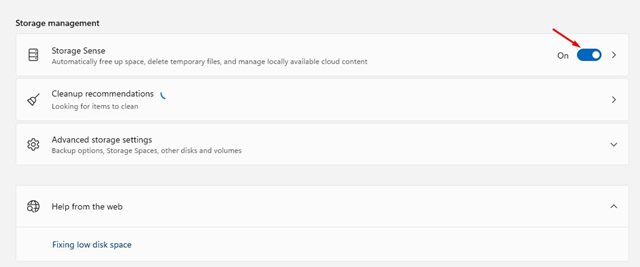
3. Scroll down and enable the Storage Sense option.
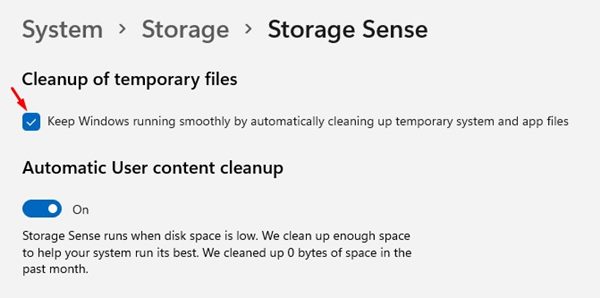
4. Click on the Storage Sense option, check the checkbox present under the Cleanup of Temporary files section.
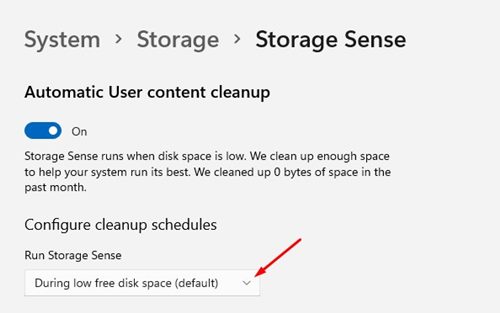
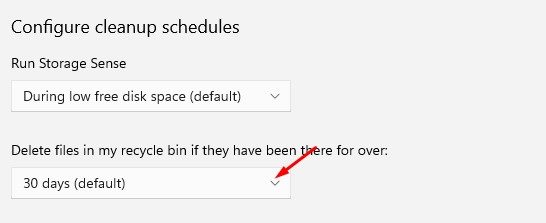
5. Scroll down and click on the drop-down menu underneath Run Storage Sense. In the drop-down menu, select your preferred frequency.
6. You can also configure the Storage Sense feature to delete files stored in the recycle bin automatically after several days.
7. You also have the option to delete files stored in your Download Folder. Click the drop-down menu for Delete files in my downloads folder and select the frequency.

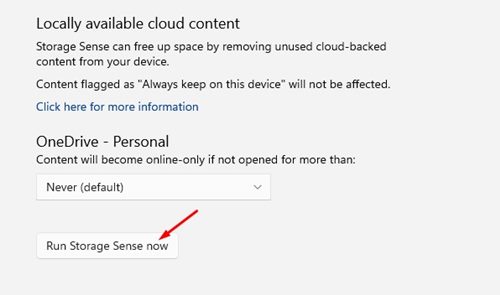
7. Scroll to the bottom and click Run Storage Sense Now.
Frequently Asked Questions
How to clean junk files on Windows 11?
You need to run the Disk Cleanup utility by following our shared steps to remove all junk and temporary files.
Is there any third-party tool to clean junk files?
Yes, hundreds of PC optimization softwares are available for PC, like CCleaner, BeachBit, etc. All of them can find and remove junk files on your system. Also, PC optimization softwares can tune your PC for better performance.
What is taking up space on my Windows 11 hard drive?
Usually, games and high-end softwares take up storage space on a computer. However, if you don’t use any high-end softwares or games, you need to navigate to Settings > System > Storage to find out what exactly is consuming the storage space.
Disk Cleanup Windows 11 command?
The disk cleanup utility on Windows 11 can also be accessed from the command prompt. For that, open Command Prompt with administrative rights and execute the command cleanmgr.
Windows 11 Disk Cleanup is missing
If the Disk Cleanup utility on Windows 11 is missing or not showing up, it might be due to corrupted or missing system files. You can run the SFC command on your device to find and repair corrupted system files. Or else, you can reset your Windows 11 PC.
It’s pretty easy to use the Disk Cleanup utility on Windows 11. If you have any doubts, let us know in the comment box below.


