Windows 11 is the greatest operating system ever made and ever since its release, Microsoft has been constantly refining it. It not only offers better features but also has a new look that impresses the masses.
Like every other older version of Windows, Windows 11 receives frequent updates. You receive updates every other day if you have joined the Dev or Canary channel. While updates are important, they can sometimes break the operating system.
Recently, many users have reported that Windows 11 lags after an update issue. According to the users, the operating system lags and crashes after installing the latest updates from Microsoft. If you’ve been facing the same problem, here’s what you should do.
Why is Windows 11 so slow after an update?
If your Windows 11 is slow after updating, chances are that you’re running short of storage space.
Sometimes, a simple restart after the Windows 11 update installation fixes the problem, but if it doesn’t help, you need to make some system changes.
Faulty updates can also trigger such problems and they are difficult to fix. Anyway, here’s how to fix Windows 11 lag after an update.
1. Restart your Windows 11

Like the Windows updates, regular restart is equally important & crucial. While Windows 11 forces you to restart your device to complete the installation, some updates don’t require restart.
Restarting will possibly eliminate background tasks and processes that may be conflicting with the operating system’s core functionality. To restart Windows 11, click on the Power Menu and select Restart.
2. Update your drivers
Maybe the version of Windows 11 that has just been installed has compatibility issues with your device drivers. Updating your device drivers can easily rule out driver incompatibility issues. Here’s how to update your drivers on Windows 11.
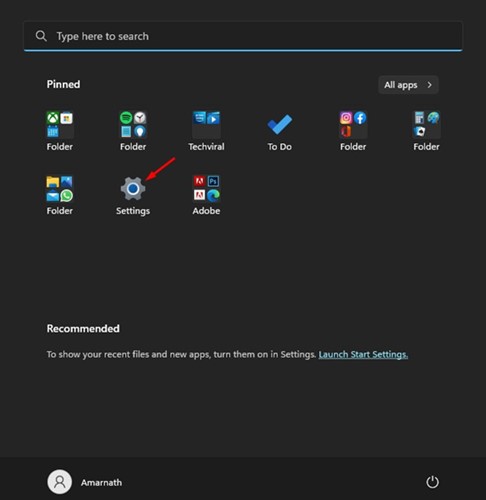
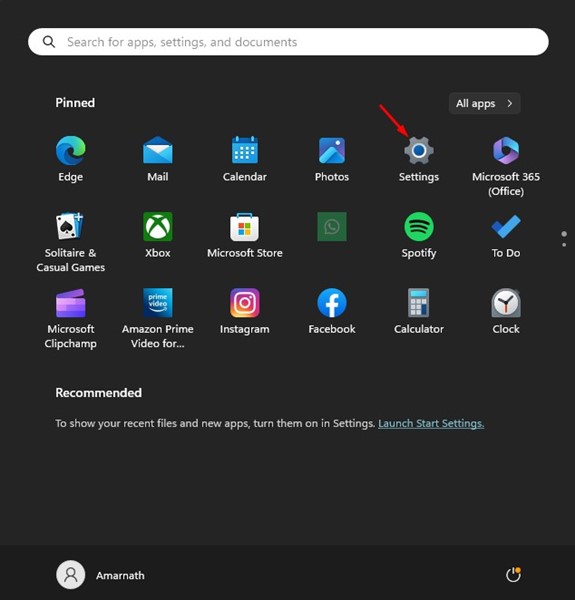
1. Open the Settings app on your Windows 11 computer.
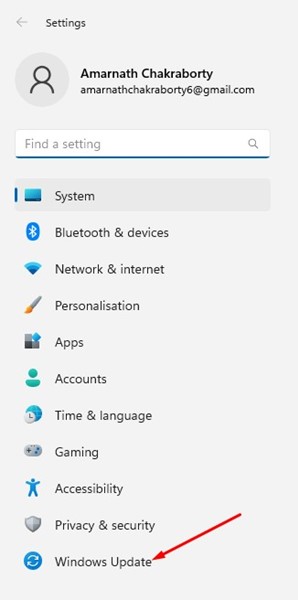
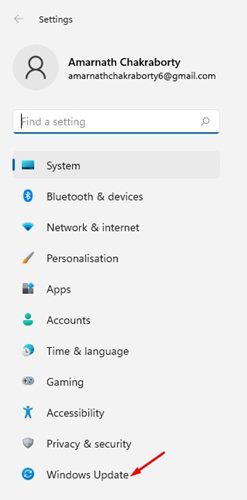
2. On the left side, switch to the Windows Update.
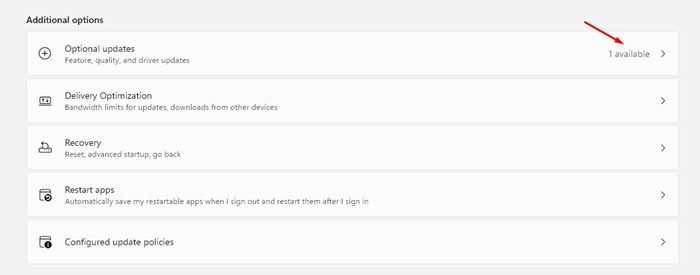
3. On the right side, scroll down to the Additional options & click on Optional updates.
4. See if any update is pending. If updates are available, click on the Download & Install button.
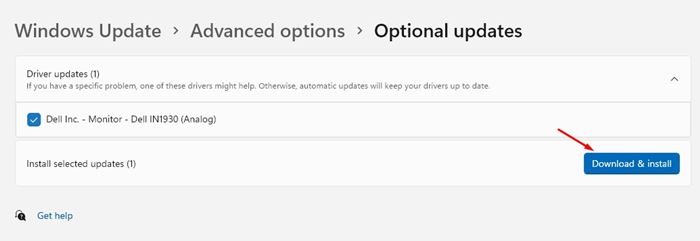
This will update all your device drivers on Windows 11. After updating the device drivers, make sure to restart your computer.
3. Remove Unused Apps
The apps you never use can still run on the startup and background. Chances are that the background apps are the culprits; hence, your Windows 11 is lagging after the update. Hence, it’s recommended that you remove all unused apps from your computer.
1. Open the Settings app on your Windows 11.
2. When the Settings app opens, navigate to the Apps > Installed Apps.
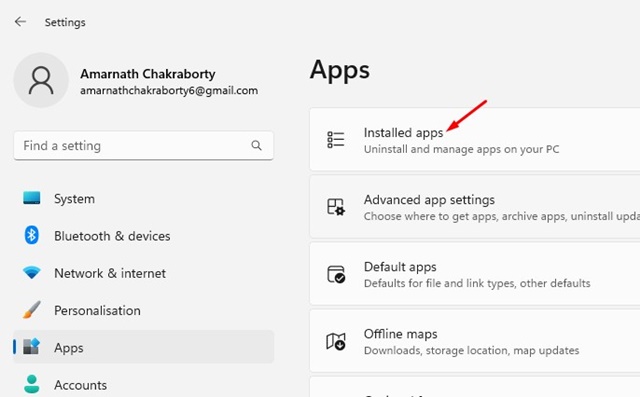
3. You will now see a list of apps that you never use.
4. Click on the three dots beside the app name & select Uninstall.

This is how you can remove unused apps from your Windows 11 computer.
4. Enable Storage Sense
Even though enabling Storage Sense won’t fix Windows 11 lagging after the update issue, it’s still useful to keep the feature enabled. Storage Sense is a feature that boosts your PC’s performance by removing all junk files.
Once you set up Storage Sense, the utility will run on a schedule and free up storage space. This feature also cleans up the old update files stored on Windows 11.
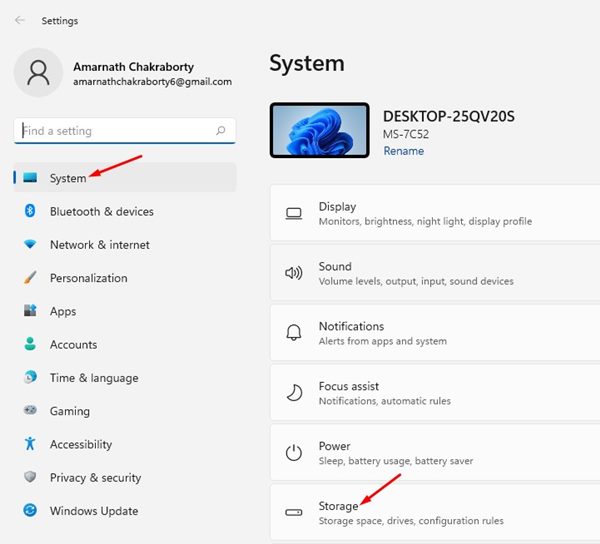
1. Open the Settings app on your Windows 11.
2. Now, navigate to the System > Storage.
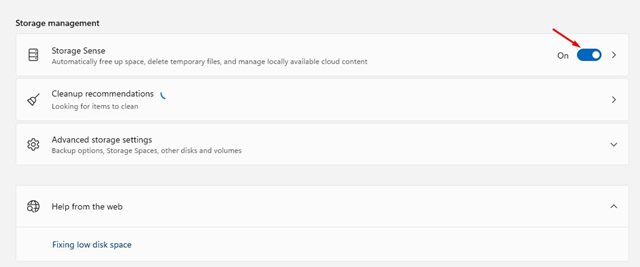
3. On the Storage Management section, enable the toggle beside Storage Sense.
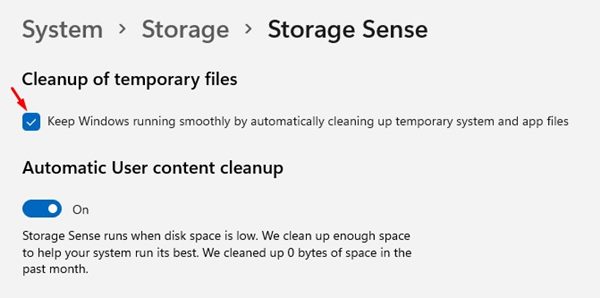
4. Now click on the Storage Sense option. On the next screen, check the option available under the Cleanup of Temporary Files section. Also, enable the toggle for Automatic User Content cleanup.
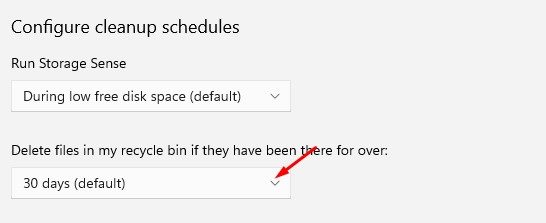
5. Now configure the cleanup schedules.
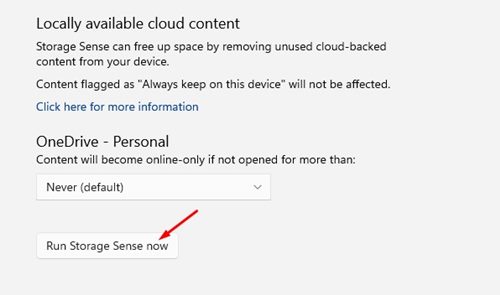
6. Now click on the Run Storage Sense Now at the bottom of the screen.
This is how you can enable Storage Sense on Windows 11 to free up storage space.
5. Disable the Startup Apps
If Windows 11 lags after restarting, you need to disable the Startup Apps. Windows 11 updates sometimes bring new apps that run on the Startup. You can prevent such apps from running on the Startup to prevent Windows 11 from lagging after restarting.
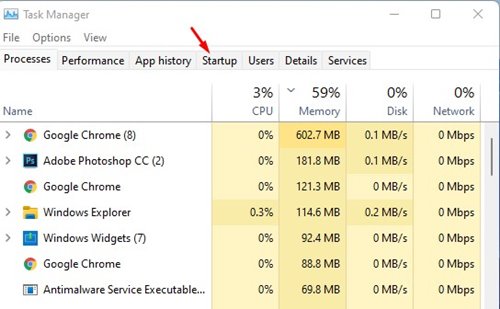
1. Type in Task Manager on the Windows 11 Search. Next, open the Task Manager app from the list.

2. When the Task Manager opens, switch to the Startup tab.
3. Right click on the apps you don’t use and select Disable.
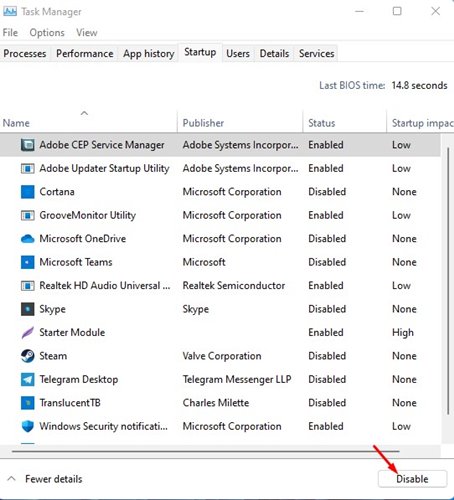
You must repeat the same steps to disable all apps you don’t want to run on the Startup. After making the changes, restart your Windows 11 PC.
6. Run the Disk Cleanup Utility
You must follow this method only if you haven’t configured Storage Sense. Storage Sense and the Disk Cleanup utility do the same thing; the only difference is that the Disk Cleanup utility is easier to access and use.
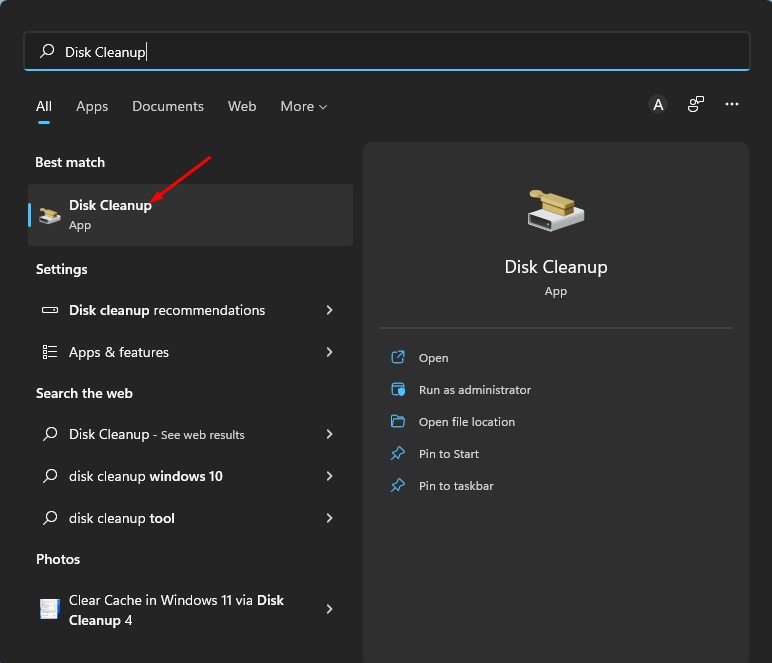
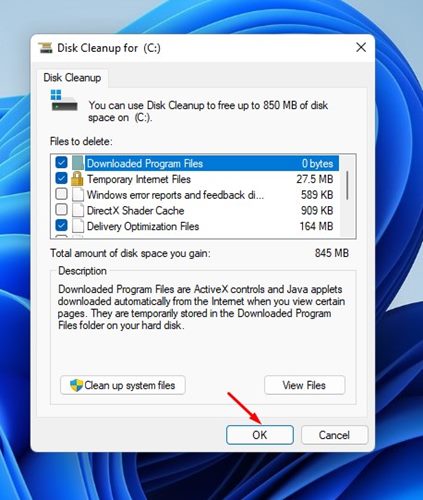
1. Type Disk Cleanup in Windows 11 Search. Next, open the Disk Cleanup utility from the list of best-match results.
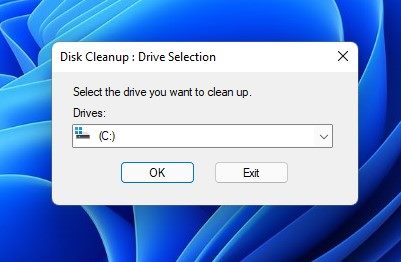
2. Disk Cleanup utility will open. Select the drive where your OS has been installed and click OK.
3. Now select the files you want to delete. You can use the default selections. Once you’ve done this, click the OK button.
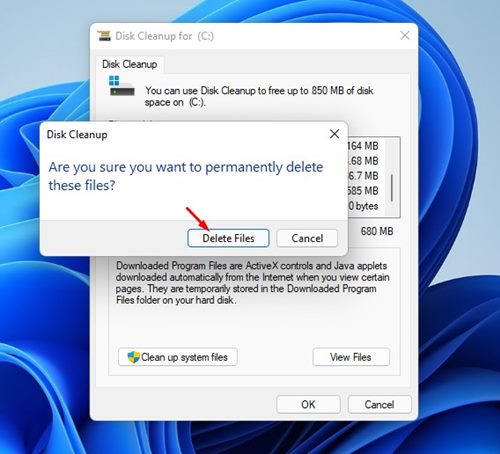
4. Now, on the Disk Cleanup confirmation prompt, click on Delete Files.
This is how you can run the Disk Cleanup utility on Windows 11 to resolve Windows 11 Lag after an update.
7. Adjust the Visual Effects
Visual effects are on the higher side of the new Windows 11 operating system, and they can potentially hamper your PC’s performance. Here’s how to adjust the visual effects on Windows 11 to fix lagging issues after an update.
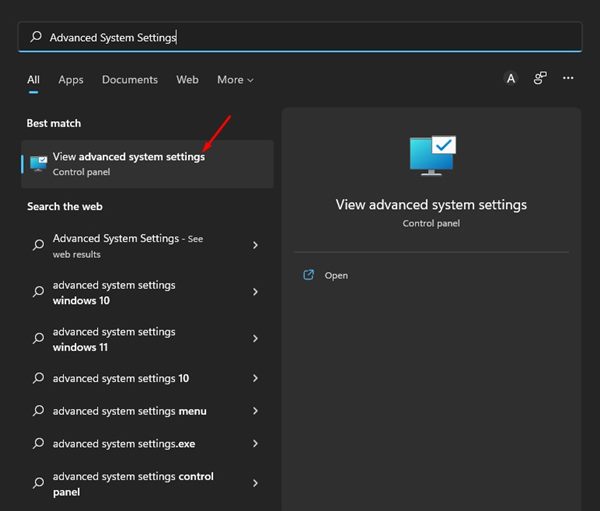
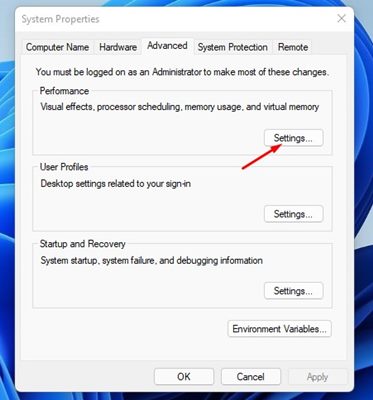
1. Type Advanced System Settings into the Windows 11 search field. Next, open the View Advanced System Settings Control panel item.
2. On the System Properties, switch to the Advanced tab.
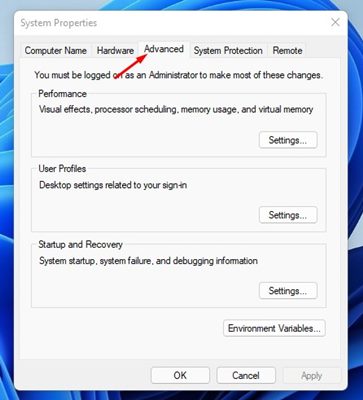
3. Now click on the Settings button underneath the Performance section.
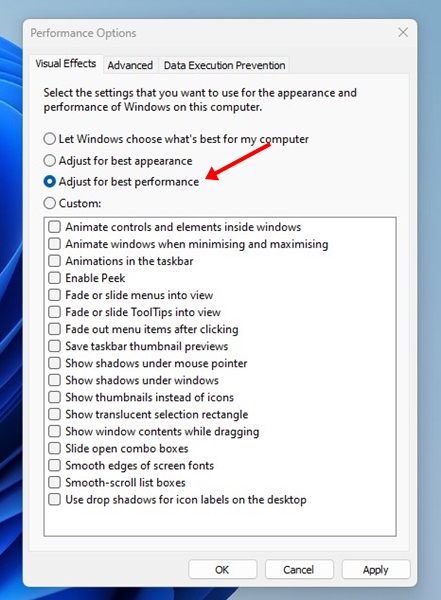
4. On the Visual Effects, check the Adjust for best performance.
5. Finally, click on the OK button to Apply the changes.
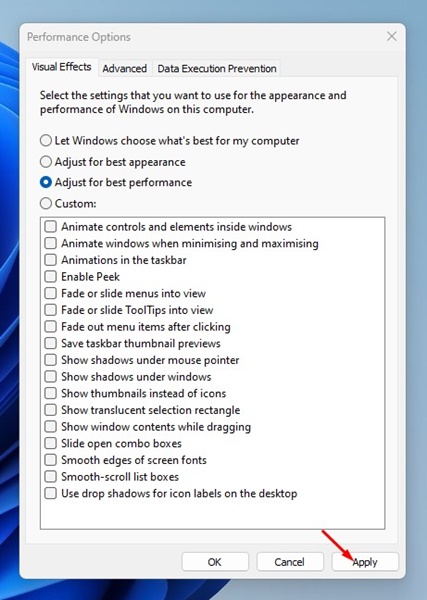
Make sure to restart your Windows 11 computer after making the changes.
8. Run Full Antivirus Scan
If Windows 11 is still lagging, it’s best to check for security threats on your computer. Here’s how to run a Full Antivirus Scan on Windows 11.
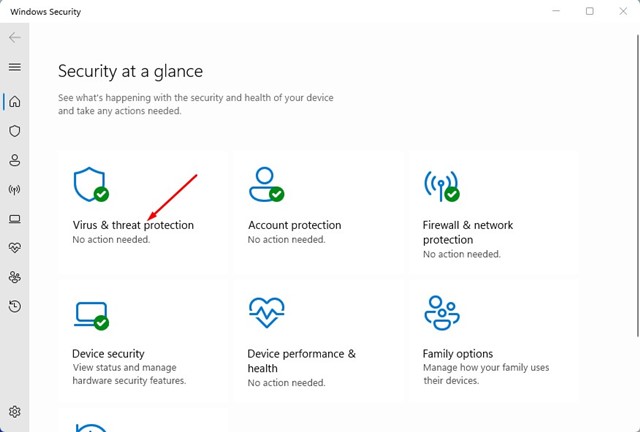
1. Open the Windows Security app from the Windows 11 search.
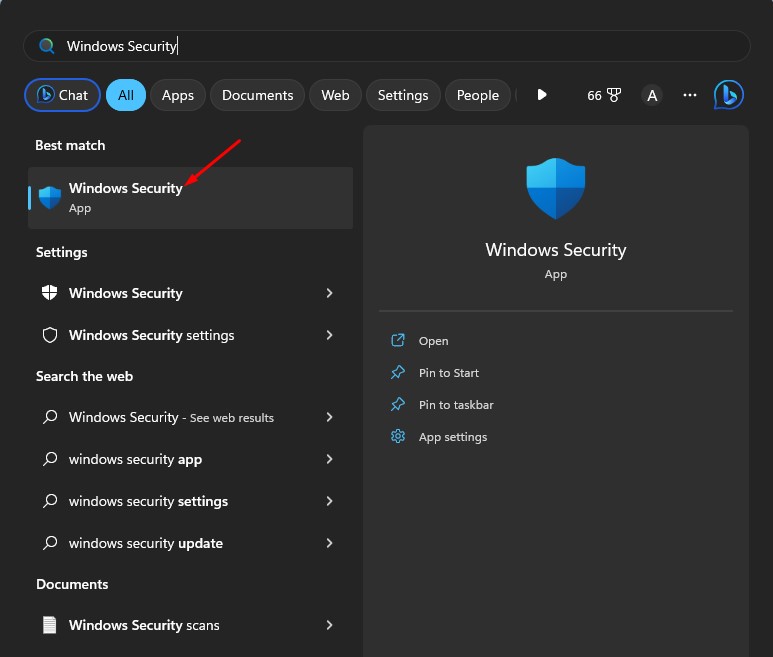
2. On Windows Security, click on Virus & Threat Protection.
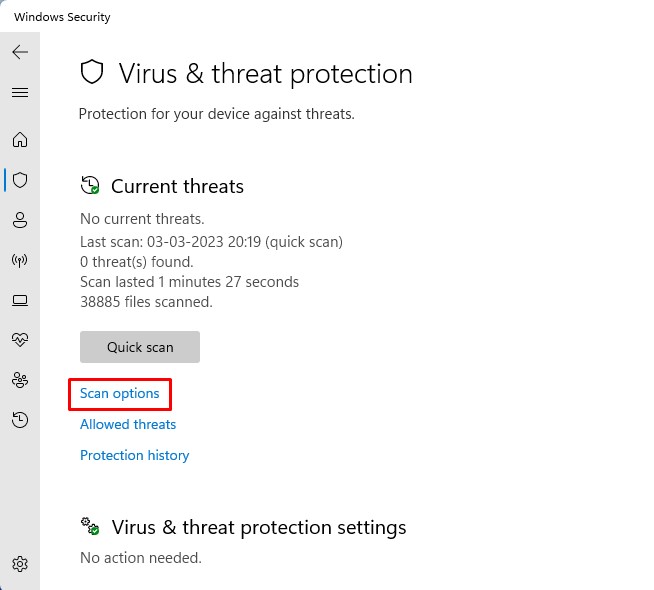
3. On the Virus & threat protection screen, click Scan options.
4. Now select Full Scan and click on the Scan Now button.
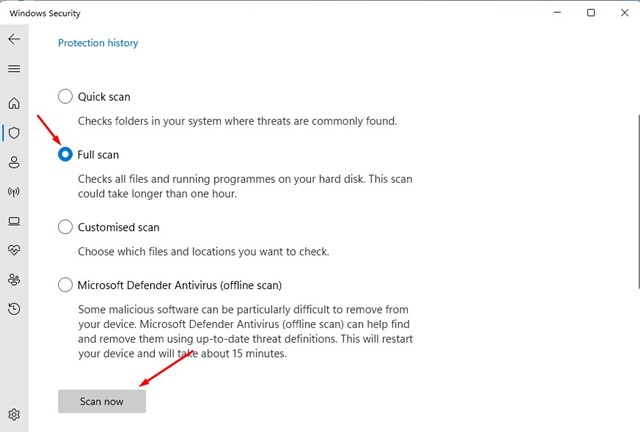
This is how you can fix Windows 11 Lag after an update by running a full antivirus scan.
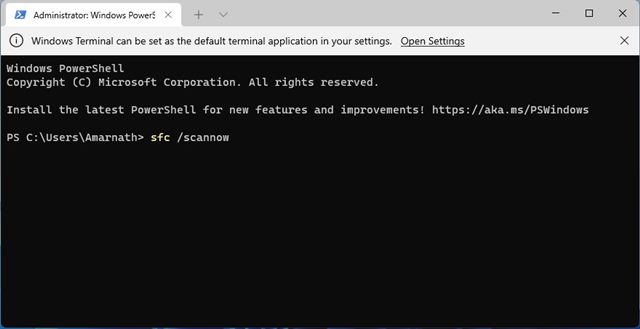
9. Run SFC & DISM Command
System file corruption is another prominent reason for Windows 11 lagging after updates. Maybe some system files are corrupted during the update installation, leading to this problem.
The best you can do is to run the SFC & DISM Command via the Command Prompt utility to fix the issue. Here’s what you need to do.
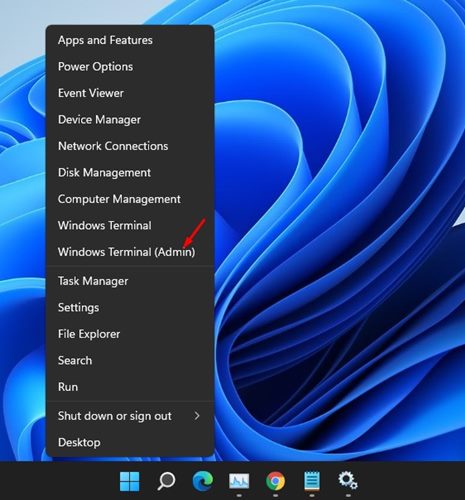
1. Right click on the Windows 11 Start button and select Windows Terminal (Admin).
2. When the Windows Terminal opens, type in sfc /scannow and press Enter.
3. If the SFC Command returns with an error message, you must run the DISM Commands. Here are the three commands you need to run one by one.
DISM /Online /Cleanup-Image /CheckHealth

DISM /Online /Cleanup-Image /ScanHealth

DISM /Online /Cleanup-Image /RestoreHealth
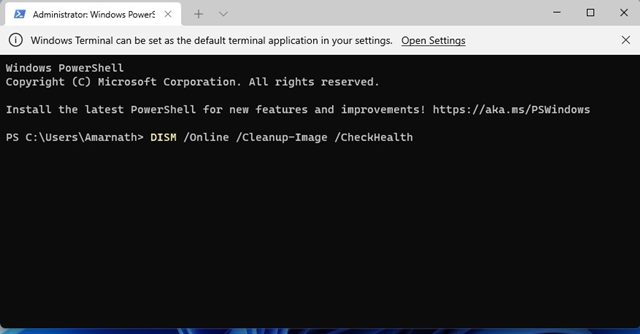
After executing all commands, you need to restart your Windows 11 computer.
10. Uninstall the Recent Windows 11 Updates
Since Windows 11 lags after installing an update, it makes sense to uninstall the recently installed updates. Here’s how you can uninstall the Recent Windows 11 updates.
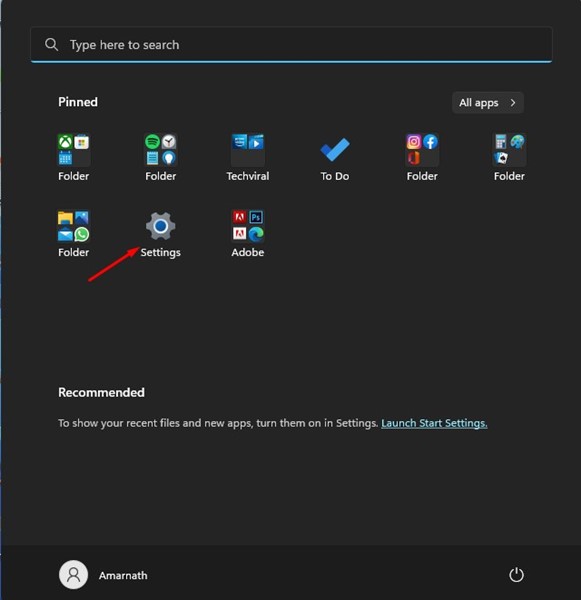
1. Open the Settings app from the Windows 11 Start Menu.
2. When the Settings app opens, switch to the Windows Update.
3. On the right side, click on the Update history.
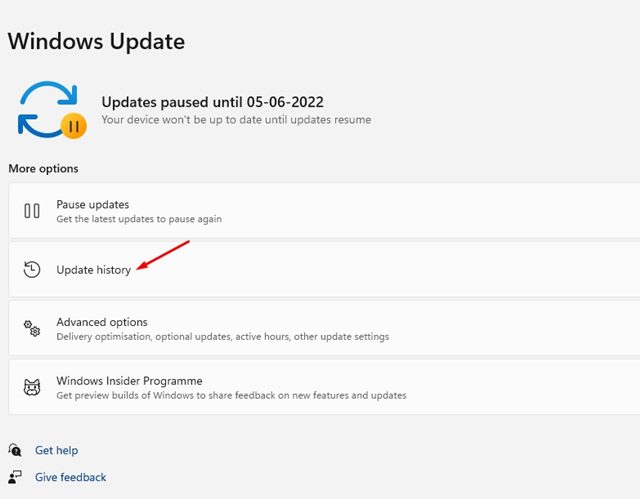
4. Under the Related Settings, click on the Uninstall Updates.
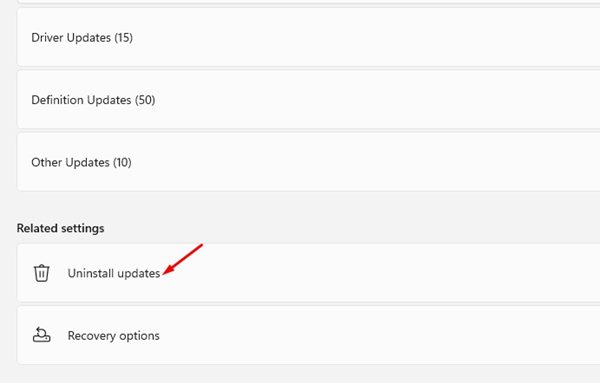
5. Now select the most recent updates and click Uninstall.

This is how you can uninstall Windows 11 updates in easy steps.
11. Perform a System Restore
You can even try rolling back your operating system to its previous state, provided Windows 11 lag after the update is not yet fixed. Here’s how you can perform a system restore on Windows 11.
- Click on the Windows Search & type System Restore.
- Open the Create a Restore point option from the list.
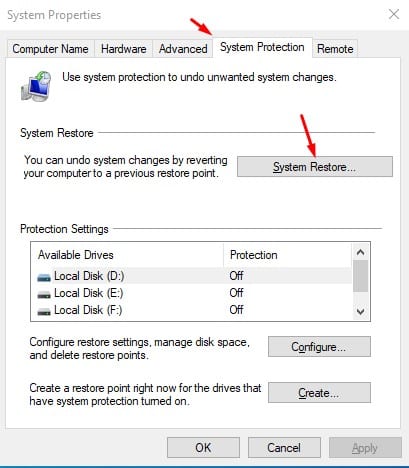
- On the System Properties, click on the System Protection tab.
- Now click on the System Restore option.
- On the dialog box that appears, click Next.
Select the last restore point on your PC and click Next.
Your PC will automatically be rolled back to the stage when it’s working fine.
12. Reset Windows 11
If nothing has worked in your favor, resetting your PC is the last remaining option to fix Windows 11 lagging after the update.
Before you reset, make sure to back up your important files and folders to cloud storage or an external file. Then, follow the steps we have shared.
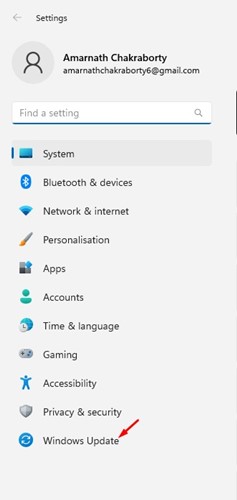
1. Open the Settings app on your Windows 11 from the Start Menu.
2. When the Settings app opens, switch to the Windows Update.
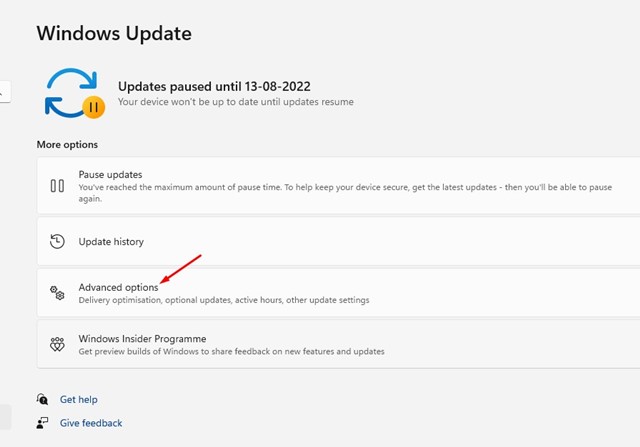
3. On the right side, click on the Advanced options.
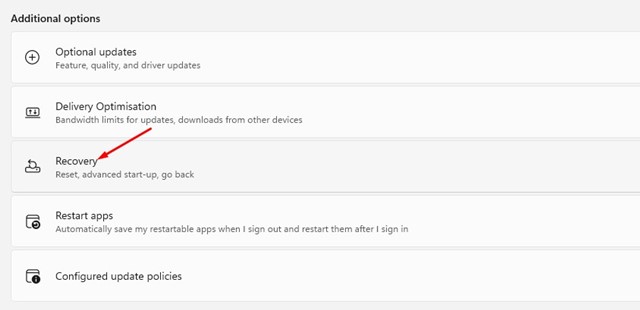
4. Scroll down to the Additional options & click on Recovery.
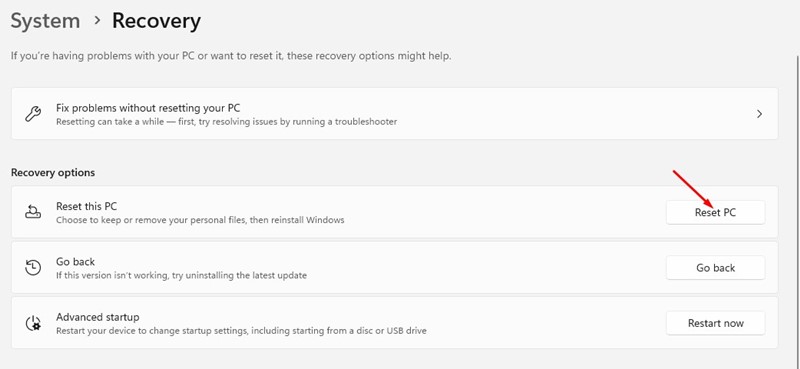
5. On the Recovery options, click on the Reset PC.
6. On the Reset this PC prompt, select Keep My Files.
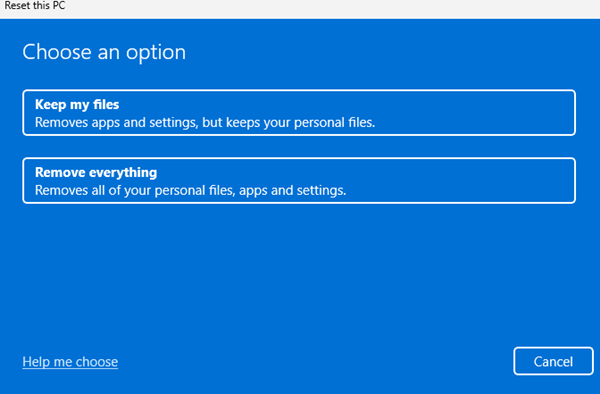
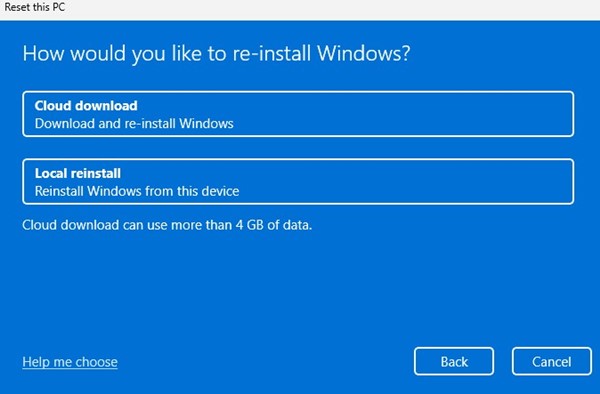
7. On the next prompt, select Cloud Download. This will download a fresh copy of Windows from the internet & install it.
8. Finally, click the Reset button to start the Reset Process.
Now, wait patiently until the Reset process completes. After the reset, continue using the Windows 11 PC without any lag.
These are some of the best and most effective methods to fix Windows 11 Lag after an update. If you have followed all the methods carefully, chances are that the Windows 11 lag after the update issue is already fixed. Let us know if you need more help troubleshooting Windows 11 lag issues.


