When it comes to photo editing, we usually think of Photoshop. Adobe Photoshop is indeed a great photo editing tool available for desktop operating systems, but it’s not beginner-friendly. You need to spend a fair amount of time learning Photoshop.
Professional photographers do use digital tools to optimize their images. They adjust various things on an image like color balance, brightness, sharpness, saturation, and more. However, now we have something known as ‘Filters’ that automatically enhances the photos.
Let’s admit, over the past few years, the description of ‘Photo Editing’ has been changed. We are living in a world of Instagram, where people enhance their photos by applying filters.
Applying filters is quite easy, provided you have the right sets of tools. You can find some best photo filters on these Android photo editing apps. Also, if you are using Windows 10, you can apply filters to photos without installing any additional app.
Steps to Add Filters to Images Using Microsoft Photos App
Microsoft’s Photos apps that ships with Windows 10 include easy-to-use filters and editing tools that can make your photos look more visually appealing. Here’s a detailed guide on how to apply filters to images via the Microsoft Photos app.
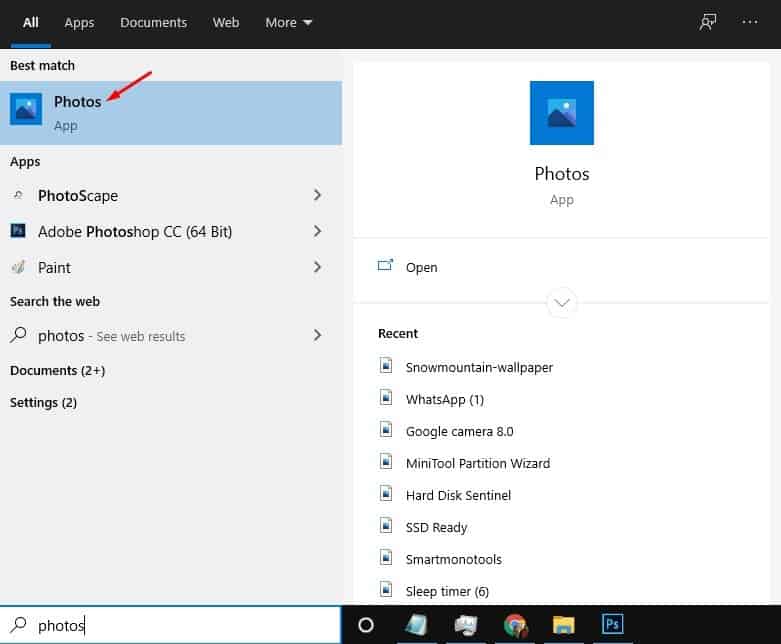
Step 1. First of all, click on the Start button and search for ‘Photos.’ Open the Microsoft Photos app from the list.
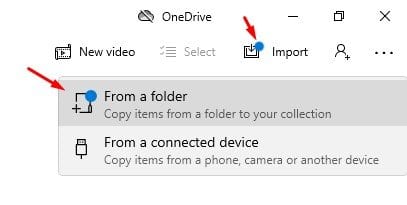
Step 2. Now you will see an interface like below. Now you need to add the image which you want to edit. For that, click on the ‘Import’ button and select the option ‘From a folder.’
Step 3. Now select the folder where you have stored your images. Once done, select the photo which you want to edit.
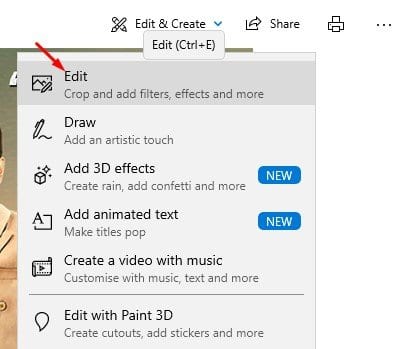
Step 4. On the right top corner, click on the ‘Edit & Create’ option.

Step 5. Select the option ‘Edit’ from the drop-down menu.
Step 6. At the top, you need to click on the ‘Filters’ tab.

Step 7. Now choose the filter of your choice from the right pane.

Step 8. You can even control the Filter intensity by sliding the slider.

Step 9. Once done, click on the ‘Save a Copy’ option.

That’s it! You are done. This is how you can apply filters to your photos in Windows 10.
So, this article is all about how to apply filters to photos in Windows 10. I hope this article helped you! Please share it with your friends also.


Hello, do you know if there is a way to apply filters to multiple images at once?
Thanks!