Well, when it comes to watching movies, videos or music on your computer, there’s no better option than Windows Media Player. For those unaware, Windows Media Player is a media player software from Microsoft which comes built-in on Windows operating system.
Windows Media Player is used to play, store and organize media files like videos, images, etc. Although Windows Media Player comes pre-built in the Windows operating system, lots of users still choose to use other media player apps like VLC, Gom Player, etc. It’s mainly because that Windows Media Player supports fewer file formats and it lacks Subtitle support.
Users can install codec packs to resolve the media incompatibility issue, but what about the subtitle support? We have manually tried different methods to add subtitles on the Windows Medis Player and found one working method. So, in this article, we are going to share the best method to add subtitles in Windows Media Player 2019.
Also Read: How To Automatically Download Movie Subtitles On Android
How to Add Subtitles in Windows Media Player
The method is simple and easy and you will just need to use some setting and a single third party tool that will allow you to add subtitles to your Windows Media Player. So follow the below steps to proceed.
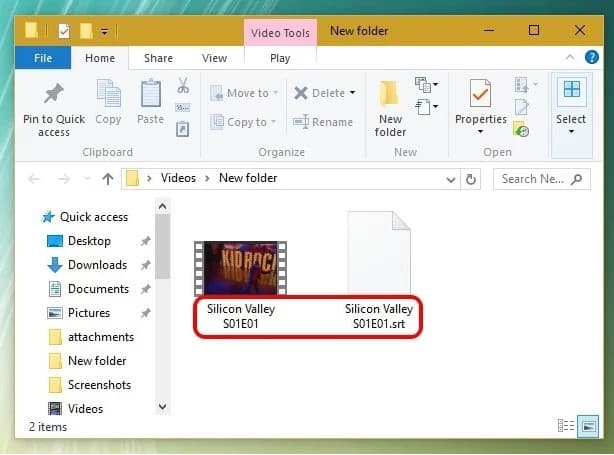
Step 1. Before following the below steps, make sure that both the video file and its subtitle file are of the exact same name. You can consider the example given below.
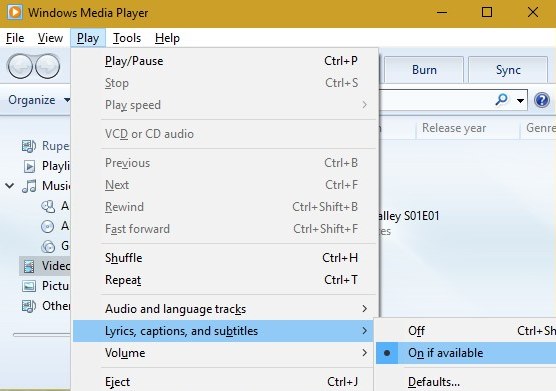
Step 2. Now you need to open Windows media player and there in library mode, you need to navigate to Play > Lyrics, captions, and subtitles and click on “On if available“.’
Step 3. Now you need to download and install the tool DirectVobSub (VSFilter) codec in your Windows Operating system.
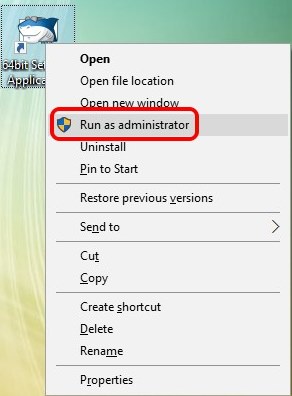
Step 4. Now sometimes subtitle will start working till the above step, if not then you need to proceed to download a tool Shark007’s Advanced codec in your Windows OS. Right-click on its desktop icon and click on Run as Administrator.
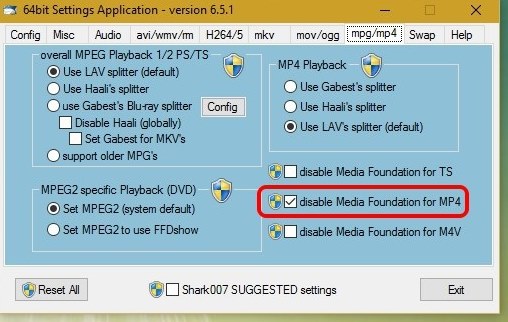
Step 5. Now you need to visit all the tabs there and start Ticking on disable Media Foundation for all the respective formats in it.
Now just try to open the video that was not playing with the subtitle file and you will notice that subtitle will be there with that video.
That’s it, you are done! You’ve successfully added subtitles to your Windows Media Player.
Also Read: How to Download Subtitles Automatically In VLC Media Player
So above discussion was all about How to Add Subtitles to Windows Media Player. With this, you can enjoy all your favorite movies with their subtitles and it will be a lot of fun watching a movie. Hope you like this, do share with others too. Leave a comment below if you have any related queries with this.
")

