You might be familiar with PowerShell if you use Windows. PowerShell is a more advanced version of the Command Prompt. Most of the commands you use on CMD can be used on PowerShell.
Being a more advanced version of CMD, PowerShell is more complicated to use, but it’s very powerful. With PowerShell, users can access the core features of the operating system. It even allows users to customize settings on the device.
However, if you are using Windows 11, you might know that most of the PowerShell command needs to be executed with administrator rights. This is why it’s always recommended to run PowerShell as an administrator.
Opening PowerShell with Admin rights is pretty easy; users just need to right-click on the PowerShell and select the ‘Run as administrator’ process. Although the process is easy, it still takes a few extra steps to run PowerShell with administrative rights.
Also read: How to Use PowerShell To Scan Windows 10/11 for Virus & Malware
2 Methods to Always Open PowerShell As Administrator in Windows 11
PowerShell can be configured in Windows 11 to open with administrator access by default. Hence, in this article, we will share a step-by-step guide on always opening PowerShell as an admin in Windows 11. Let’s check out.
1) Using Windows Terminal Preview
Important: This feature is available only on Windows Terminal Preview 1.13.
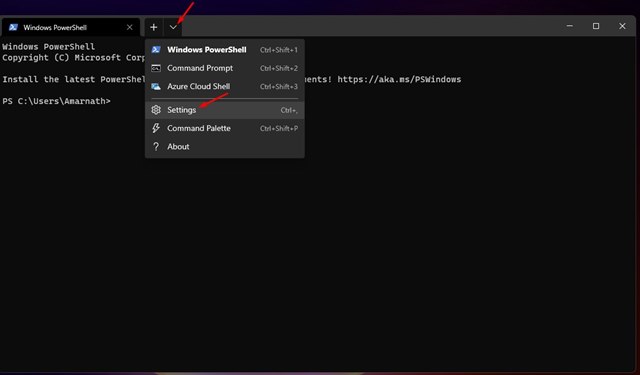
1. First of all, click on the Windows 11 Search and type in Windows Terminal. Open Windows Terminal from the list of options.
2. Next, click on the drop-down arrow next to the new tab option and select ‘Settings’.
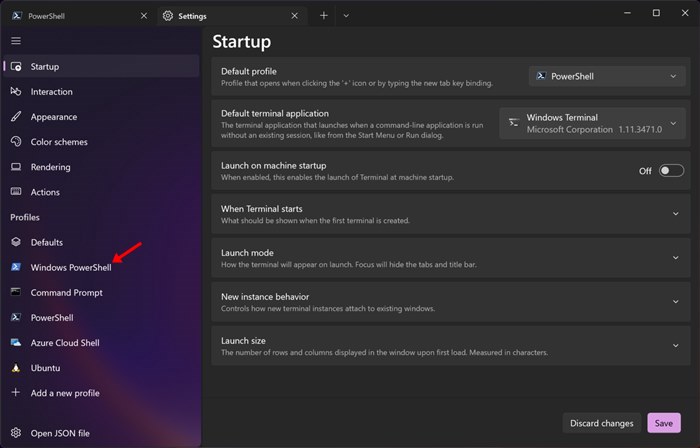
3. On the Settings, select the Powershell option.
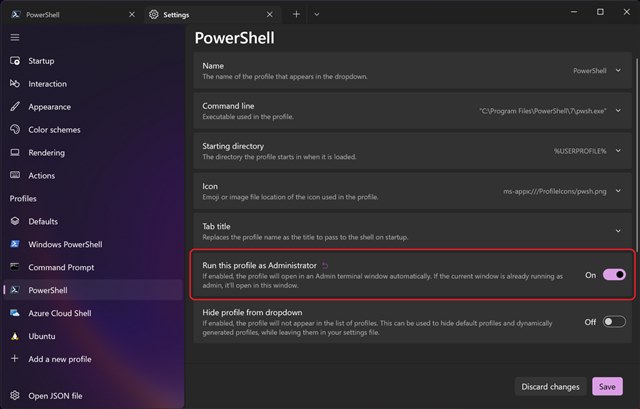
4. On the right, enable the toggle button behind ‘Run this profile as administrator’. Once done, click on the Save button.
That’s it! You are done. This will always open PowerShell as an admin in Windows 11.
2) Always Open PowerShell as an administrator via Shortcut
If you are not using the latest version of Windows Termina, you need to follow this method. Here we will create a desktop shortcut to run PowerShell as administrator.
1. First, right-click anywhere on a blank space and select New > Shortcut.
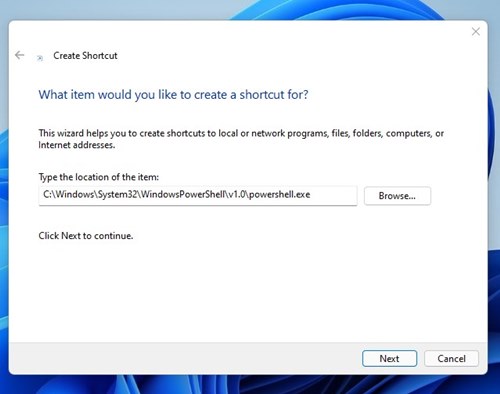
2. On the location field, paste the following path:
C:\Windows\System32\WindowsPowerShell\v1.0\powershell.exe
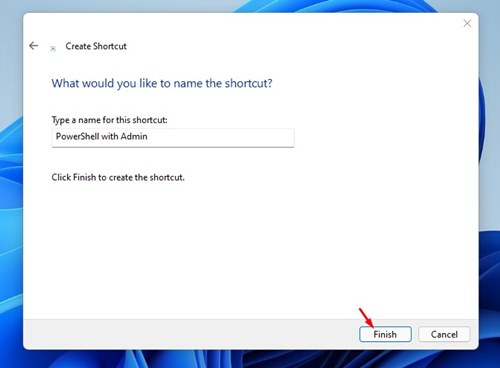
3. Once done, click on the Next button. On the next screen, name the new shortcut and click on the Finish button.
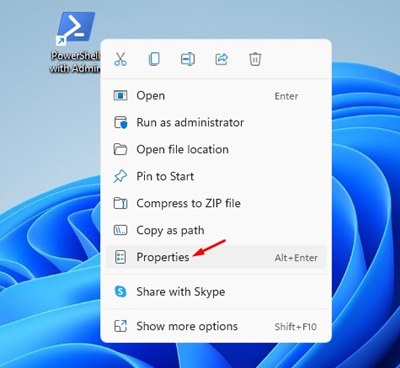
4. Now right click on the shortcut file and select Properties.
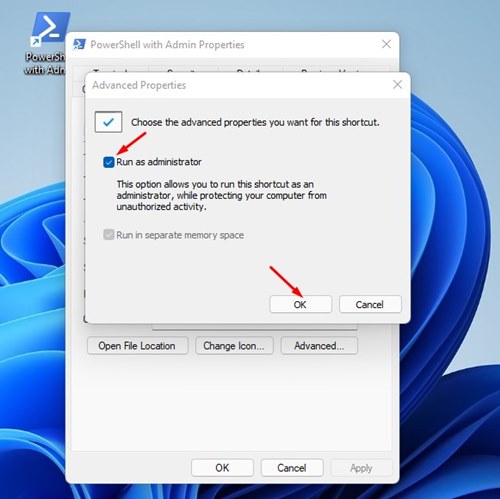
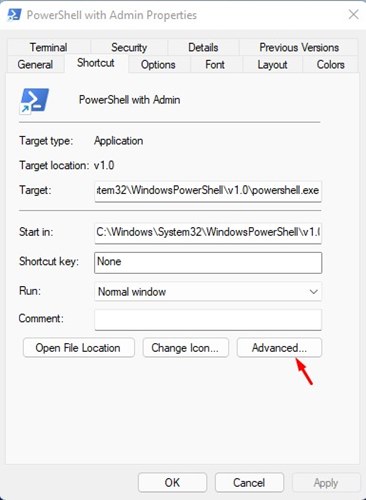
5. On the Shortcut tab, click on the Advanced option as shown below.
6. On the Advanced Properties pop-up, check the ‘Run as administrator’ option and click on the Ok button.
That’s it! Now, whenever you want to run PowerShell with admin rights, just double-click on the desktop shortcut you have created.
It’s pretty easy to always run PowerShell as an administrator in Windows 11. I hope this article helped you! Please share it with your friends also. If you have any doubts related to this, let us know in the comment box below.


