While making changes to the system settings or privacy settings on Windows 11, we see a UAC prompt asking to confirm the action. That UAC prompt appears when you try to do something that requires administrative privileges.
System utilities such as Command Prompt, PowerShell, etc., need administrator privilege to make system-level changes. Apart from the system utilities, you may even have to run a few programs as an Administrator on your Windows 11 PC.
You get two options to run apps as an administrator on Windows 11 – The first includes right-clicking on the Program and selecting the Run as administrator option. The second one is to set the app/program to always run as an administrator.
How to Always Run Apps as Administrator on Windows 11
If you have specific programs that you often use and require administrator privilege, it’s best to set those apps to always run as an administrator. In this way, you will save some time & hassle. Hence, in this guide, we will share a step-by-step guide on always running apps as an Administrator in Windows 11.
1) Set Apps to Always Run as an Administrator
In this method, you need to always make changes to the app’s advanced properties to run them as an administrator. You need to do this for every app you want to always run as an administrator. We have used the PowerShell app to demonstrate the method.
1. First, open the Windows 11 search and type in PowerShell (Your app name).
2. Now, right-click on PowerShell and select Open File Location.

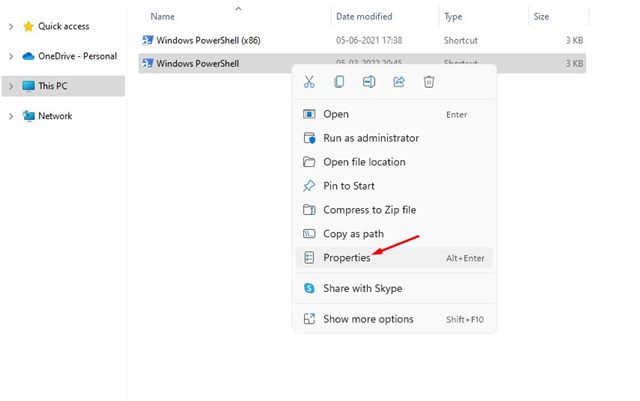
3. On the App’s installation folder, you need to right-click on the app shortcut and select ‘Properties’.
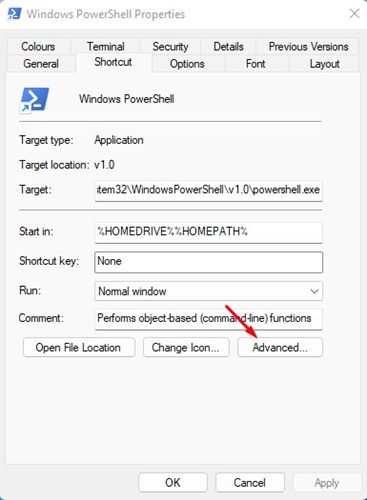
4. Next, click on the Advanced option, as shown in the screenshot below.
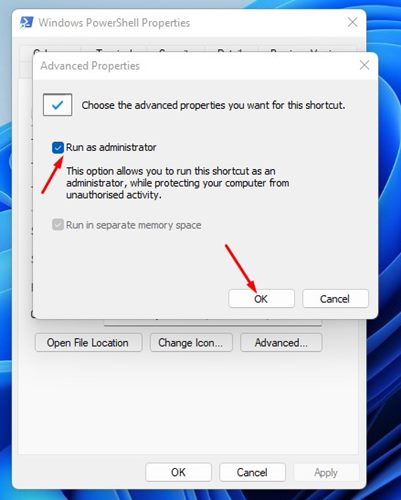
5. On the Advanced Properties, check the Run as administrator option. Once done, click on the Ok button.
That’s it! You are done. You need to repeat the steps for every app you want to run as an Administrator.
2) Always Run Apps as Administrator by Modifying Compatibility Settings
In this method, we will make some changes to the Compatibility settings of the app to grant them admin rights. Here are some of the simple steps you need to follow.
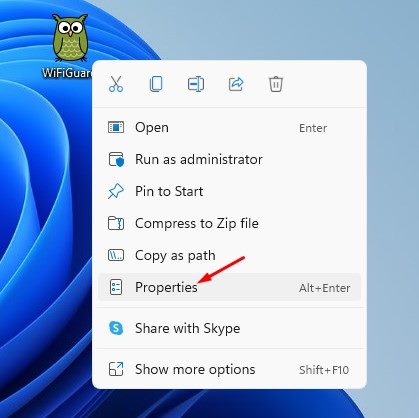
1. First, right-click on the program you want to always run as Administrator and select Properties.
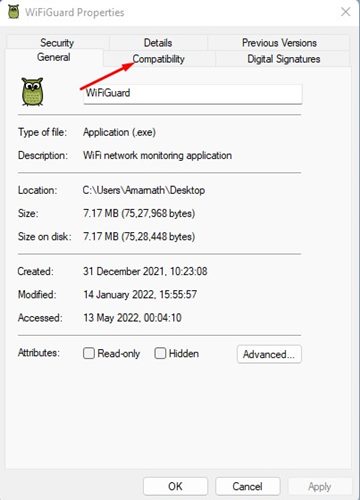
2. On the App Properties page, switch to the Compatibility tab as shown below.
3. Next, in the Settings section, check the Run this program as an administrator and click on the Ok button.
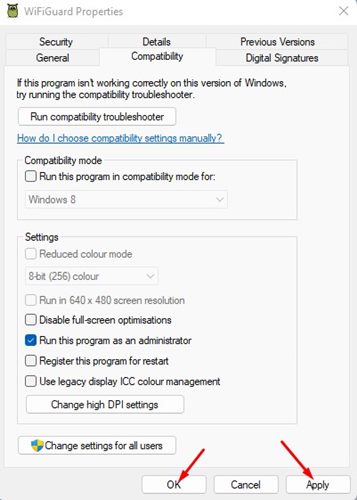
That’s it! You are done. This will run the apps with admin permissions from the next time.
3) Use the Administrator Account
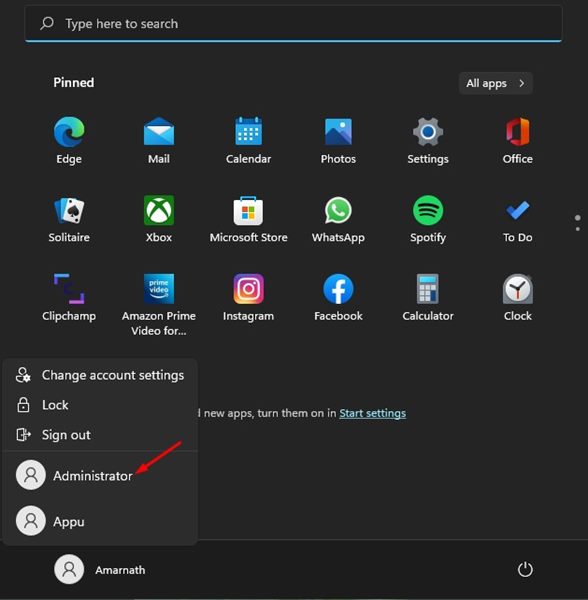
If you want to run all apps with elevated privileges, you need to start using the Administrator account. When you sign in with the Administrator account, all apps and programs will run as an administrator, and you won’t see the UAC prompt anymore.
However, since an Administrator account has elevated rights for everything, it can pose a security risk. This is the only reason the Administrator Account is kept hidden from users on Windows 11.
If you want to enable the Administrator account on your Windows 11, you must follow our guide to Enable Administrator Account on Windows 11.
So, these are the three best ways to always run apps/programs as an administrator in Windows 11. Although it’s easy always to run apps as an Administrator on Windows 11, make sure you don’t provide admin access to apps you don’t trust.


