Well, it’s no doubt that Gmail is right now the most used email service out there. Compared to all other email services, Gmail offers you better features and more controls. On Gmail, you can even send emails with file attachments as well.
A few weeks ago, we shared an article discussing how to set up email forwarding in Gmail. The method works well, but it forwards every email that you receive on your Gmail account.
What if you want to forward only specific emails in Gmail? If you wish to do so, you can easily do it by creating a filter rule.
Also Read: 10 Best Ways to Fix Gmail Not Receiving Emails
Steps to Forward Specific Mails to Another Gmail
Hence, in this article, we will share a step-by-step guide on how to automatically forward specific emails in Gmail. Let’s check out.
Creating an Email filter in Gmail
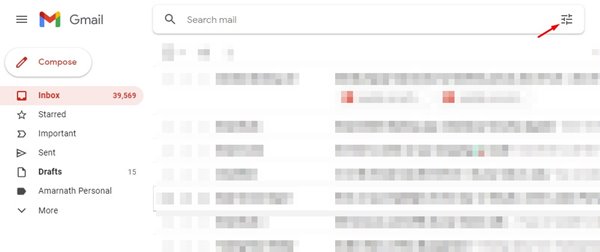
The first step requires creating a filter to forward emails to specific addresses. For that, you need to open Gmail.com and click on the Gmail search box at the top. Next, click on the search options button posited on the right side.
Enter the Filter Criteria
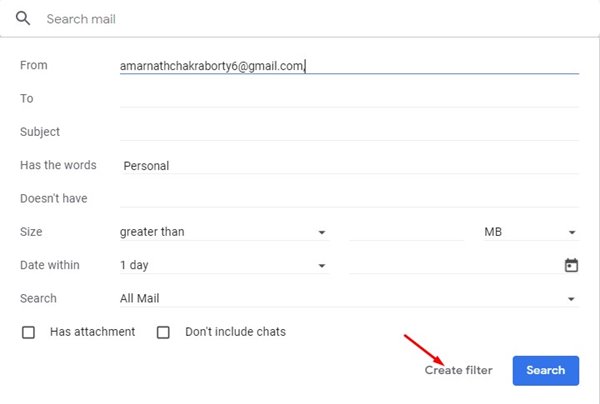
The next step requires entering the email filter criteria. Here you need to enter the criteria that you want Gmail to look for. These include From, To, Subject, Has the Words, Doesn’t Have the words, Size, and many other things.
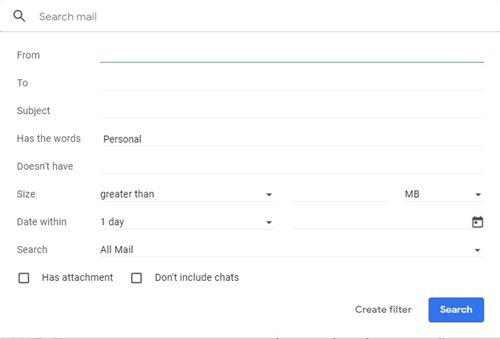
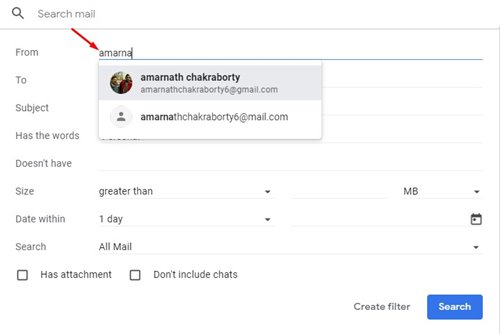
If you want to forward messages received from a specific email address, enter the email address in the ‘From’ field. In this way, all messages you will receive from the particular contact will land on the forwarded email address.
Once done with the setup, click on the ‘Create Filter’ button.
Selecting the Filter Actions
In the final step, you need to select the filter actions. To forward the emails that match the criteria you have set, check the option ‘Forward it to’ and choose the forwarding email address in the drop-down list.
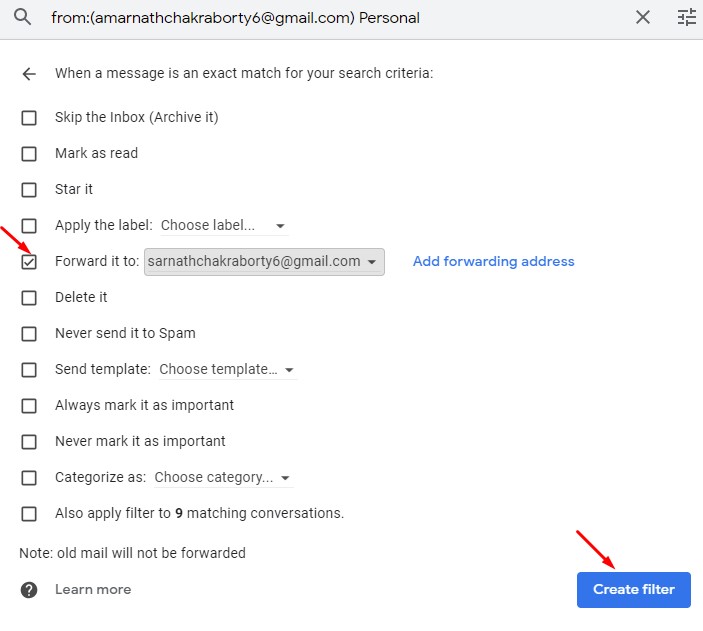
If you haven’t set up email forwarding, you need to click on the ‘Add forwarding address’ and enter the email address where you want to receive the emails. Then, to enable email forwarding, follow our guide Forward Emails from One Gmail Account to Another.
After making the changes, click on the ‘Create Filter’ button.
How to Delete Filter & Stop Forwarding
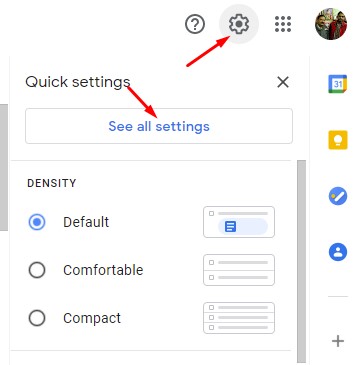
Well, if you wish to delete or stop the email forwarding option, you need to click on the Settings gear icon and click on the ‘See All settings’ button.
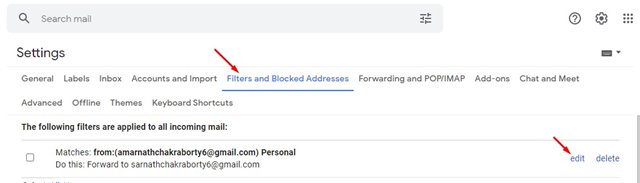
On the Next page, click on the ‘Filters and Blocked Addresses’ tab. You will find your current filters. To make the changes, click on the ‘Edit‘ button and make your adjustments.
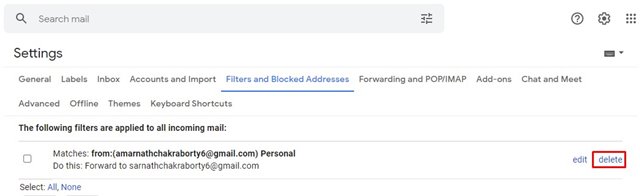
To delete the filter, click on the ‘Delete’ button, and on the confirmation button, click on the ‘Ok’ button.
That’s it! You are done. This is how you can automatically forward specific emails in Gmail.
So, this guide is all about how to automatically forward specific emails in Gmail. I hope this article helped you! Please share it with your friends also. If you have any doubts related to this, let us know in the comment box below.