Well, Google recently rolled out the latest version of its mobile operating system – Android 11. Android 11 is only available for Pixel, Xiaomi, OnePlus, Oppo, and Realme Smartphone. Like the previous versions, Android 11 also introduced some new features like One-Time app permissions, Notification History, etc.
You can even get some of Android 11’s exclusive features on any Android by following our guide -. Among many other changes, Google has also introduced the ability to automatically revoke permissions from apps that users don’t use in Android 11.
The new feature is named ‘Auto Revoke Permissions,’ and it does exactly what it sounds. It automatically revokes permissions for files, camera, contacts, location, etc., for apps you haven’t used for a while.
Also Read: Best Home Security Apps For Android
How to Automatically Revoke Permissions for Unused Apps on Android
The feature is disabled by default, but users can easily enable it from the App settings. This article will share a detailed guide on how to use Android 11’s new auto-remove permission feature. Let’s check out.
Note: The Auto Revoke Permissions feature should be enabled manually for every app installed on your device.
Step 1. First of all, make sure that your phone is running on the latest Android 11.
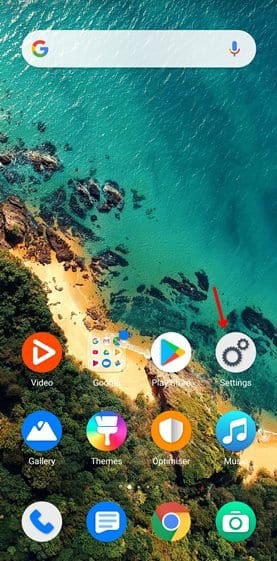
Step 2. Now open the App drawer and tap on ‘Settings.’
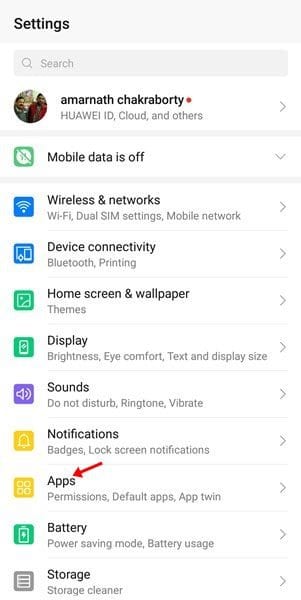
Step 3. On the Settings page, tap on the ‘Apps and Notifications’ option.
Step 4. Under the apps, pick the app whose permissions you’d like to have automatically revoked.
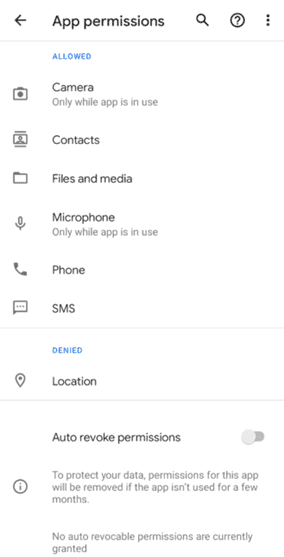
Step 5. Now scroll down and look for an option ‘Auto revoke permissions.’
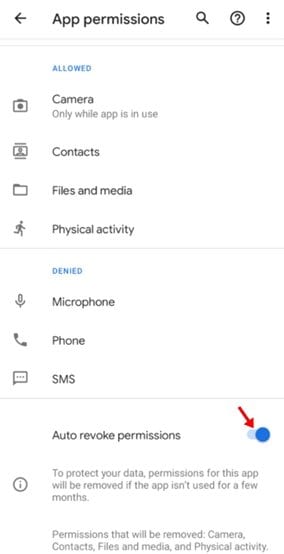
Step 6. Now use the toggle button to turn on the auto revoke permission feature.
That’s it! You are done. If you don’t use the app for a few months, Android 11 will automatically revoke all authorized permissions.
So, this article is all about how to revoke permissions from unused apps on Android automatically. I hope this article helped you! Please share it with your friends also. If you have any doubts related to this, let us know in the comment box below.


