If you have been using Windows 10 for a while, you might know that whenever you install an app or game from the Microsoft store, it gets installed in your C: drive.
While installing third-party apps, you can choose the installation folder, but this doesn’t happen while downloading apps & games from the Microsoft store.
Well, if you have lots of storage left on your system drive, that won’t be a problem. However, if you are using SSD and have limited storage, installing every app or game in the C: drive might not be an appropriate option.
In such cases, changing the Microsoft Store download location for installing apps is always best. If you manually select the download location for the store apps, the Microsoft store will start downloading the new apps to the selected location.
Also Read: How to Always Run Windows Terminal as Administrator
Change the Download Location for Microsoft Store Apps
So, if you want to change the Microsoft Store download location on Windows 10, you are reading the right article. This article will share the best method to change the Microsoft Store download location for apps. Let’s check out.
1) Change Download Location Using Windows Settings
Microsoft does allow you to change the Microsoft Store download location. The option is hidden deep under the Windows Settings app. Follow the steps given below to change the Microsoft Store download location.
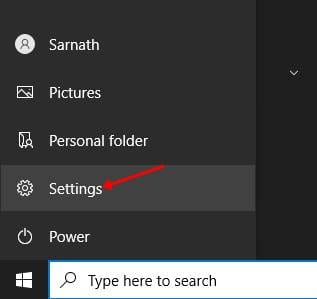
1. First, click on the Windows Start button and select Settings.
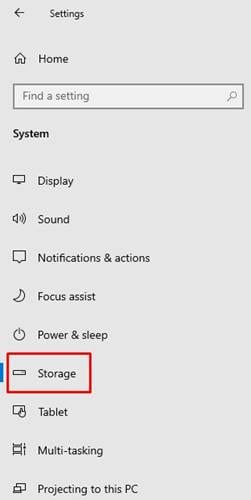
2. On the Settings page, click on the System option.

3. On the System, click on the Storage option.
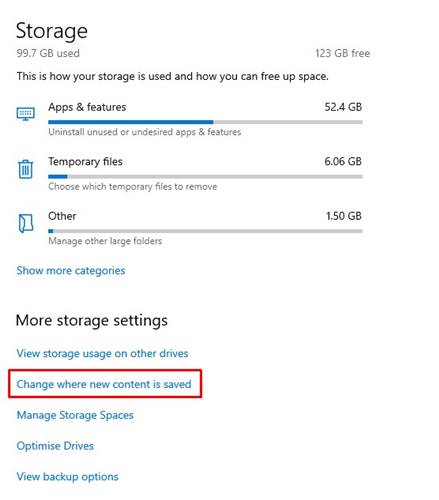
4. Click on the Change where new content is saved on the right pane.
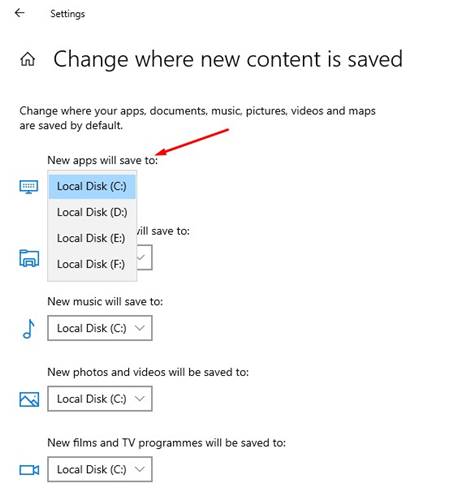
5. Now, under the New apps will save to the drop-down list; select the drive as per your wish.
That’s it! You are done. Now Microsoft Store will always download apps in your desired drive.
2) Move Apps to Another Drive
If you cannot implement the above method for any reason, you need to follow this one. In this method, you need to move apps downloaded from the Microsoft Store.
The feature doesn’t work with every app and game. It only works with apps that were installed through the Microsoft Store.
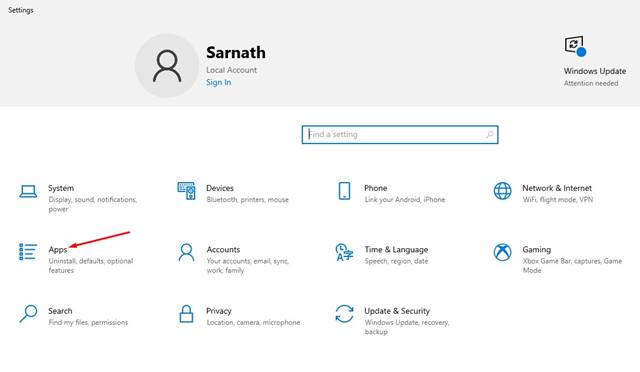
1. First, click on the Windows Start button and select Settings.
2. On the Settings page, click on the Apps.
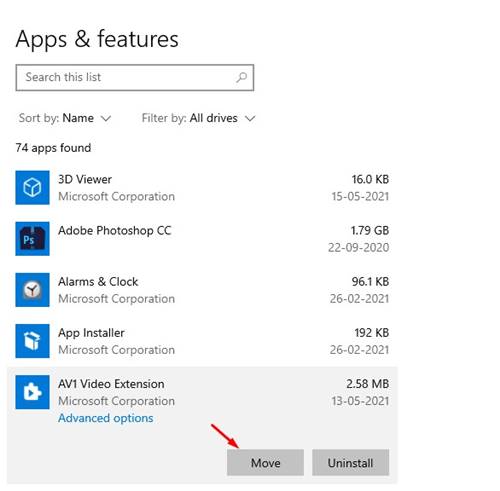
3. Under the Apps & Features, select the app to move and click on the Move button.
4. Select the drive where you want to move the app on the following popup.
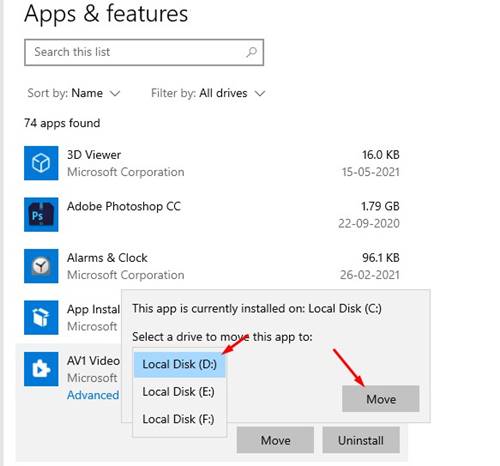
5. Once selected, click on the Move button.
That’s it! This is how you can move apps on Windows 10 pc.
Also read: 200+ Best CMD Commands For Windows 10/11
So, this article is all about changing the Microsoft Store download location for apps and games. I hope this article helped you! Please share it with your friends also. If you have any doubts about this, let us know in the comment box below.


