A network interface card (NIC), commonly called a Network Adapter, is a computer component used to communicate with another computer. For example, it connects our computer to the network and the internet over a wired or wireless connection.
This article will learn how to check the network card speed in Windows 11. Now, you may wonder why anyone would need to check the speed of a network card. However, knowing the current link speed can be highly beneficial in many situations.
Knowing the actual speed of your network card can help you determine whether the adapter is functioning according to its technical specification and will also help you diagnose a few internet performance-related problems.
Additionally, if you are planning to upgrade your internet plan, knowing the maximum speed of the network adapter will help you determine whether you can utilize the maximum speed & bandwidth.
3 Best Methods To Check Network Adapter Connection Speed
Whatever network card your PC uses, if you are using Windows 11, you can confirm the link speed in easy steps. Below, we have shared a few easy ways to check the network adapter speed in Windows 11. Let’s check out.
1) Check Network Adapter Speed via Settings
We will use the Windows 11 Settings app to check the Network adapter speed in this method. Here are some of the simple steps that you need to follow.
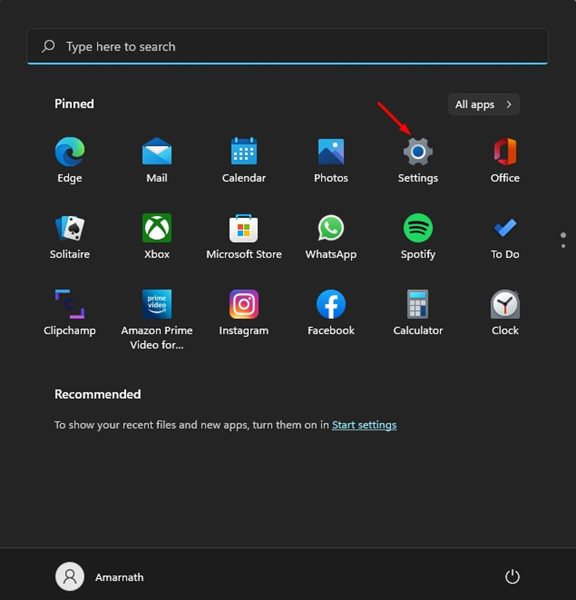
1. First of all, click on the Windows 11 Start button and select Settings.
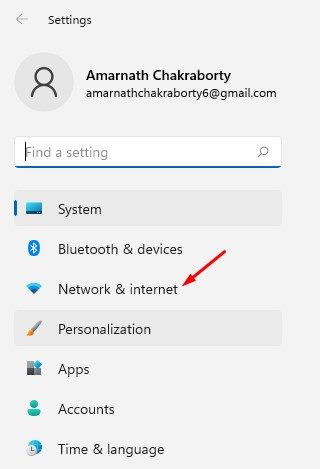
2. On the Settings page, click on the Network & Internet option below.
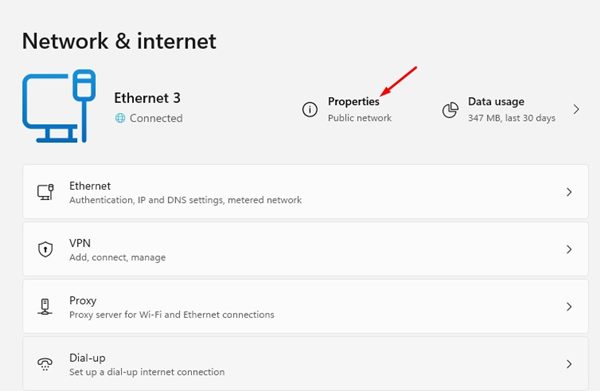
3. Click on the Properties option under the connected network on the right pane.
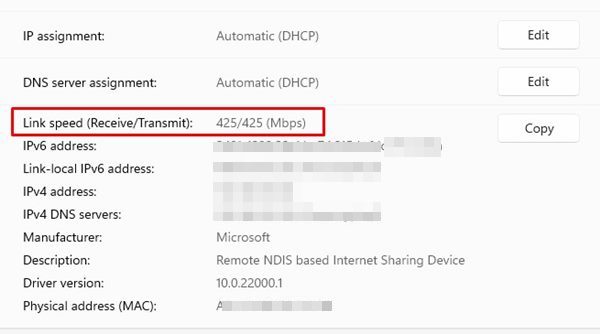
4. On the next page, you need to look at the Link Speed (Receive/Transmit) information. This displays the current network adapter connection speed.
That’s it! You are done. This is how you can determine the current network adapter connection speed in Windows 11.
2) Check Network Card Speed via Control Panel
We will use the Windows 11 Control Panel to check the network card speed in this method. Here are some of the simple steps you need to follow.
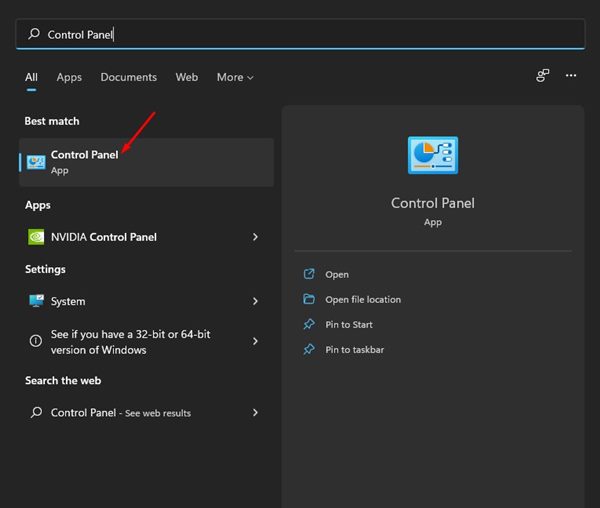
1. First of all, open Windows 11 Search and type in Control Panel.
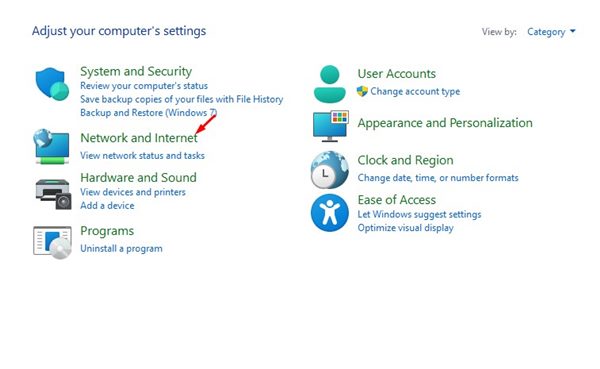
2. On the Control Panel, click on the Network and Internet option.
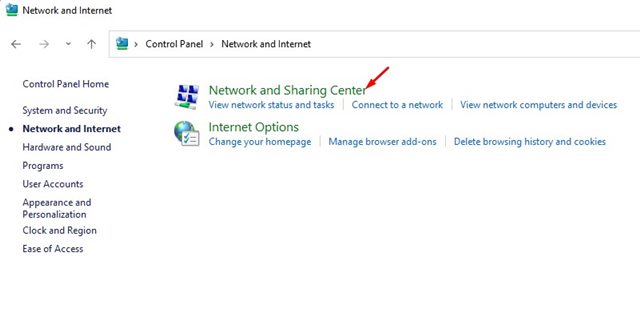
3. Click on the Network and Sharing Center on the next screen.
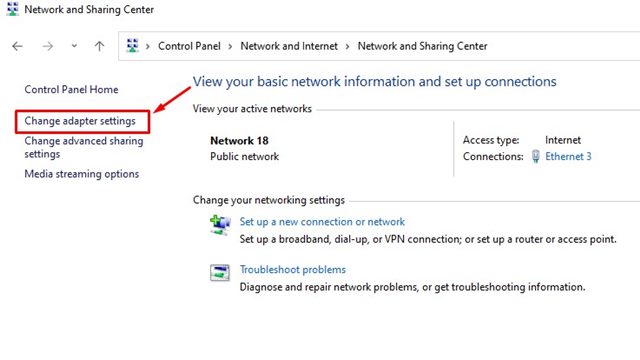
4. On the left, click on the Change Adapter Settings.
5. Now, double-click on the WiFi or Ethernet Network Adapter Card. This will show you the status; you need to check the Speed information.
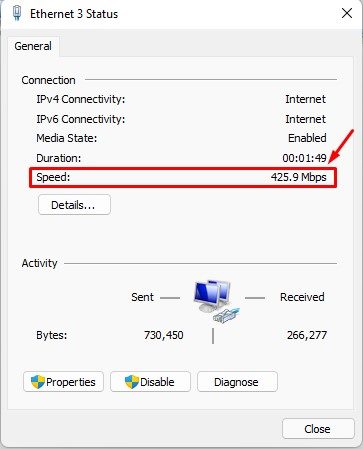
That’s it! The speed value on the Status Window displays the network card speed.
3) Check Network Card Speed via CMD
We will use the Command Prompt to check the Network card speed in this method. Here are some of the simple steps you need to follow.
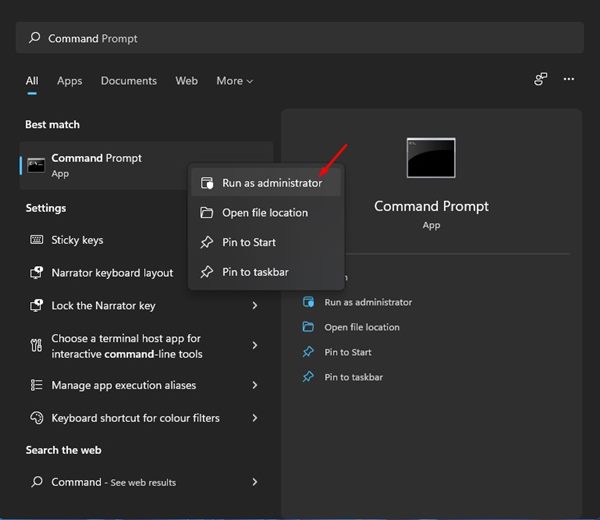
1. First, open the Windows 11 search and type in CMD. Right-click on the CMD and select Run as administrator.
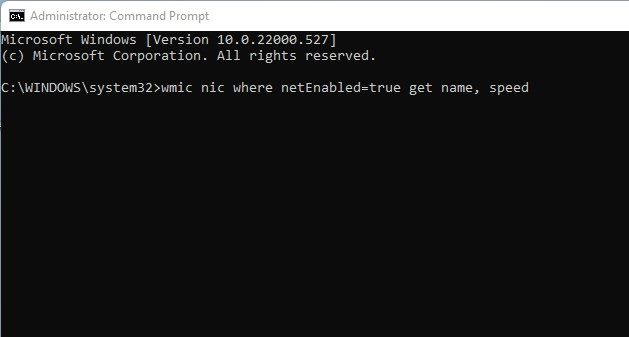
2. On the Command Prompt, enter the command:
wmic nic where netEnabled=true get name, speed
3. You need to note down the Speed figure specified behind the network card name.
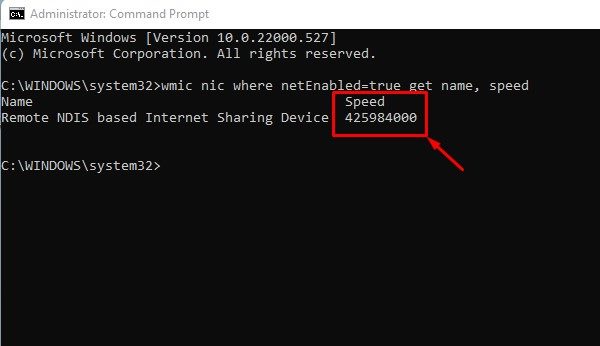
That’s it! You are done. This is how you can use Command Prompt to determine network card speed.
There are other ways to check Network card speed on Windows, but most require third-party app installation. The methods we have shared in this guide also work on Windows 10 operating system.
Knowing the network adapter connection speed could be helpful, especially while troubleshooting network issues. I hope this article helped you! Please share it with your friends also. If you have any doubts about this, let us know in the comment box below.


