Well, PC enthusiasts and gamers have been obsessed with getting the fastest and powerful available hardware components for their new PC. So, before purchasing a new computer, a gamer considers various things like the RAM speed, processor speed/cores, SSD, GPU, etc.
If we talk about the RAM, the 8GB of RAM is usually sufficient for regular gaming and multitasking. However, do you know that RAM speed also decides the overall performance of your computer?
While purchasing a new RAM for a PC, you might have seen a large number followed by MHz (Megahertz) like DDR4 8GB 2400Mhz RAM, or DDR4 4GB 3200Mhz RAM. The 2400Mhz/3200Mhz is the RAM speed here. RAM speed is measured in Mhz, and more MHz means more data transfer speed.
For example, a 2400Mhz RAM means it can perform 2.4 billion clock cycles per second. So, in short and simple words, more Mhz means more data transfer speed. However, the only thing to note here is that you have to make sure that the processor also supports the frequency.
Things to Note before Purchasing/Installing RAM
Let’s say you already have 4GB 2400 Mhz RAM installed in your PC, and you want to upgrade it to 8GB. So, if you purchase 4GB 3200Mhz RAM and install it alongside the 2400Mhz RAM, it will not work.
In that case, you would need to purchase 4GB 2400 Mhz RAM, or else your computer won’t turn on. So, before purchasing a new RAM, it’s always best to check the RAM speed.
3 Methods to Check RAM Speed in Windows 11/10
Now that you are fully aware of RAM speed, you might want to check your RAM speed on Windows 10 or Windows 11. Below, we have shared few best methods to check RAM speed on Windows PC.
1. Use Task Manager
Well, Task Manager serves as the easiest option to check RAM speed on Windows 10 computers. You need to follow some of the simple steps given below to check RAM speed via Task Manager.
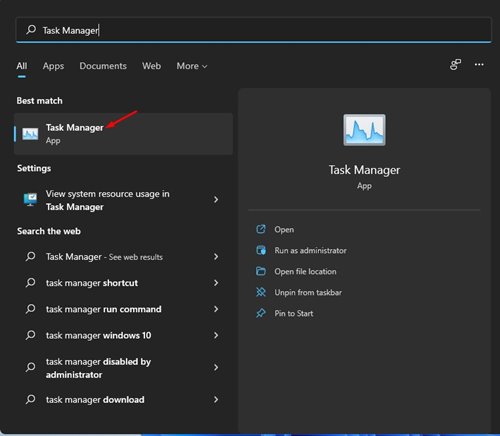
Step 1. First of all, open Windows search and type in ‘Task Manager’. Open the task manager from the list.
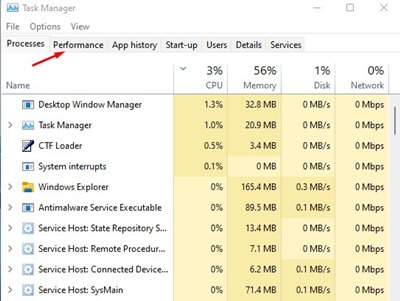
Step 2. On the Task Manager, click on the ‘Performance‘ tab.
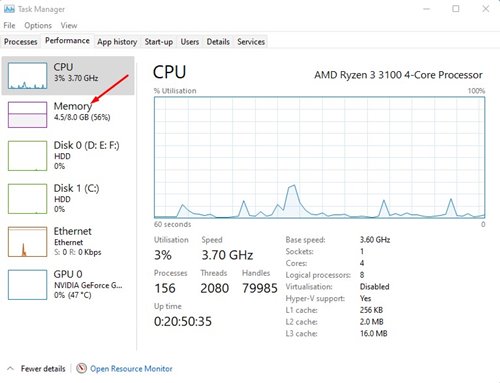
Step 3. On the Performance tab, click on the ‘Memory‘ option.
Step 4. Now on the right pane, check the ‘Speed.’ The number behind the Speed is the actual RAM speed.
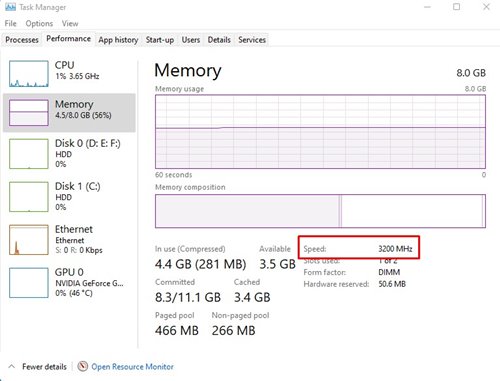
That’s it! You are done. This is how you can use Task Manager to check the RAM speed on Windows 10 and Windows 11.
2. Using Command Prompt
Like the Task Manager, you can even utilize the Windows 10/11 command prompt to check the RAM speed. Follow some of the simple steps given below to check the RAM speed via Command Prompt.
Step 1. First of all, press Windows Key + R button on your keyboard. This will open the RUN dialog box.
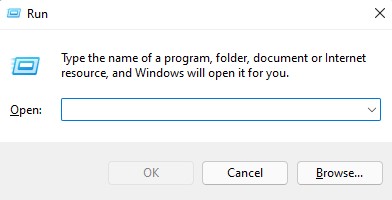
Step 2. On the RUN dialog box, enter ‘CMD‘ and hit the enter button.

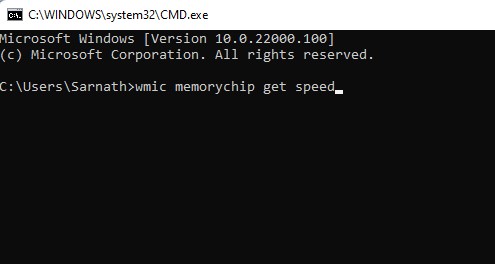
Step 3. This will open the Command Prompt on your PC. On the Command prompt, enter the following command and hit the Enter button.
wmic memorychip get speed
Step 4. Command Prompt will now show you the RAM speed.
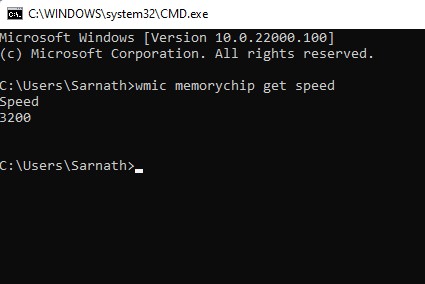
That’s it. You are done. This is how you can check RAM speed in Windows 10/Windows 11 computers.
3. Check the sticker on your RAM
If for any reason, you are unable to figure out the RAM speed on your Windows PC, or if your PC is not turning on due to some reason, you need to check the RAM.
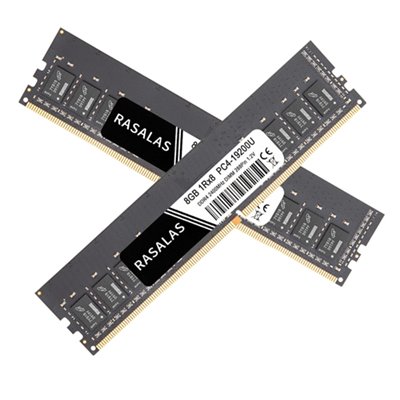
For that, you would need to open the PC cabinet and check the RAM sticker. Every manufacturer puts a sticker on the RAM to help buyers in purchasing the correct RAM. The sticker will tell you the RAM size, RAM speed, and few other details.
So, this article is all about how to check RAM speed on Windows 10 and Windows 11. I hope this article helped you! Please share it with your friends also. If you have any doubts related to this, let us know in the comment box below.


