WinSxS (Windows Side by Side) is a folder where Windows stores its recovery files, files needed to install updates, previous versions of Windows components, and more. It’s a very important folder that helps you revert to the previous state in case of software failure. Since Windows often uses WinSxS to store new files, the folder size can expand over time, leading to low disk space.
Where is the WinSxS folder located?
The folder is located in your system installation drive; you will usually find it in the C:\Windows\WinSxS path. When you open this folder, you will notice that the files are stored in multiple places in the operating system. However, there’s only one copy of a file, and the rest are just hard links.
Is it safe to delete the WinSxS Folder?
You can’t delete the WinSxS, and you shouldn’t try to delete it. Deleting the files from the WinSxS folder might break the operating system’s functionality. In the worst case, your PC might even fail to boot.
To avoid such issues, the best bet is to reduce the size of the WinSxS folder; this will keep you on the safe side.
1. Reduce the Size of the WinSxS folder via Task Scheduler
You can use the Task Scheduler to reduce the WinSxS folder size in Windows 11.
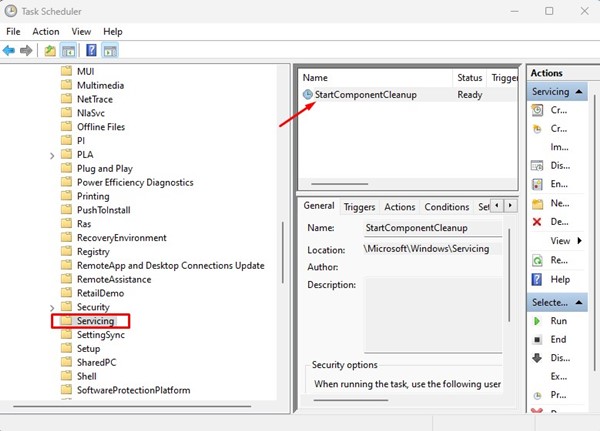
1. Open the Task Scheduler app from the Windows Search.

2. Navigate to the following path:
Task Scheduler Library\Microsoft\Windows\Servicing\StartComponentCleanup
3. On the StartComponentCleanup, click the Run button in the Selected Item section.
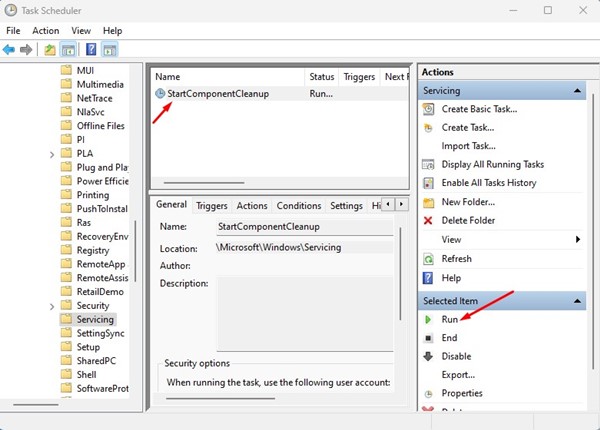
This will run the StartComponentCleanup tool and reduce the size of your WinSxS folder.
2. Cleanup WinSxS using Disk Cleanup Tool
You can use the Disk Cleanup utility to reduce the WinSxS folder size.
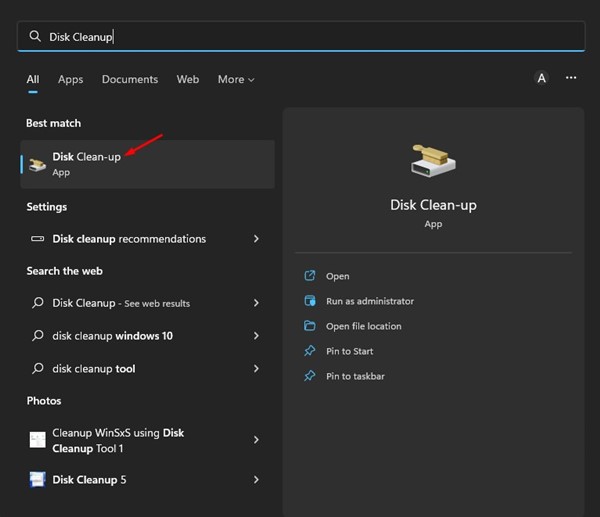
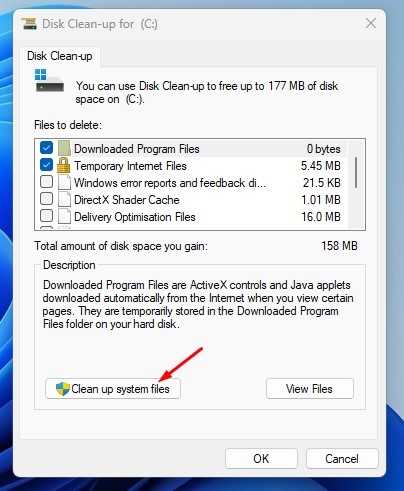
1. Open the Disk Clean-up utility from the Windows Search.
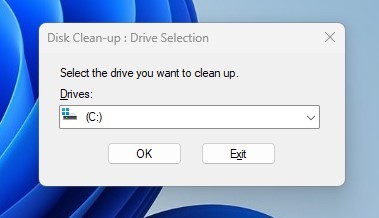
2. Select the drive you want to clean and click OK.
3. Click Clean up system files.
4. Select all checkboxes and click Ok.
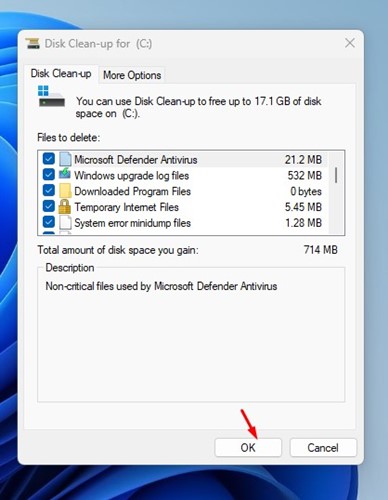
The Disk Cleanup utility will run and clean all unnecessary system files.
3. Clean Up WinSxS Folder using Storage Sense
Storage Sense is a storage management tool that lets you free up drive space by removing items you don’t need. It can clean up some files from the WinSxS folder.
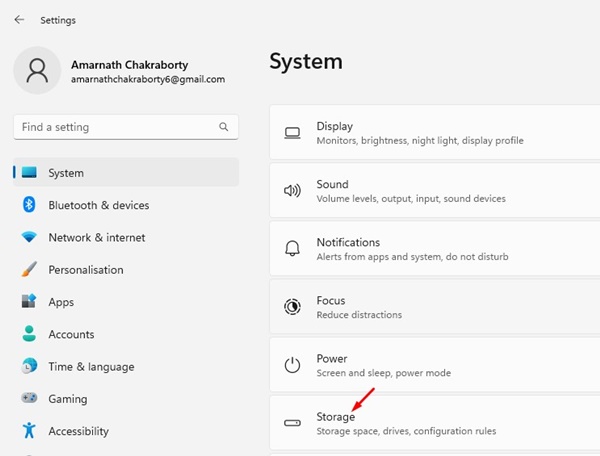
1. Click on the Windows 11 Start Button and select Settings.

2. Switch to the Storage.
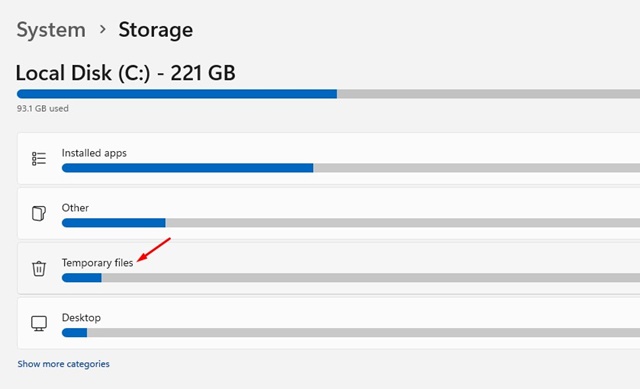
3. Click Temporary files.
4. Unselect the Recycle Bin and Downloads. Make sure all other options are selected.
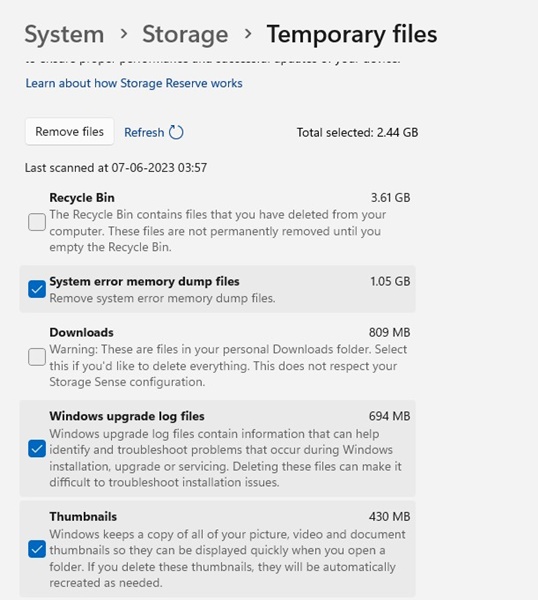
5. Click Remove files.

This will immediately run Storage Sense on your Windows 11 computer.
4. Clean up the WinSxS folder via CMD
You can also utilize the Command Prompt to reduce the size of the WinSxS folder.
1. Click on the Windows 11 search and type in Command Prompt. Right-click the Command Prompt and select Run as administrator.

2. Execute the command:
DISM.exe /Online /Cleanup-Image /StartComponentCleanup
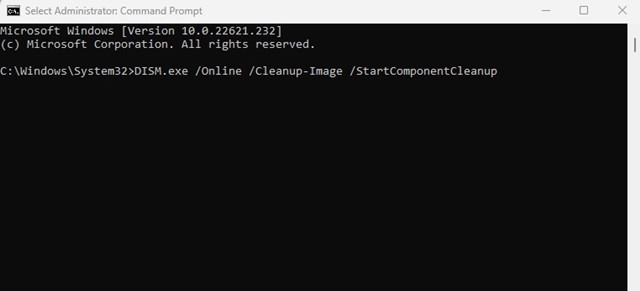
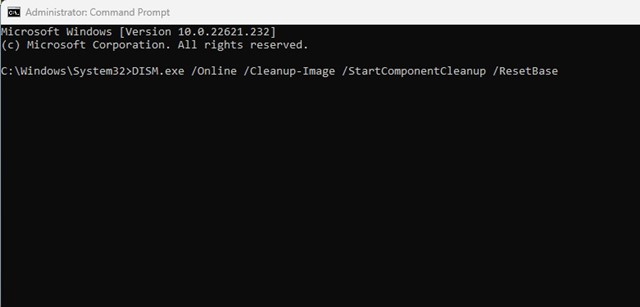
3. This will clear the specific group of files from the WinSxS folder. If you want to clean older Windows component versions, execute the command:
DISM.exe /Online /Cleanup-Image /StartComponentCleanup /ResetBase
Also Read: How to Block Access to Removable Storage Devices in Windows 11
These are the best ways to reduce the WinSxS folder size in Windows 11. You shouldn’t delete this folder at any cost; if you want to reduce the size, just follow our shared methods.


