If you are using your ISP’s default DNS servers, you will most likely face DNS-related errors at regular intervals. Almost every DNS-related issue could be solved by choosing a custom or public DNS. However, before switching the DNS server, you should note down the current DNS server.
How to Check DNS On Windows
To check the DNS server you are using on Windows, you need to use CMD. Right-click the Start Button and choose Command Prompt (Admin).
In the Command Prompt, enter the following command.
ipconfig /all | findstr /R "DNS\ Servers"
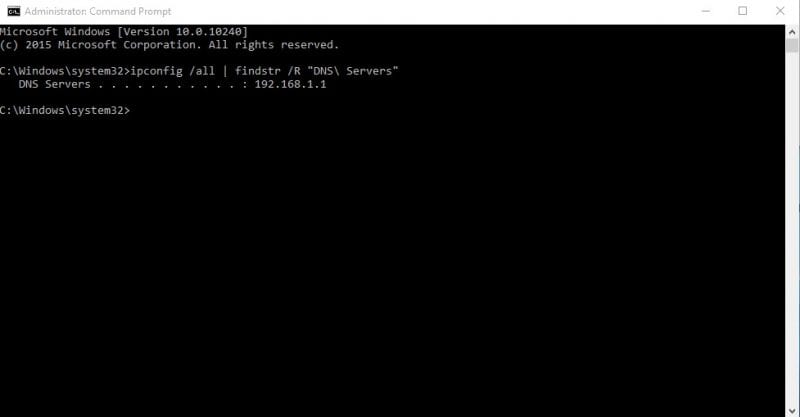
This command will list the current DNS server that you are using. You can also use another command to find the DNS server on Windows. To do so, enter this command:
nslookup google.com
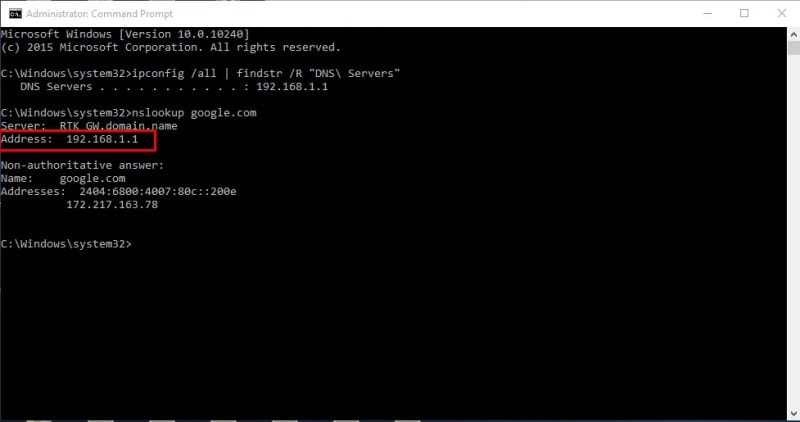
You can use any website domain instead of Google.com. The command will list the current DNS server.
How to Check DNS on Mac & Linux?
On Mac and & Linux-based computers, you need to enter the same CMD command to know what DNS server you are using. Enter the command given below to do an nslookup on any website.
nslookup google.com
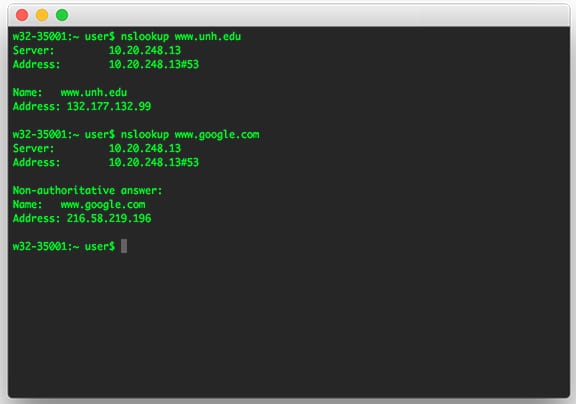
You can replace Google.com with any website of your choice. This is how you can check the DNS server on Mac and Linux computers.
How to Check DNS Server On Android
You can use any network scanner app on Android to know what DNS Server your Android is using. Or else, use free apps like Network Info II.
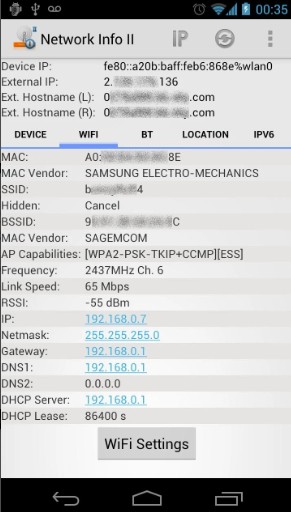
On Network Info II, you must look at the WiFi tab and then check the DNS1 and DNS2 entries. These are the DNS addresses your phone is using.
How to check the DNS Server on an iPhone?
Like Android, iOS has numerous network scanner apps to help you find the DNS server. One of the popular network scanner apps for iOS is Network Analyzer, which shows plenty of useful information about your WiFi network.
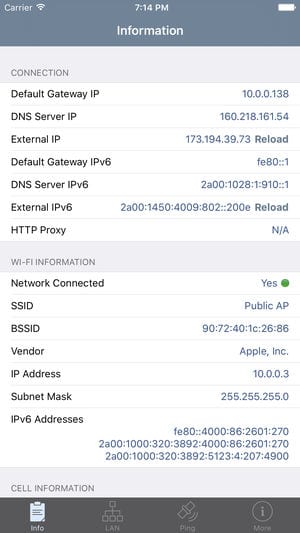
On iOS, you can use Network Analyzer and then look at the ‘DNS Server IP’.
How to Check the DNS Server Of the Router
If you want to know what DNS server your router is using, head to the router’s IP Address (192.168.1.1 or 192.168.0.1) and log in with the username and password.
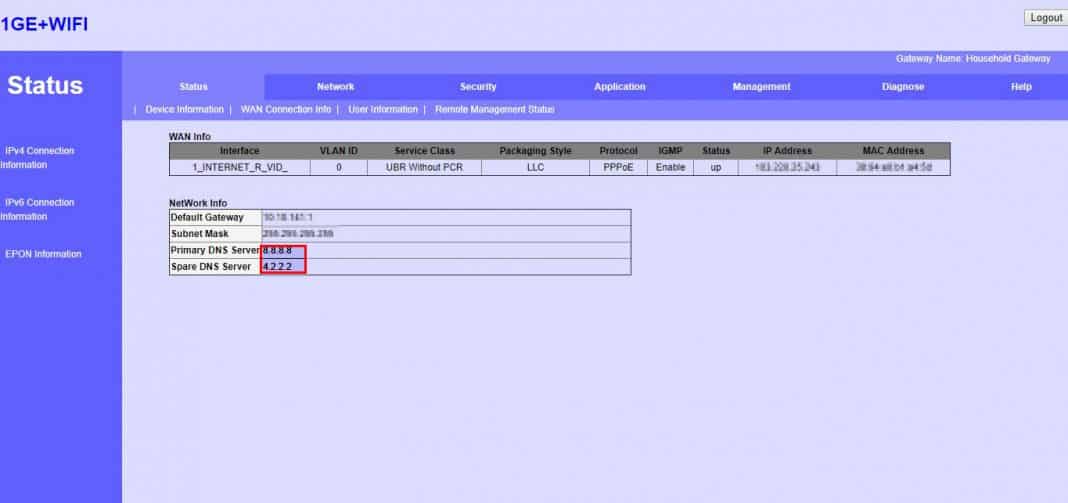
You will see the Router homepage. Depending on the router mode, you must check the Wireless Network or the Network tab. There, you will find the options for DNS 1 and DNS 2 entries. If you wish to change the DNS address, you can update it there.
Best Free Public DNS Servers
If you want better speed and better security, you should switch to a public DNS server. Many free public DNS servers are available out there that provide better browsing speed and security.
Some free public DNS servers can even unblock blocked content on the web.
How To Change DNS Servers on Windows and Android?
If you are using a Windows operating system, read our article – How to Change Default DNS to Google DNS for Faster Internet. This article explains how you can easily switch DNS. Android users can use the DNS changer apps to switch DNS. Check out this article listing the best DNS Changer Apps for Android.
These are some methods to find out the DNS server used on your devices. If you need more help on this topic, feel free to discuss it with us in the comments.


Cloudflare DNS is faster in the vast majority of locations and offers servers with malware protection and family filtering.
Email is valid for 72 hours.
Good Information