While BlueStacks is the best Android emulator for PC, it still needs manual configuration. You need to set up the emulator manually to get better frame rates while playing Android games on a PC.
BlueStacks is highly customizable, allowing users to customize every emulator part. There are settings available on BlueStacks to boost the FPS, increase the performance, or save the battery life.
Depending on your needs, you can customize the settings of BlueStacks to fit your needs. This article will discuss how to set the preferred GPU on BlueStacks 5.
Setting Preferred GPU on BlueStacks 5 will increase the overall performance of the emulator. You will get better frame rates, notice an increase in performance, run games at their highest settings, and more.
Configure BlueStacks GPU Settings to Boost Performance
So, if you are looking for ways to improve the performance of BlueStacks, you might find this guide very useful. Here we have shared a detailed guide on configuring GPU settings in BlueStacks 5 to increase gaming performance. Let’s check out.
1) Set Dedicated GPU in Use
This method will force BlueStacks 5 to use your dedicated GPU instead of the integrated graphics. Here’s how to set dedicated GPU in BlueStacks 5.
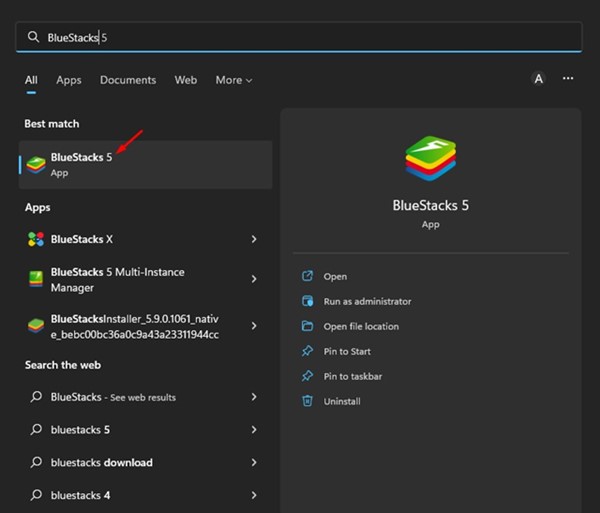
1. First, click on the Windows 11 search and type in BlueStacks. Next, open BlueStacks 5 from the list of matching results.
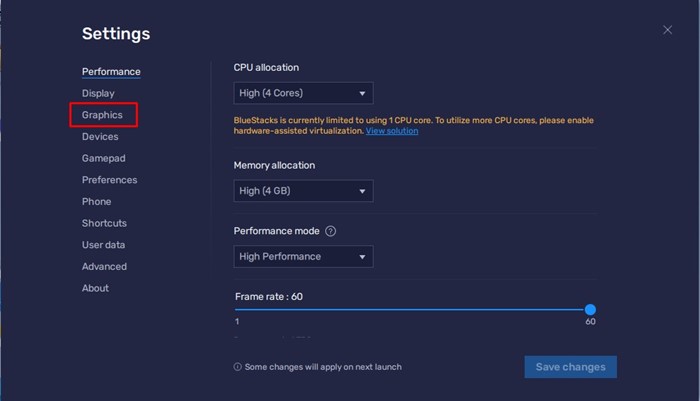
2. When the BlueStacks 5 opens, click on the Settings gear icon on the right side.

3. On the Settings page, switch to the Graphics tab, as shown in the screenshot below.
4. On the right side, scroll down and click on the Drop-down underneath GPU in use.
5. From the drop-down, select ‘Prefer Dedicated GPU‘. If there’s no switch, toggle on the ‘Prefer Dedicated GPU’ option.
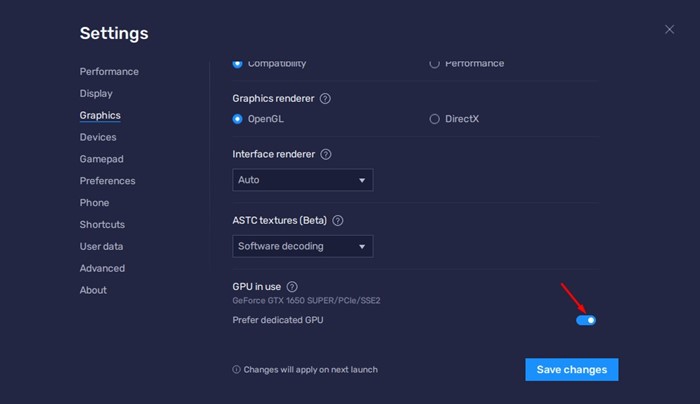
6. Once done, click the Save changes button at the bottom right corner.

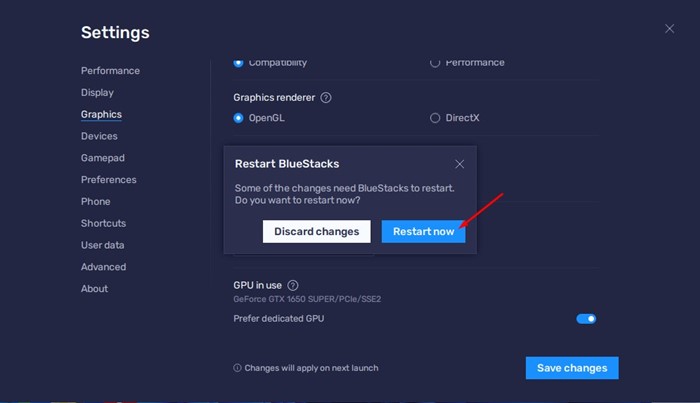
7. Now, you will be asked to restart the BlueStacks. Click on the Restart now button to restart the emulator.
That’s it! This is how you can dedicate your GPU to BlueStacks 5 in Windows 11.
2) Change Graphics Settings in Windows
You can also change the graphics settings of your Windows PC to improve the performance of BlueStacks. Here’s how to use dedicated GPU on BlueStacks to boost performance.
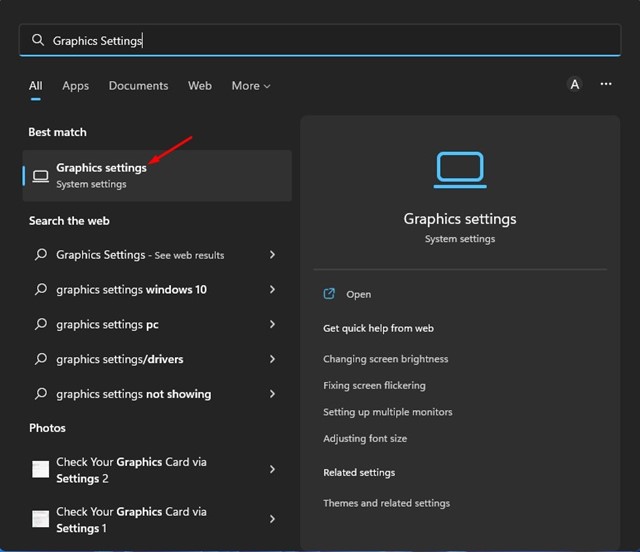
1. Click on the Windows search and type in Graphics Settings. Next, open the Graphics settings option from the list.
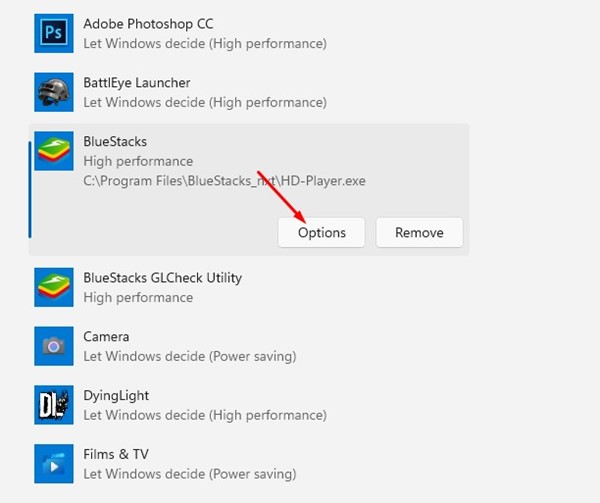
2. On the Graphics Settings, scroll down and select BlueStacks. Next, click on the Options.
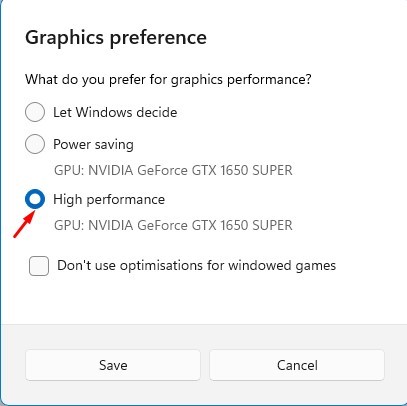
3. Next, select High Performance on the Graphics preference prompt and click on the Save button.
That’s it! This is how you can force Windows to always use a dedicated GPU for BlueStacks 5.
Also read: How to Install and Use BlueStacks 5 on Windows 11
So, this is how you configure GPU settings in BlueStacks 5 to increase gaming performance. This slight modification can significantly improve the performance of the BlueStacks emulator. If you need more help related to setting dedicated GPU as default for BlueStacks 5, let us know in the comments below.


