Power Mode Settings on Windows 11 could be of great use, especially if you have a laptop. The Power Mode settings page provides you with access to the settings that let you control your PC/Laptop’s power consumption. Thus, if you have a laptop and are looking for ways to maximize the battery life, you need to change the Power Mode options.
Apart from the default plans, Windows 11 also provides you with an option to create your custom power plan. So, if you are not satisfied with the default power plans of Windows 11, you can create your custom power plan with specific settings to achieve the results you want.
Create a Custom Power Plan on Windows 11
You need to access the Power Options page of Windows 11 to create your custom power plan.
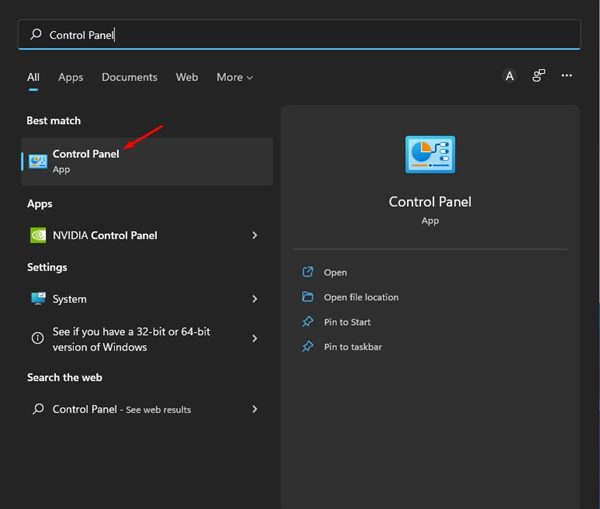
1. Open the Windows 11 search and type in Control Panel.
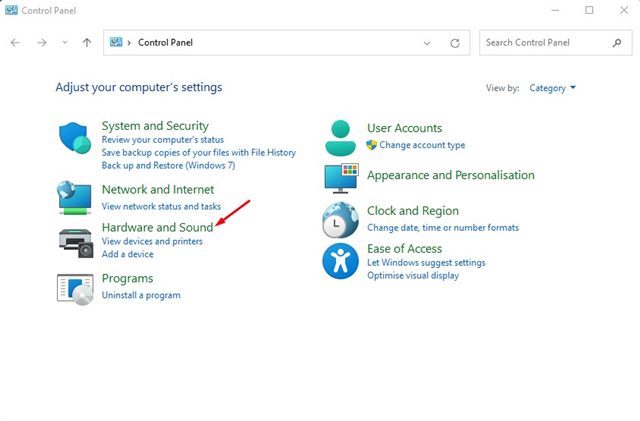
2. Click on the Hardware and Sound.
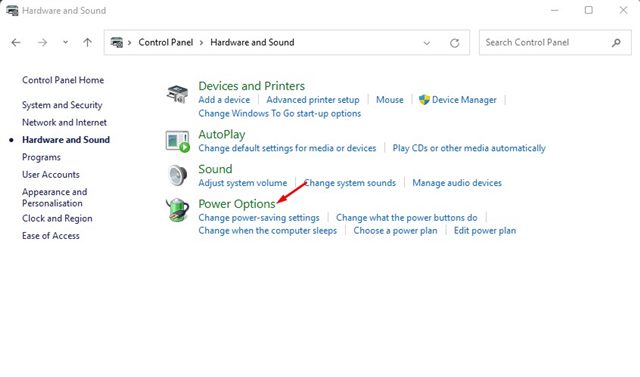
3. Click on Power Options.
4. Click on the Create a power plan link.
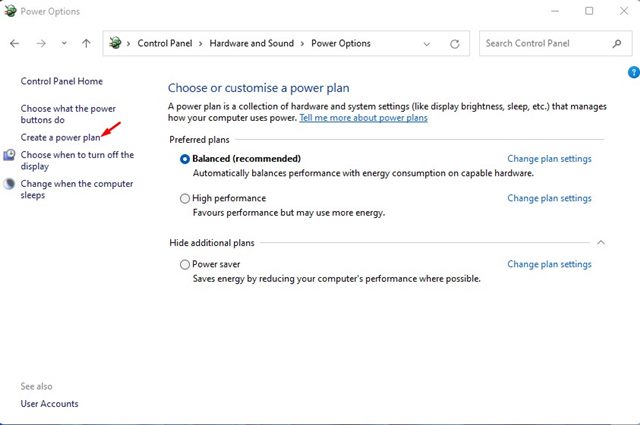
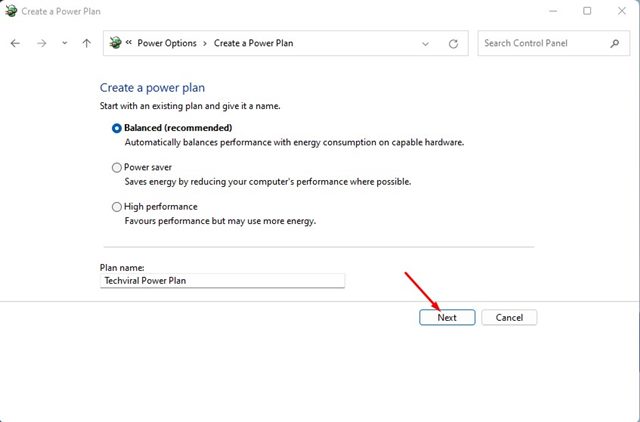
5. Select a base power plan. Once done, enter the plan name in the ‘Plan name’ section. Once done, click Next.
6. In the Custom Power Plan settings, select when to turn off the display for both On battery & Plugged in. Once done, click Create.
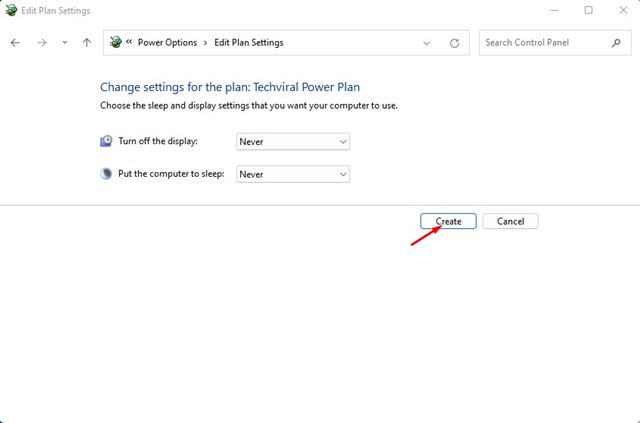
This will create your custom power plan on Windows 11. By following the same method, you can make as many power plans as you want.
Customize the Power Plan on Windows 11
After creating a custom power plan, you are likely to customize its settings to improve your PC’s performance.
1. Open the Windows 11 search and type in Control Panel.
2. Click on Hardware and Sound.
3. Click on Power Options.
4. Click on the Change plan settings link beside the Power Plan you want to customize.
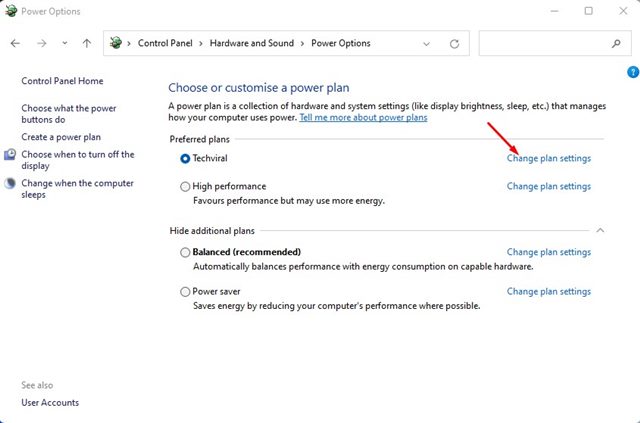
5. Click on the Change advanced power settings link on the next screen.
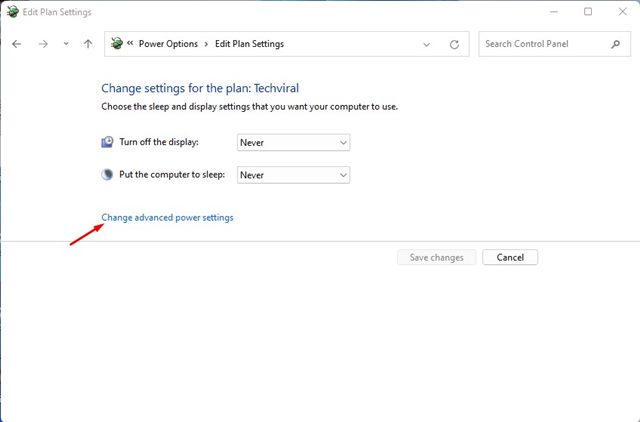
6. This will open the Power Options window. You need to customize various settings depending on your needs.
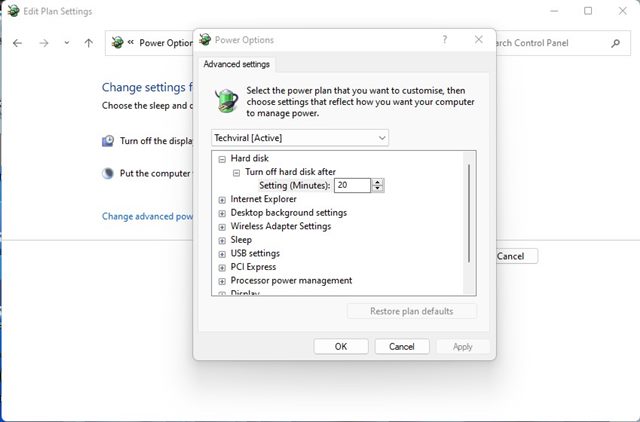
7. Once done with the customization, click on the Ok button.
You will find various options in the Advanced Settings tab; you need to go through each setting and set the one that suits best for you.
How to Delete a Power Plan on Windows 11
If you are not satisfied with the Power Plan or don’t want to use it in the future, you can delete the Power Plan in easy steps.
1. Navigate to the Control Panel > Hardware and Sound > Power Options.
2. Select a different plan. You can’t delete a Power Plan that is in use.
3. Click on the Change plan settings link behind the custom power plan in Power Options.
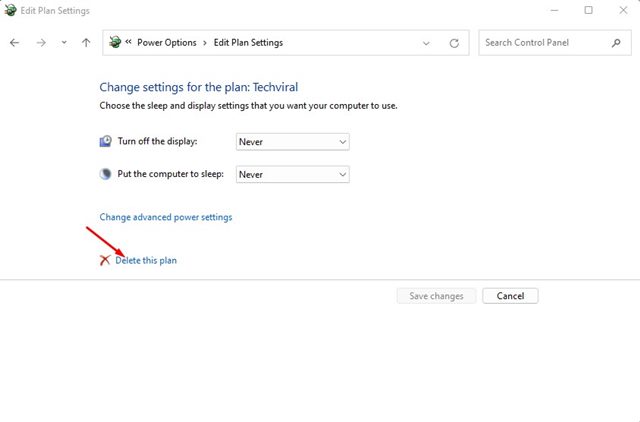
4. Click on the Delete this plan option.
5. On the Confirmation prompt, click Ok.
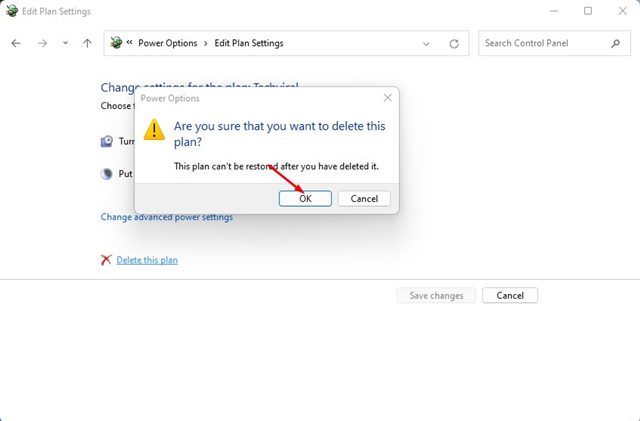
You can’t delete the Power Saver, Balanced, or High-Performance power plan on Windows 11. This would delete the Custom Power Plan that you have created. You can only delete the power plan that you have created manually.
That’s all about creating a custom power plan on Windows 11. There are no restrictions on creating power plans on Windows 11, and you can have different wireless adapter settings, sleep options, USB settings, etc., on each plan. If you are not satisfied with the power plan or are facing problems, you can quickly delete it.