SuperFetch, or SysMain, is a process introduced in Windows Vista, and it’s supposed to improve system performance. The feature is enabled by default on every Windows version and runs in the background constantly to analyze your RAM usage patterns. Over time, it learns about the apps you frequently use and preloads them into RAM, which speeds up app loading.
While the feature can surely speed up app loading, sometimes it can trigger High CPU & RAM usage problems. Many Windows 11 users have recently reported high CPU usage while using their PCs. Upon deeper inspection, it was found that Service Host: SysMain was the culprit behind high CPU & RAM usage.
So, it’s best to disable the feature if you are using Windows 11 and facing problems due to Superfetch or SysMain.
1. Disable Superfetch via Windows Services
This method will use the Windows Services app to disable Superfetch on Windows 11.
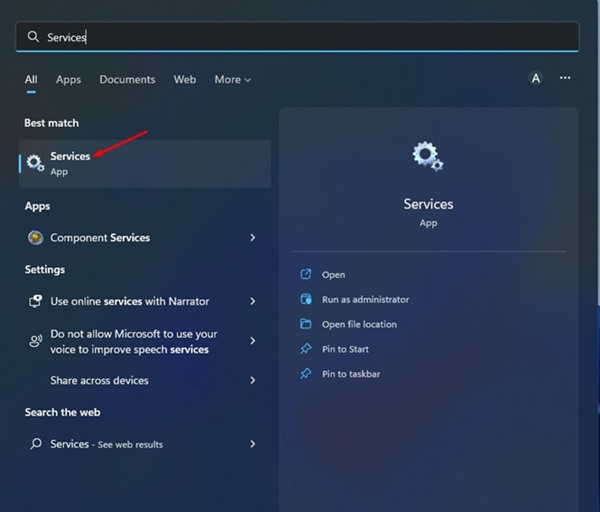
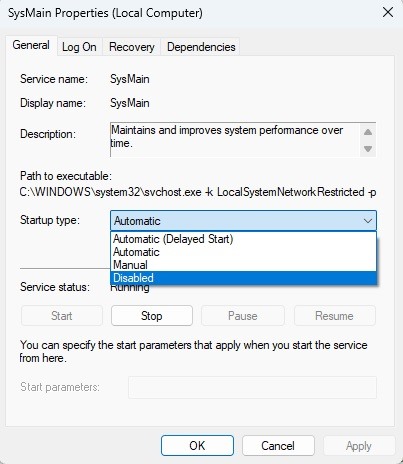
1. Click on the Windows 11 search and type in Services. Next, open the Services app from the list.
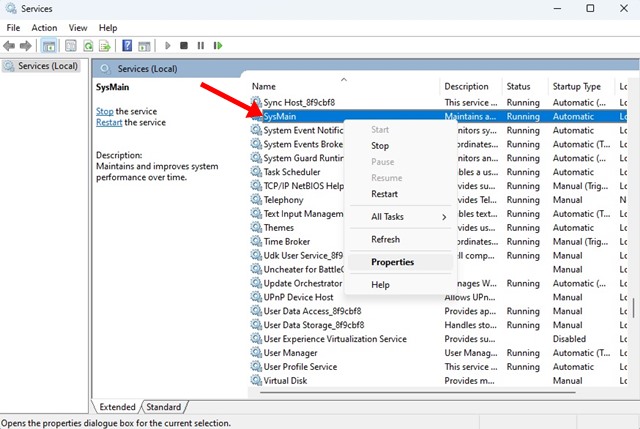
2. Find and right-click on the SysMain. On the right-click menu, select Properties.
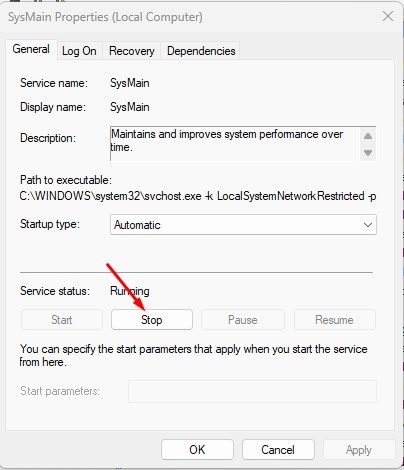
3. In the SysMain Properties, click on the Stop button underneath Service Status.
4. Select Disabled on Startup Type and click on the Apply button.
2. Disable Superfetch in Windows 11 via Registry
You can use the Registry Editor to disable the Superfetch or SysMain on your Windows 11 PC.
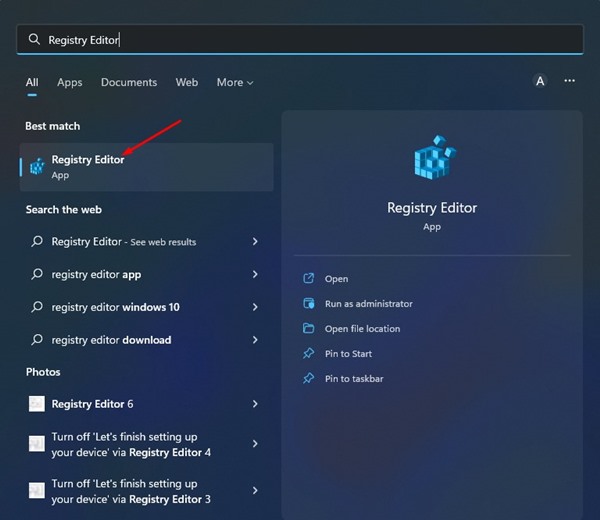
1. Click on the Windows 11 Search and type Registry. Open the Registry Editor from the list.
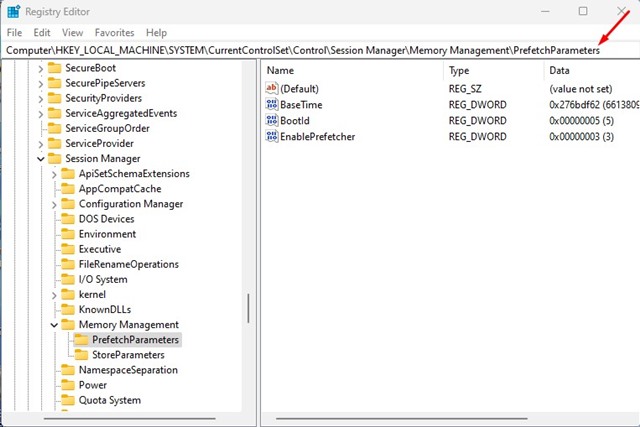
2. Navigate to the following path:
Computer\HKEY_LOCAL_MACHINE\SYSTEM\CurrentControlSet\Control\Session Manager\Memory Management\PrefetchParameters
3. In the right pane, right-click and select New > DWORD (32-bit) Value.
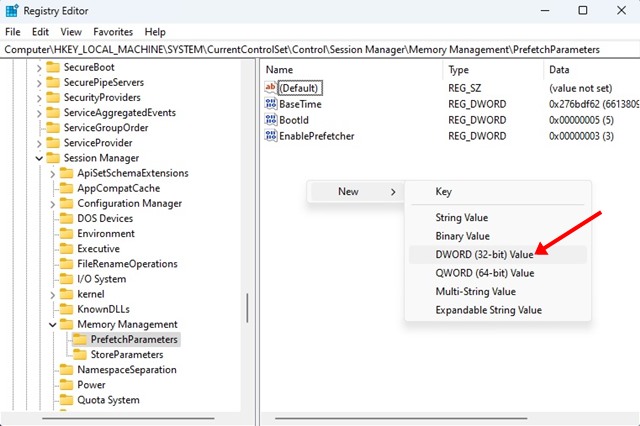
4. Name the newly created DWORD (32-bit) Key as EnableSuperfetch.
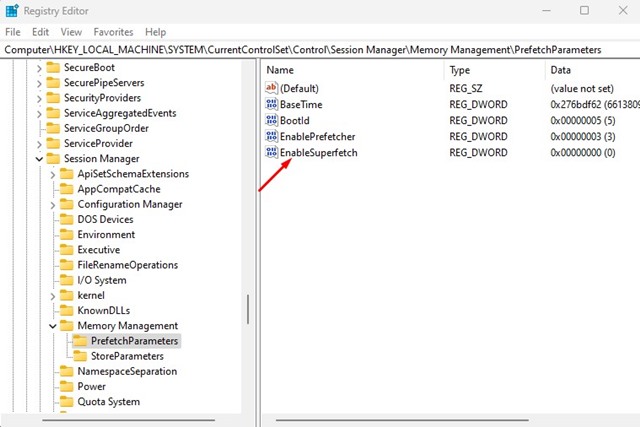
5. Once done, double-click on EnableSuperfetch and enter 0 in the Value data field.
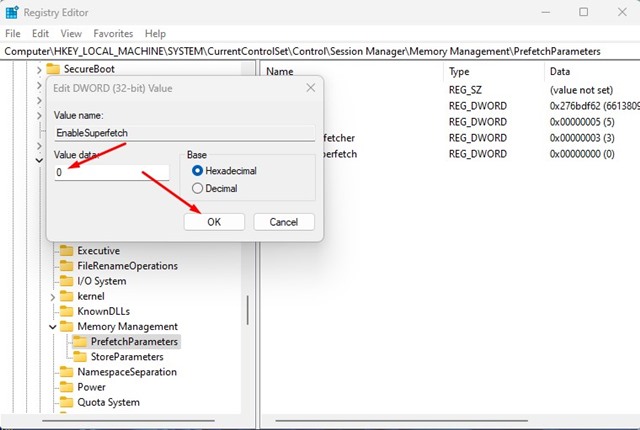
6. Once done, click the Ok button and close the Registry Editor.
3. Disable SysMain in Windows 11 via Command Prompt
You can even utilize the command line utility of Windows 11 to disable SysMain.
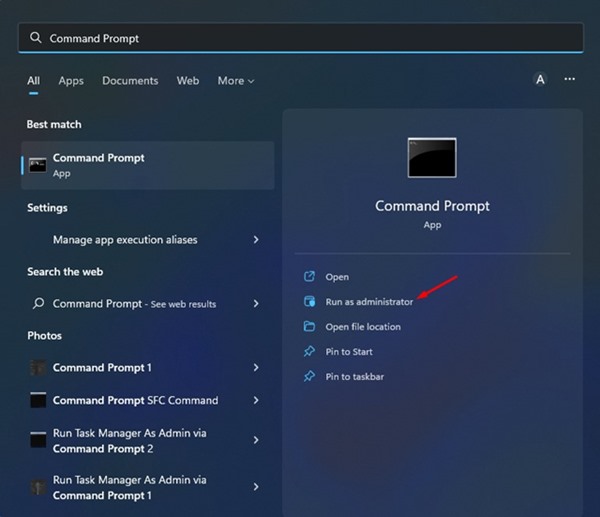
1. Click on the Windows 11 search and type in Command Prompt. Right-click on Command Prompt and select Run as administrator.
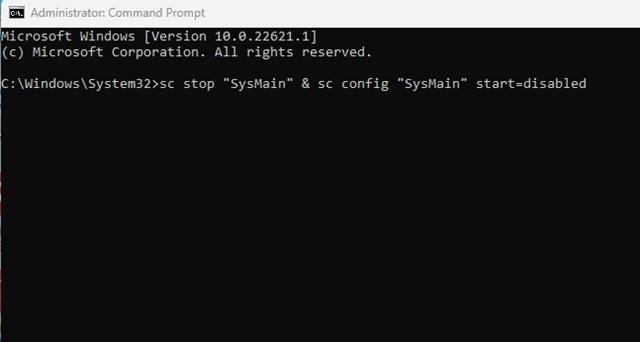
2. Paste the following command and press Enter.
sc stop “SysMain” & sc config “SysMain” start=disabled
I have shared a detailed guide on fixing the High CPU usage issue on Windows 11. Make sure to go through that guide and implement our shared methods.
Also Read: How to Create Tasks & Set Reminders in Windows 11
If you still face high CPU usage problems on your Windows 11 PC, you might need to troubleshoot a few other things. If you have a high-end PC, you should keep this feature enabled as it improves the load time for apps. However, if you face problems due to it, you can follow these three methods to turn off the feature altogether. If you need more help disabling Superfetch or SysMain on Windows 11, let us know in the comments.