When it comes to fulfilling all our daily email needs, Gmail seems to be the best option, and Google itself backs it. Gmail is right now the most used and leading email service out there. Also, compared to other email services, Gmail offers you more features.
If you are a regular Gmail user, you would know about the ‘Labels.’ Labels are nothing but folders that Gmail uses to categorize your email communications. Depending on the apps authorized to your email ID, your Gmail Inbox may have specific labels like SMS, Work, Sent Items, Personal, etc.
What’s more interesting is that Gmail allows you to create new labels or folders to group your emails into different categories. Also, to remind you, Gmail has a ‘Move to’ feature, which lets you easily send emails to a specific folder you have created.
In this article, we will share a detailed guide on how to create a new label in Gmail for desktop. Let’s check out.
Also Read: How to Change Your Email Display Name On Gmail
Create New Folders (Labels) in Gmail to Organize your Emails
Creating new labels in Gmail for the web is pretty straightforward. Follow some of the simple steps given below to create a new label in the Gmail (desktop) version.
Step 1. First of all, login to the Gmail website from your desktop web browser like Chrome.
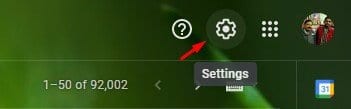
Step 2. Now click on the Gear icon as shown in the screenshot below.
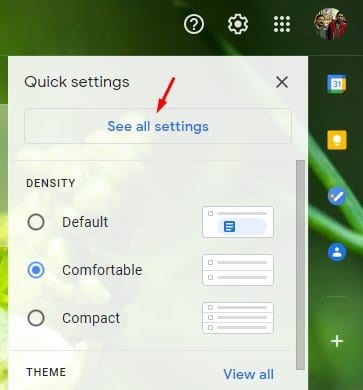
Step 3. Next, click on the ‘See All Settings’ button.
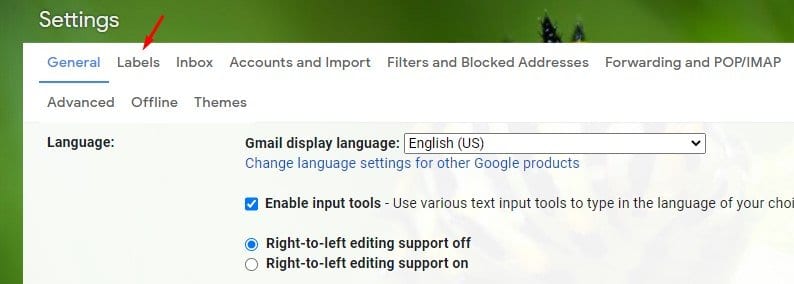
Step 4. Now click on the ‘Labels’ tab.
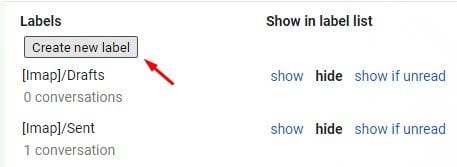
Step 5. Under the labels, you will find all your previous folders. To create a new folder, click on the ‘Create New Label’ button.
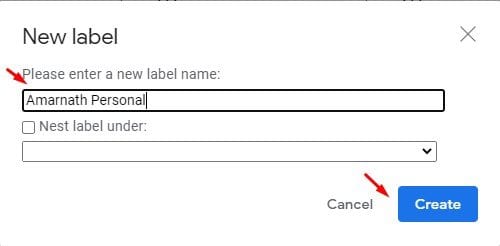
Step 6. Name the new label and click on the ‘Create’ button.
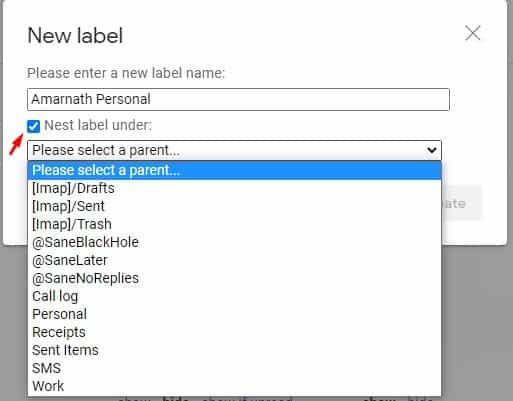
Step 7. You can also nest the labels. For that, click on the checkbox near ‘Nest Label under’ and select the parent label.
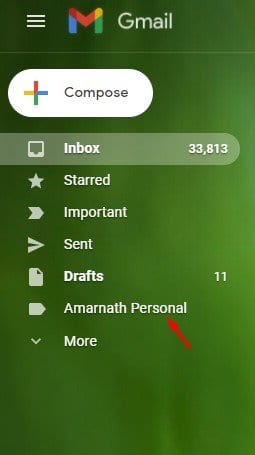
Step 8. Once done, you will find the new label in the left-hand pane of your Gmail inbox.
That’s it! You are done. This is how you can create a new label in Gmail.
So, this article is all about how to create new labels in Gmail. I hope this article helped you! Please share it with your friends also.