Windows 11 users have reported missing the Pencil icon to edit the Quick Settings options; for many, the Quick Settings don’t open at all. If you’ve been facing issues with the Quick Settings panel, here’s what you should do.
Add/Remove Quick Settings options on Windows 11
If you want to add new options to the Quick Settings on Windows 11, follow these steps.
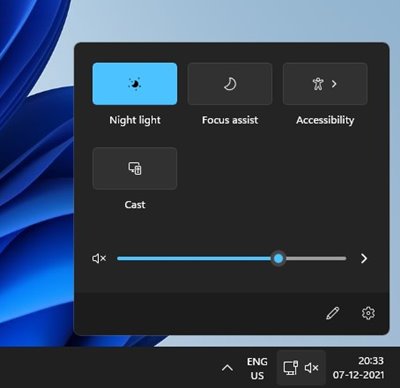
1. Open the Quick Settings panel on Windows 11 by pressing the Windows + A key.
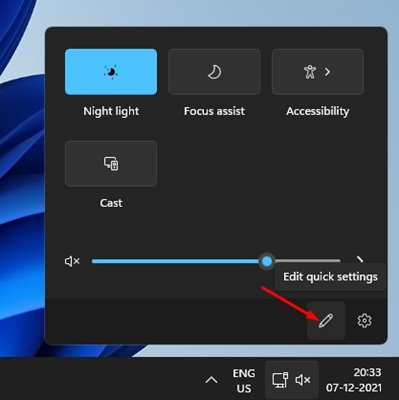
2. At the bottom, click on the edit quick settings button (Pencil icon).
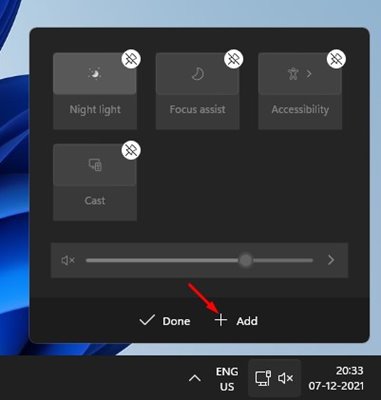
3. Click the + Add button to add new functions to the Quick Settings.
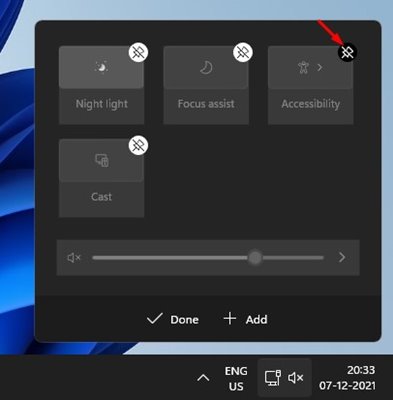
4. To remove a feature, click on the unpin option at the top of each feature.
Fix the Pencil Icon Missing in Windows 11 Quick Settings
Many users have claimed that the Pencil button does not appear in the Quick Settings panel. If you’re facing the same problem, here’s what you should do.
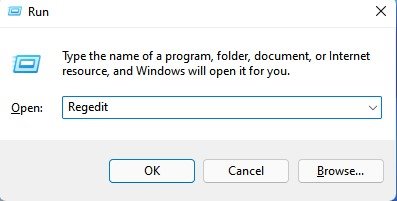
1. Press the Windows Key + R button to open the RUN dialog box. On the RUN dialog box, type in Regedit and press Enter.
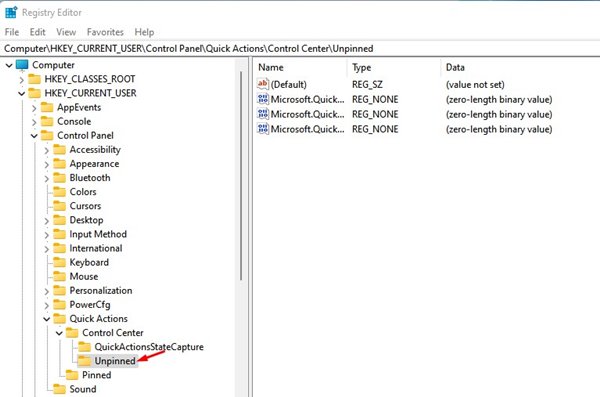
2. Navigate to the given path:
HKEY_CURRENT_USER\Control Panel\Quick Actions\Control Center\Unpinned
3. On the right panel, right-click on Microsoft.QuickAction.Edit and select Delete.
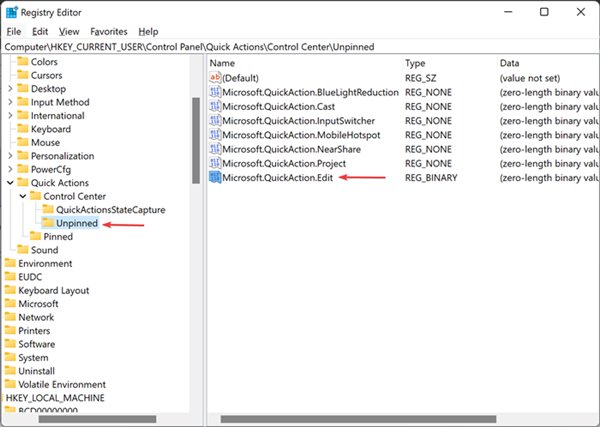
After deleting the key, restart your computer.
Reset Windows 11 Quick Settings
If you are still having issues with Quick Settings, you need to reset the feature.
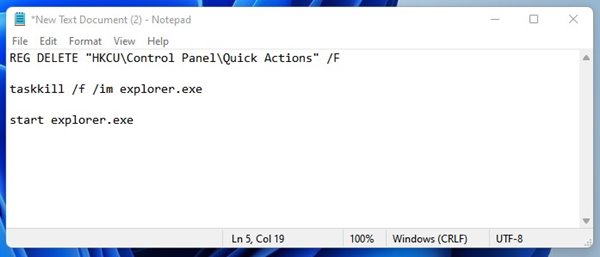
1. Open a Notepad on your Windows 11 computer.
2. Paste the given lines.
REG DELETE "HKCU\Control Panel\Quick Actions" /Ftaskkill /f /im explorer.exestart explorer.exe
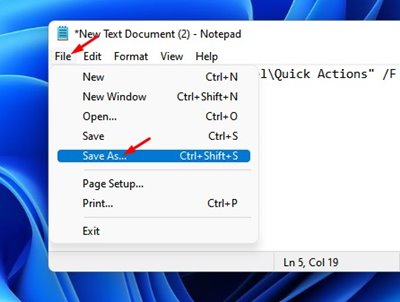
3. Click on the File option and select Save As.
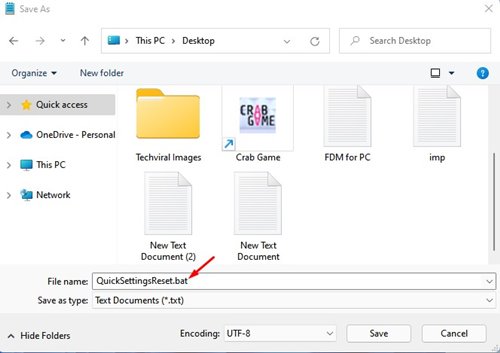
4. In the Save as type box, save the file with a name and append the .bat file extension. For example, ResetQuickSettings.bat.
5. To reset Quick settings, right-click on the batch file and select Run as Administrator.

Also Read: How to Get Help in Windows 11
Quick Settings in Windows 11 is a great feature, and if you are facing issues, you need to follow these methods. If you have any doubts, let us know in the comment box below.


