If you have been using Windows operating system for a while, you might know about the Disk Management utility. Disk Management is the native partition management tool of Windows 10 that lets you create, delete, and merge partitions.
Let’s admit; there are times when we want to organize our drive partitions. Sometimes, we want to remove partitions we no longer need to make more space available to increase another partition size. To simplify the partition management process, Windows 10 offers multiple tools.
Also Read: How to Optimize Storage Drives For Better Performance in Windows 10
List of 2 Best Methods to Delete a Drive Partition on Windows 10
In this article, we will discuss the methods to delete an existing drive partition on Windows 10. So, let’s check out the methods.
1. Using Disk Management Utility
In this method, we will use the Disk Management Utility of Windows 10 to delete a drive partition. Just follow some of the simple steps given below.
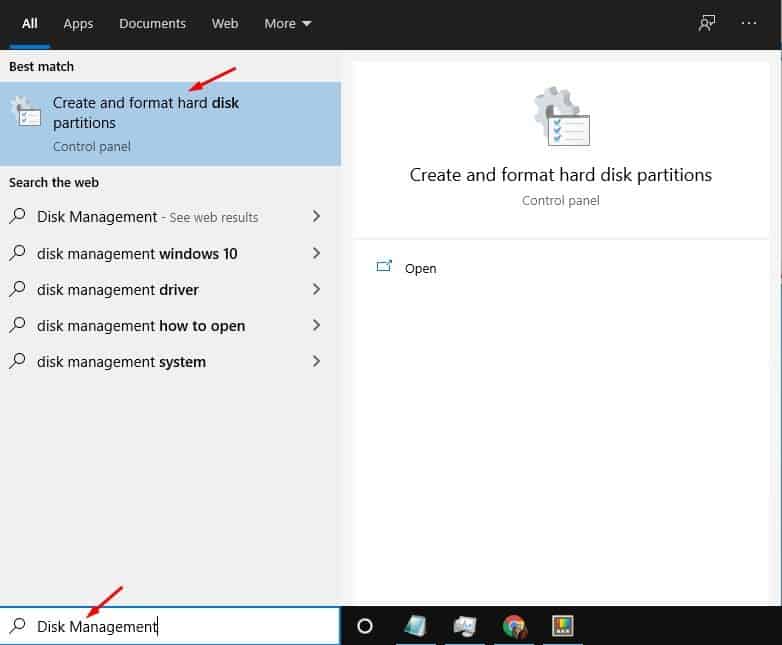
Step 1. First of all, open the Windows Search and type in Disk Management. Double click on the ‘Create and Format Hard Disk Partitions’ from the list of options that appears.
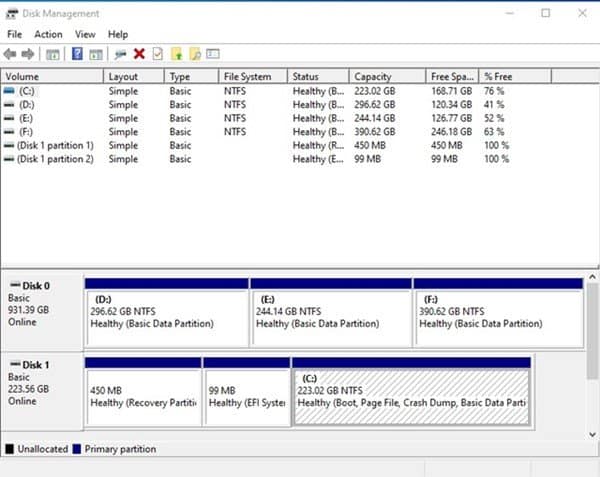
Step 2. Now you will see a screen like below.
Step 3. Now select the drive with the partition you want to remove. Next, right-click on the partition you want to remove and select the ‘Delete Volume’ option.
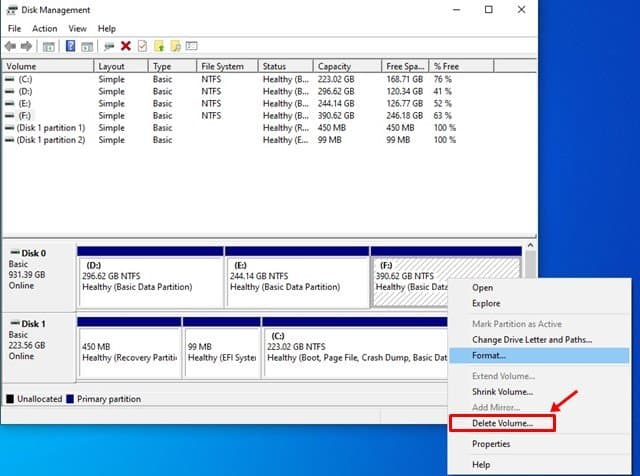
Step 4. Once done, click on the ‘Yes’ button to confirm the action.
That’s it! You are done. The deleted partition will be available as ‘Unallocated Space.’ You can merge the unallocated space with existing partitions or can create a new one.
2. Using PowerShell
If you are not comfortable with the Disk Management utility, you can choose to use the PowerShell option. Follow some of the simple steps given below to delete a drive partition via Powershell.
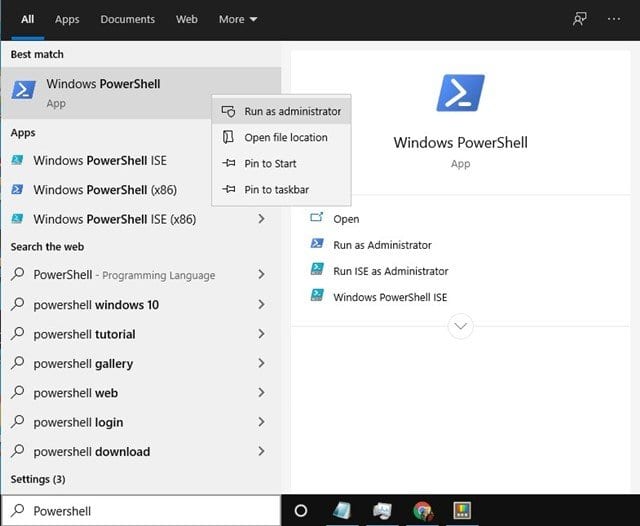
Step 1. First of all, open Start and search for Powershell. Right-click on the Powershell and select ‘Run as Administrator.’
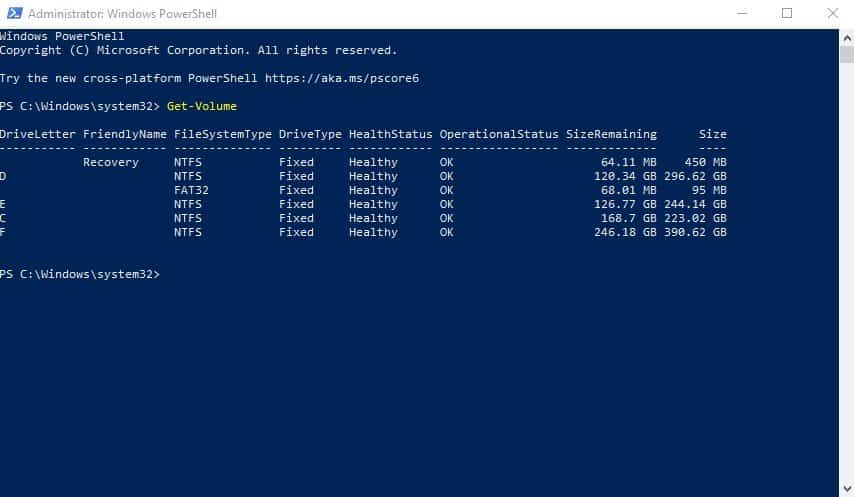
Step 2. On the Powershell Window, enter the command – Get-Volume. This will list all available partitions.
Step 3. To delete a partition, enter the command – Remove-Partition -DriveLetter PARTITION-LETTER
Necessary: Replace the ‘PARTITION-LETTER’ with the letter of the partition you want to delete. For example – Remove-Partition -DriveLetter D
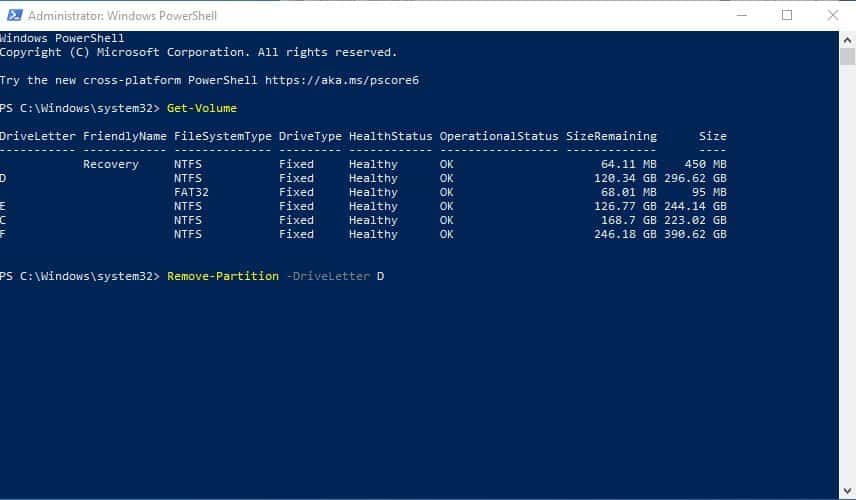
Step 4. Next, type in ‘Y’ and press enter to confirm the deletion.
That’s it! You are done. This is how you can delete a drive partition via Powershell.
This article is all about how to delete a drive partition on the Windows 10 operating system. I hope this article helped you! Please share it with your friends also. If you have any doubts related to this, let us know in the comment box below.

