When you purchase a new laptop or computer, the HDD/SSD will have a single partition containing the important system files & folders. With the help of the Disk Management tool, you can later create a new partition by shrinking the size of the existing one.
While expanding or creating a new drive partition is fairly easy on Windows 11, what if you want to delete a drive partition? The steps to delete a drive partition are a little different and are very confusing.
How to Delete a Drive Partition on Windows 11
Hence, we have written this guide for users looking for ways to delete a drive partition on Windows 11. Although the methods are meant for Windows 11, most will work even on older versions of Windows like Windows 10. Let’s get started.
1. How to Delete Drive Partition using Settings
In this method, we will utilize the Settings app of Windows 11 to delete a drive partition. Here’s what you need to do to delete a drive partition on Windows 11.
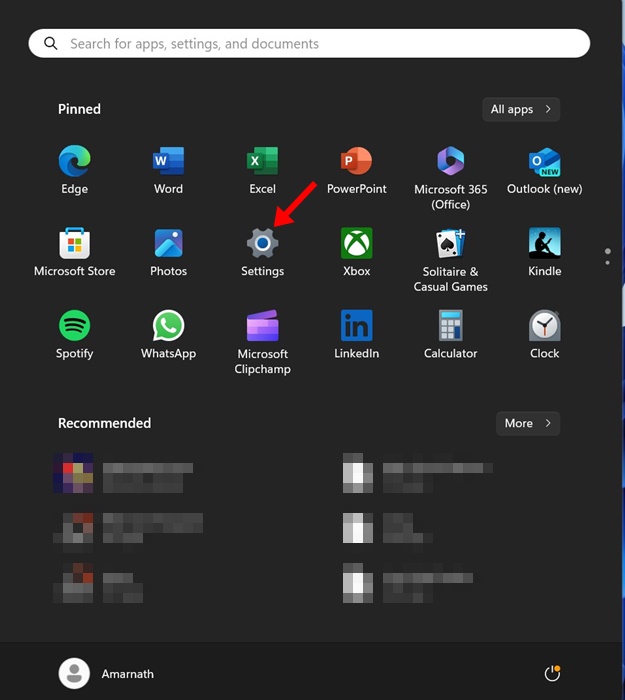
1. To get started, launch the Settings app on Windows 11.
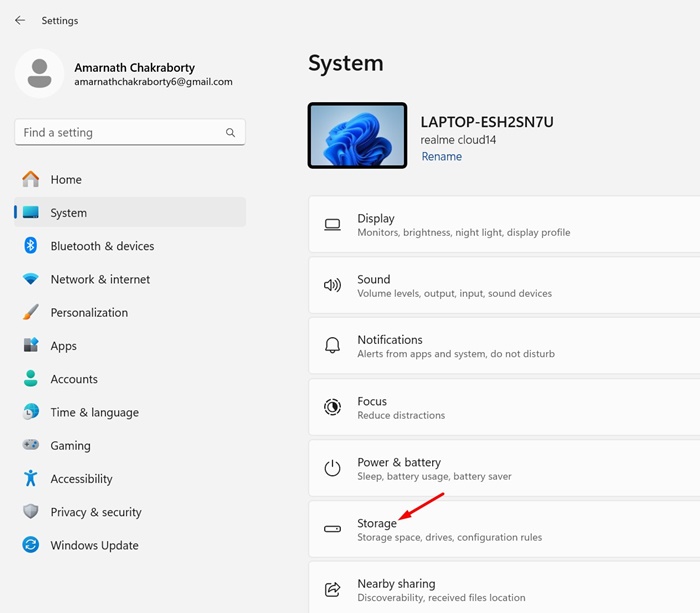
2. Next, switch to the System > Storage.
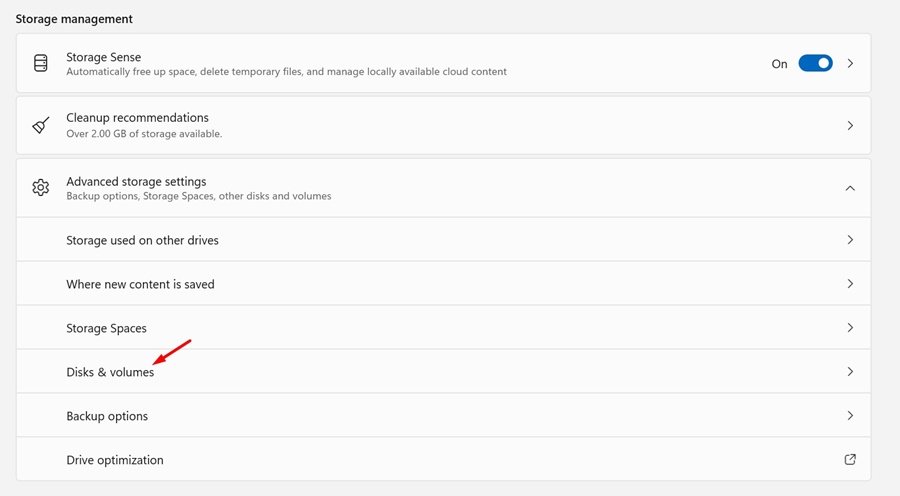
3. On the Storage, expand the Advanced Storage Settings. Next, click Disks & Volumes.
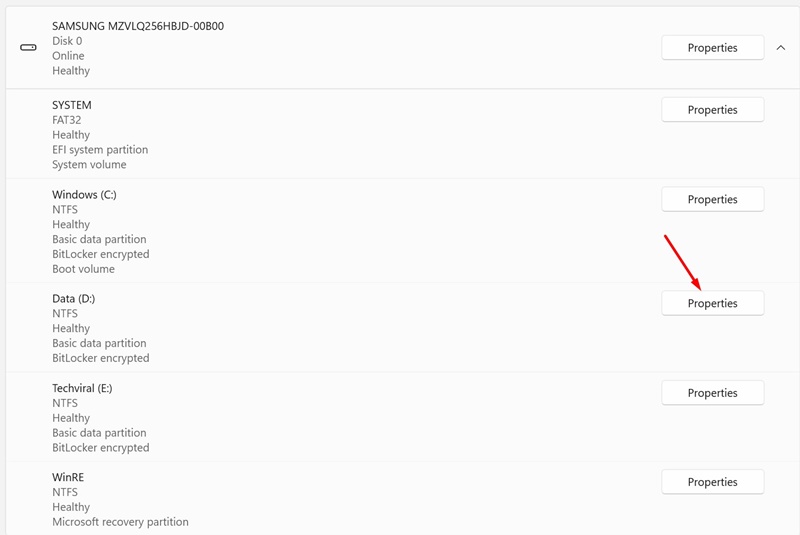
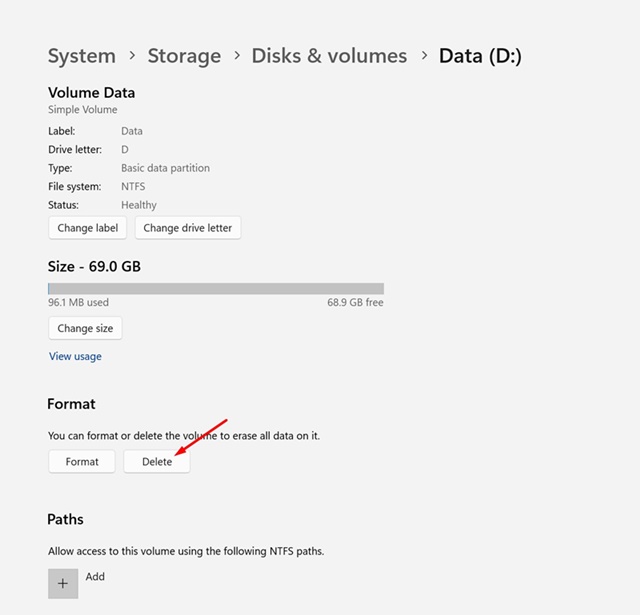
4. Now click on the Properties next to the drive you want to delete.
5. Next, in the Format section, click on Delete.
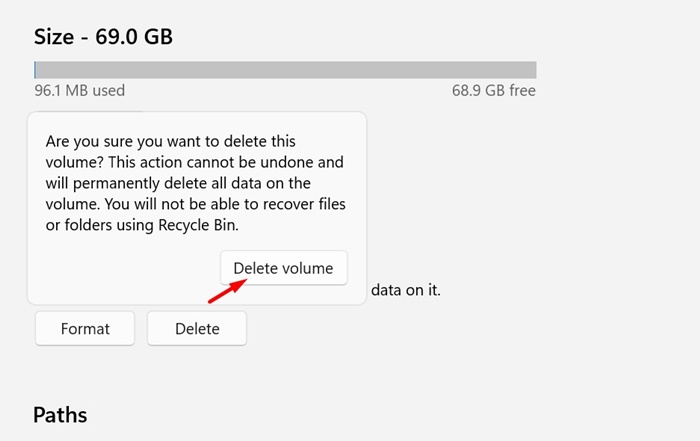
6. On the confirmation prompt, select Delete Volume.
That’s it! This will immediately delete the drive partition on your Windows 11 computer.
2. How to Delete Drive Partition using Disk Management Utility
You can even use the Disk Management utility to delete a drive partition on Windows 11.
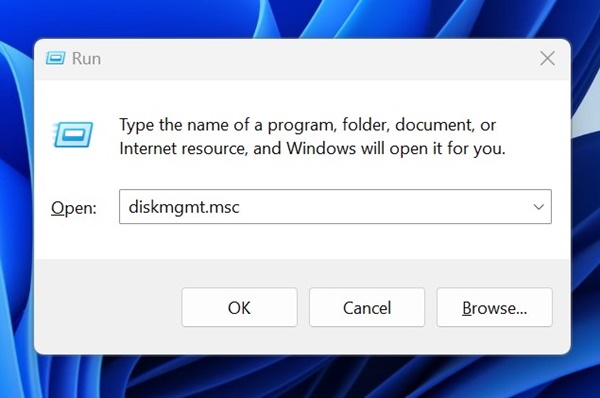
1. Open the RUN dialog box (Windows + R). On the Run dialog box, type diskmgmt.msc and press Enter.
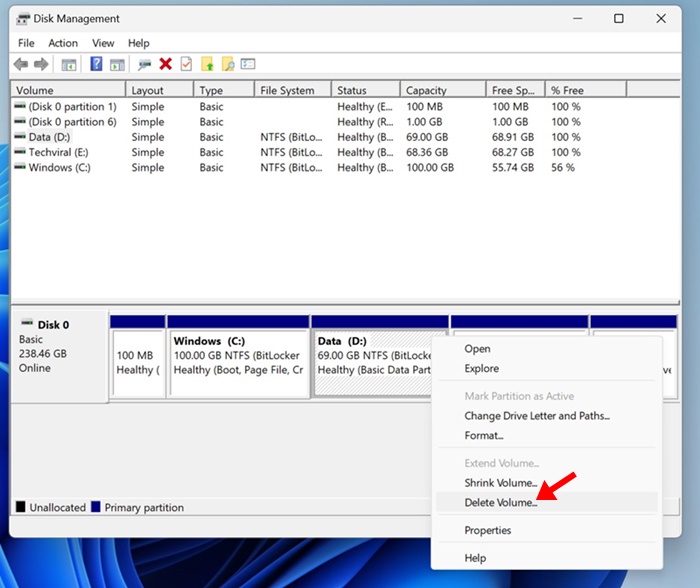
2. When the Disk Management utility opens, right click on the partition you want to delete.
3. On the right click menu, select Delete Volume.
4. On the confirmation prompt, click on Yes.

That’s it! This will immediately delete the drive partition on your Windows 11 computer.
3. How to Delete Drive Partition on Windows 11 via PowerShell
Windows PowerShell is another great utility that you can use to delete a drive partition on Windows 11. Here’s what you need to do.
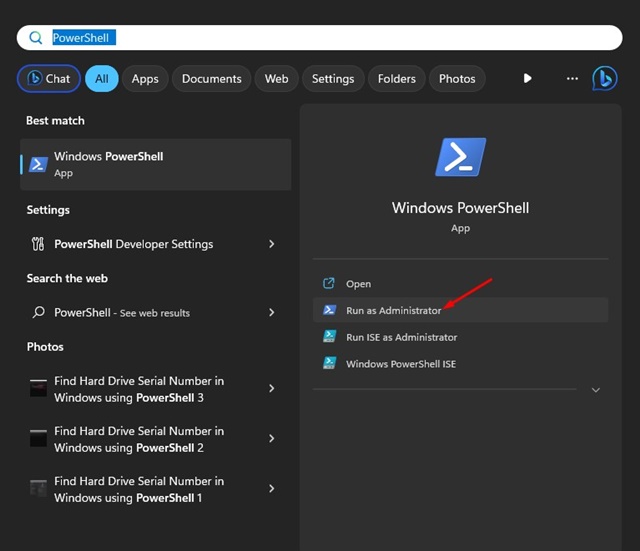
1. Type PowerShell on Windows 11 search and select Run as administrator.
2. When the Powershell opens, execute this command:
Get-volume
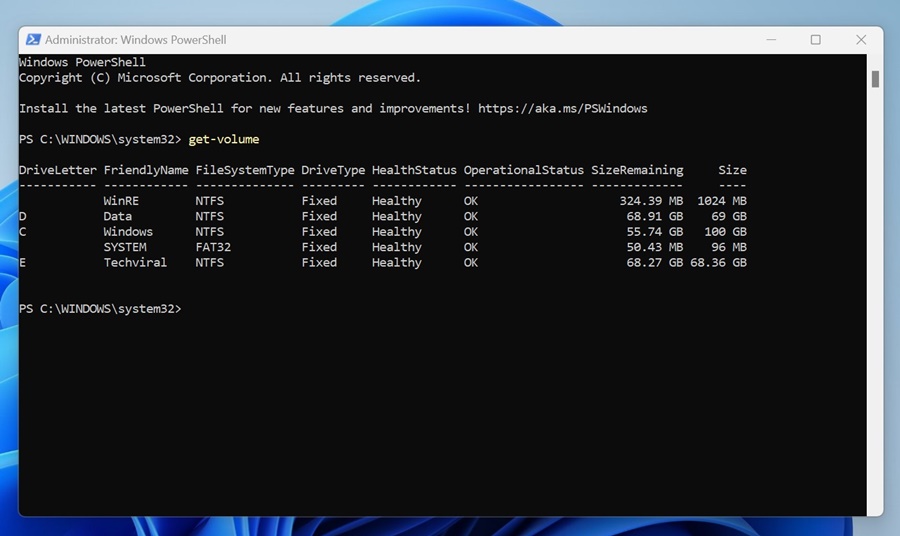
3. Now, you will see a list of all drives available. Note the letter assigned to the drive you want to delete in the DriveLetter column.
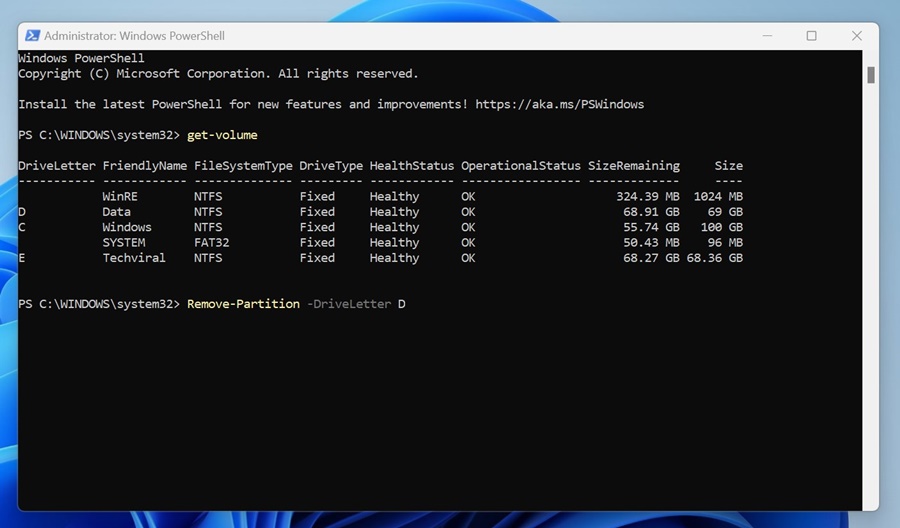
4. Next, execute the given command by replacing the X with the actual drive letter.
Remove-Partition -DriveLetter X
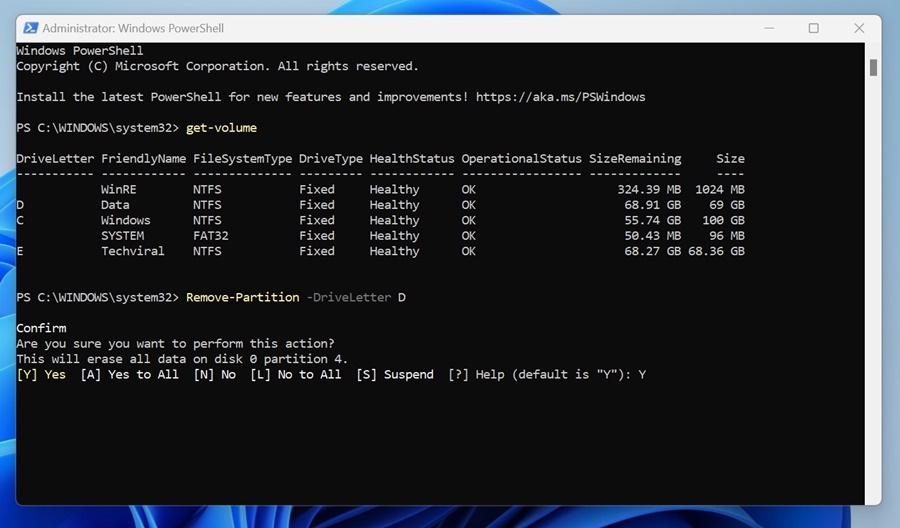
5. Type Y and press Enter to confirm the action.
That’s it! This is how you can delete a drive partition on Windows with the help of the PowerShell utility.
4. Delete Drive Partition on Windows 11 with Command Prompt
PowerShell & Command Prompt are command line utilities, but the steps to delete a drive partition differ. Here’s how to delete a drive partition on Windows with a command prompt.
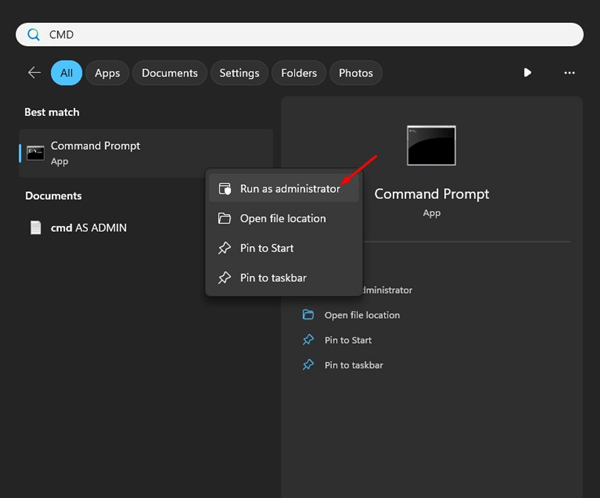
1. Type Command Prompt on Windows 11 Search. Next, right click on the CMD and select Run as administrator.
2. When the Command Prompt opens, execute the following commands one by one:
diskpart
list volume
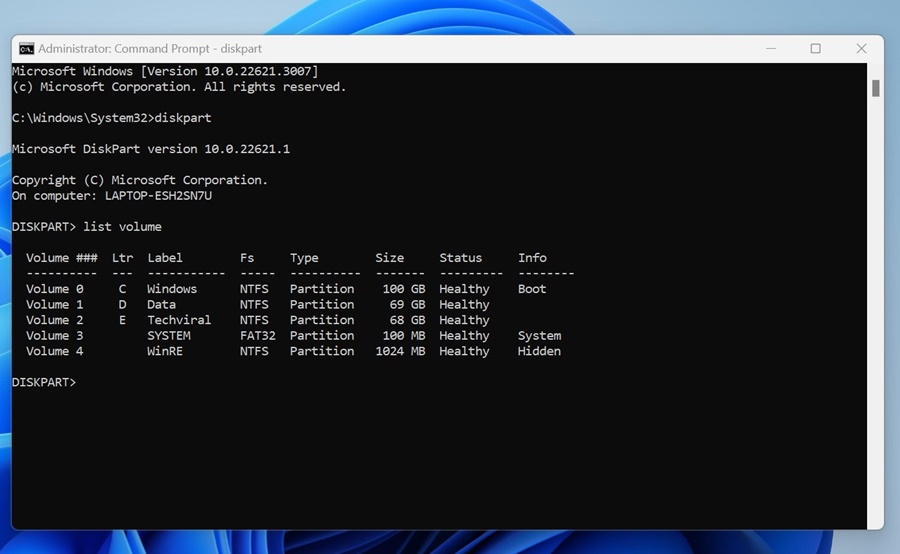
3. Now note the number associated with the drive you want to delete.
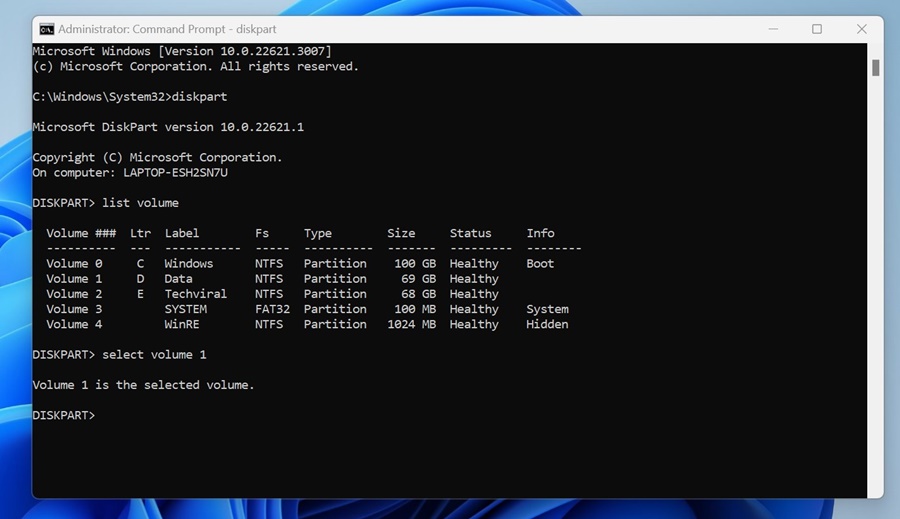
4. Now execute the given command by replacing N with the drive number you’ve noted.
select volume N
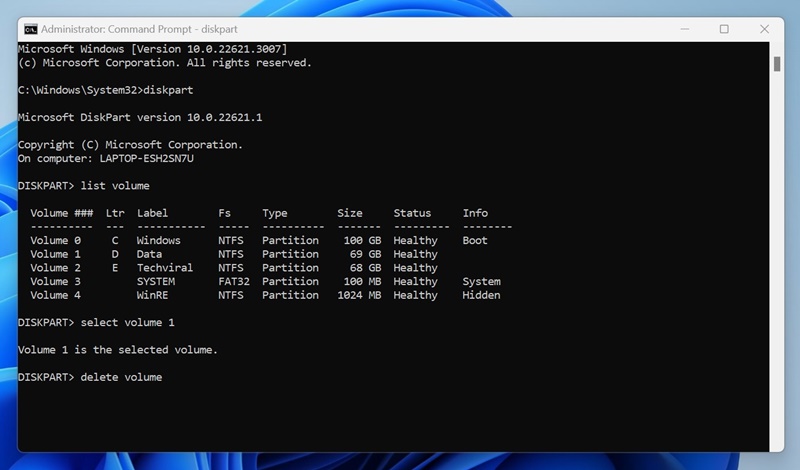
5. After selecting the drive partition, execute this command:
delete volume
That’s it! After executing the commands, close the Command Prompt utility and restart your computer.
So, these are the few best & easiest methods to delete a drive partition on a Windows 11 computer. If you need more help in deleting a drive partition on Windows 11, let us know in the comments below. Also, if you found this guide helpful, don’t forget to share it with your friends.