
If you have limited battery life or don’t prefer to play system sounds, you can permanently disable them from the System Sound settings page. You don’t need to unplug the sound device or mute the speakers to disable the System Sounds. The option to disable only the Startup sounds is available on the Windows 11 Settings page, and it can be done in simple steps.
Disable all System Sounds in Windows 11
1. Click on the Windows 11 Start button and select Settings.
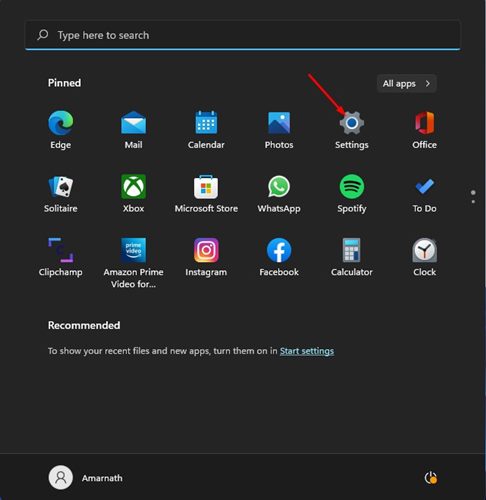
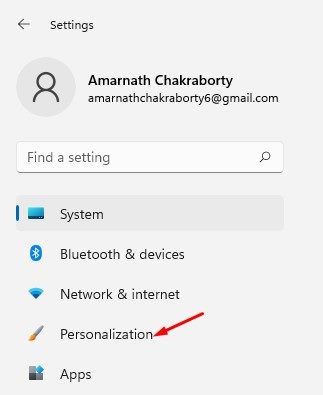
2. On the Settings page, click on the Personalization option.
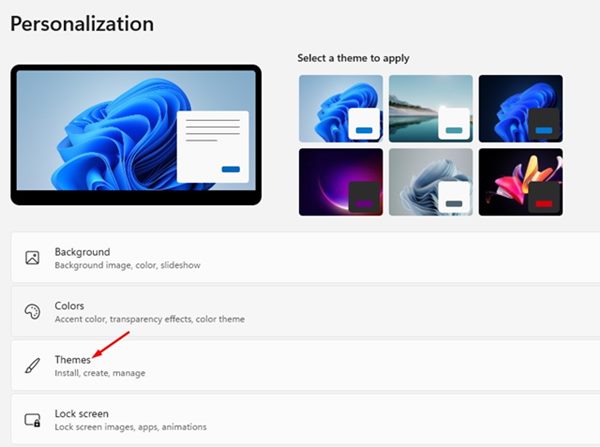
3. On the right, scroll down and tap on the Themes option.
4. On the next screen, you need to click on the Sounds option.
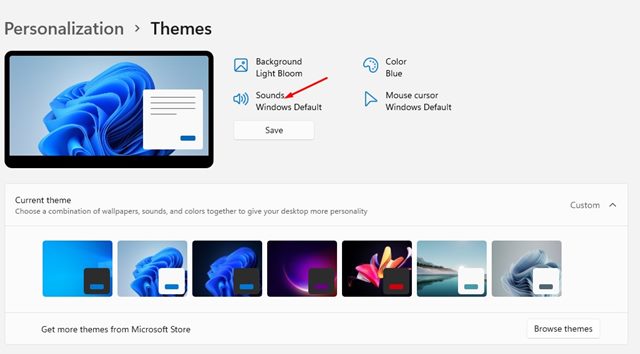
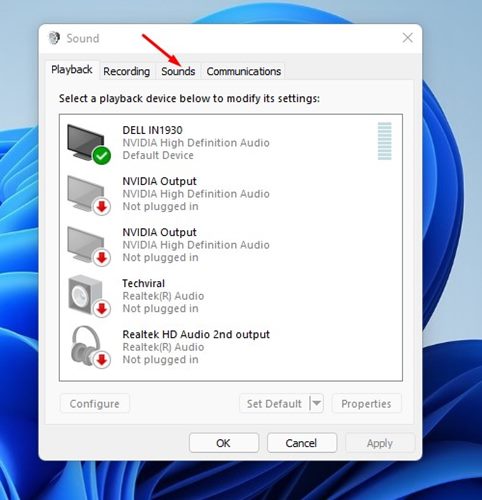
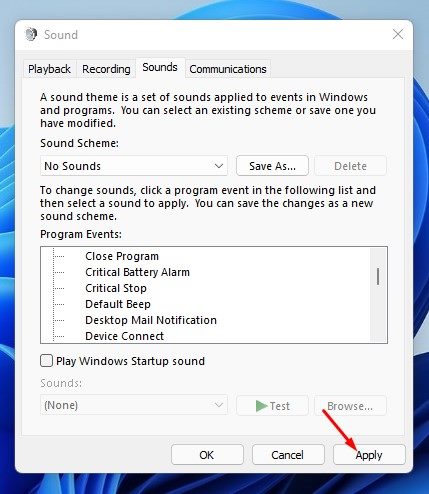
5. This will open the Sound Settings dialog Window on your PC/Laptop. Simply switch to the Sounds tab.
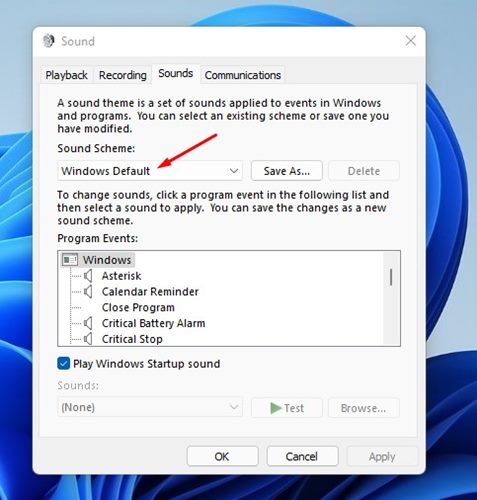
6. In the Sound settings, click on the drop-down menu for the Sound Scheme.
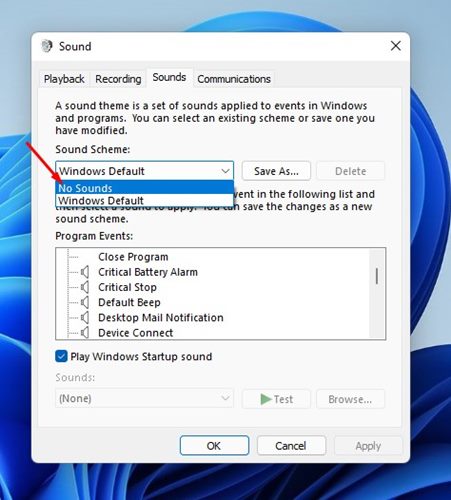
7. On the Drop-down menu, select No sounds.
8. If you wish to disable the Startup Sound, simply uncheck the option Play Windows Startup sound.
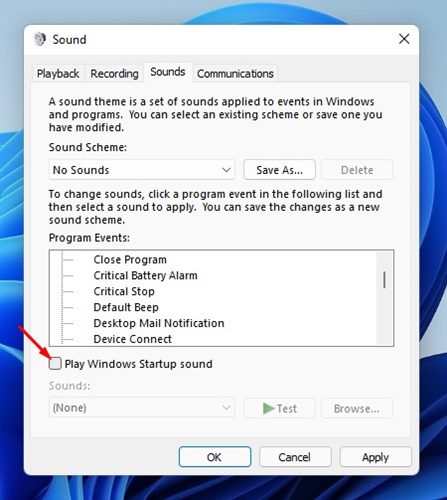
9. After making the above changes, click on Apply, then Ok.
As we mentioned above, it’s pretty easy to disable all system sounds in Windows 11. I hope this article helped you! Please share it with your friends also. If you have any doubts related to this, let us know in the comment box below.


