If you have been using Windows 10 for a while, you might know that the operating system has many bugs and errors. For example, it’s pretty common for Windows users to face BSOD errors, Black screen errors, driver errors, and more.
Whenever Windows 10 detects a critical error, it creates a dump file and takes specific action to troubleshoot the error. Although Windows 10 fails to fix the problems in most cases, the dump files that it creates can be used for troubleshooting purposes.
What are Crash Dump Files?
Crash dump files are a file type that’s automatically created when the system experiences BSoD, commonly known as ‘Stop error’, ‘system error’, or ‘bug check’.
Those crash dump files can help developers fix BSOD or unknown system errors. If you are experiencing problems with BSOD, you can send the crash dump file to the developers to fix the error.
Although crash dump files were of great use, they can waste lots of hard drive space. So, if you never use Crash Dump files, then it’s best to disable the creation of crash dump files in Windows 10.
Also read: How to Optimize Storage Drives For Better Performance in Windows 10
How to Disable Crash Dump Files Creation On Windows 10
It’s pretty easy to disable the crash dump files creation on Windows 10. You need to implement some of the simple steps shared below.
Important: Windows 10 automatically clears crash dump files when HDD space is limited. You need to enable the Storage sense to clear the crash dumps.
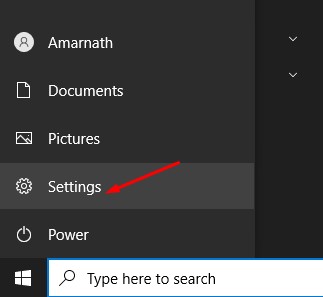
1. First of all, click on the Windows 10 start button and select Settings.
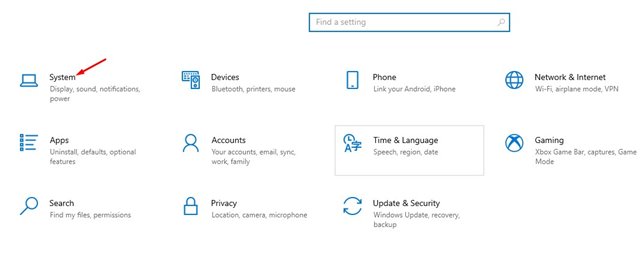
2. On the Settings app, click on the System option.
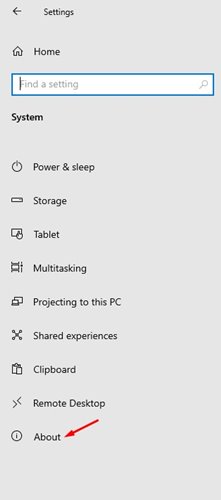
3. Now the left pane, click on the About option.
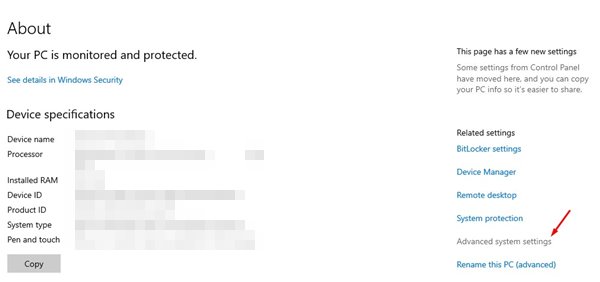
4. On the right pane, click on the Advanced system settings as shown below.
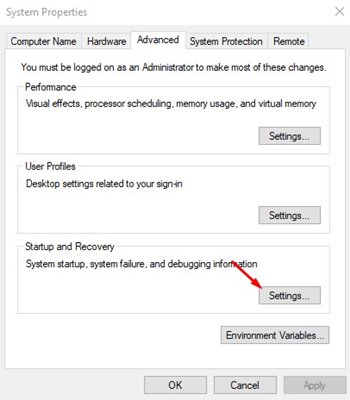
5. Now, on the System properties page, click on the Advanced tab.
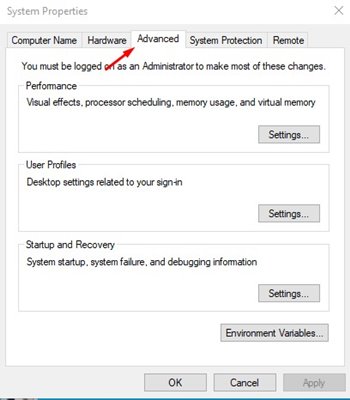
6. Click on the Settings button under the Startup and Recovery.
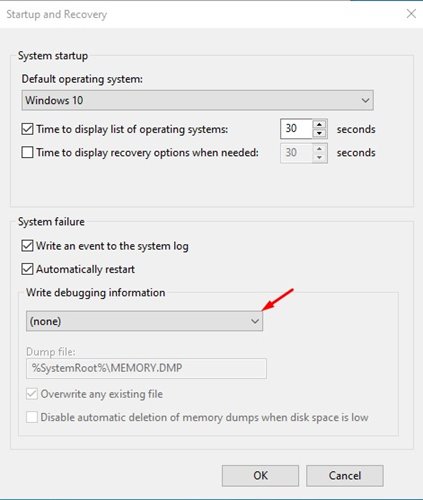
7. On the next page, under the write debugging information, use the drop-down menu and select the (none) option. Once done, click on the Ok button.
That’s it! You are done. If you change your mind, you can revert the changes you have made.
So, this guide is all about how to disable crash dump creation on Windows 10 computers. I hope this article helped you! Please share it with your friends also. If you have any doubts related to this, let us know in the comment box below.


