Well, if you have a great interest in the tech world, then you might know about IPv4 and IPv6. IPv4 was the first version of IP and its right now the most used IP version. IPv4 uses a 32-bit address scheme whereas IPV6 utilizes the 128-bit internet address.
What is the IPv6 Protocol?
IPv6 is the current internet protocol and its all set to replace IPv4 as the standard protocol. Almost all routers and modems available out there now have support for IPv6. IPv6 is getting more widely deployed, but it can create few issues while establishing a connection.
If we talk about IPv6 internet, the internet protocol can produce a delay in establishing a connection to the resources because the host attempts first for iPv6 and if there’s no routing path, then it tries for IPv4.
Another thing is that IPv6 has few security flaws and it opens up possibilities for attackers to enter your network.
Fortunately, the usage of IPv6 is still pretty low and you can disable it without any issue. So, here in this article, we are going to share a tutorial on how to disable IPv6 in Windows 10.
How To Disable IPv6 In Windows 10
Below, we are going to share a working method that would help you to disable IPv6 in Windows 10. Make sure to follow the steps carefully to avoid any errors. So, let’s explore how to disable IPv6 on Windows 10 computers.
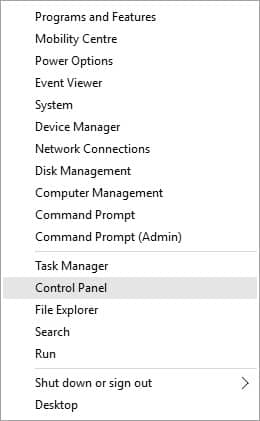
Step 1. First of all, open Control Panel on your Windows 10 computer. Simply right-click on the Windows icon and then select ‘Control Panel’
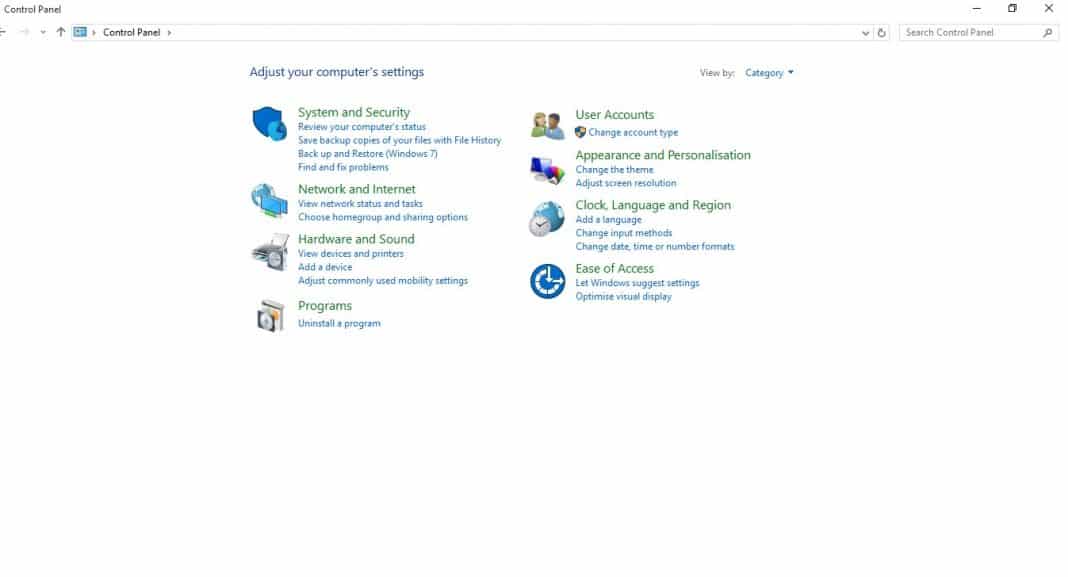
Step 2. Now you will see the Control Panel.
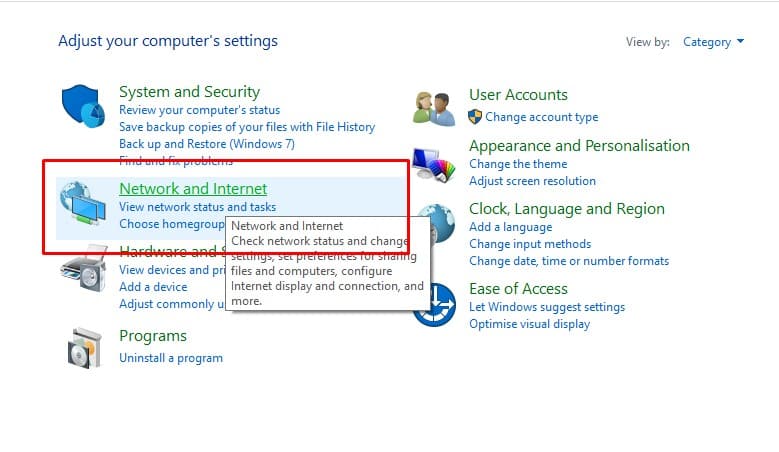
Step 3. On Control Panel, you need to click on ‘Network and Internet’
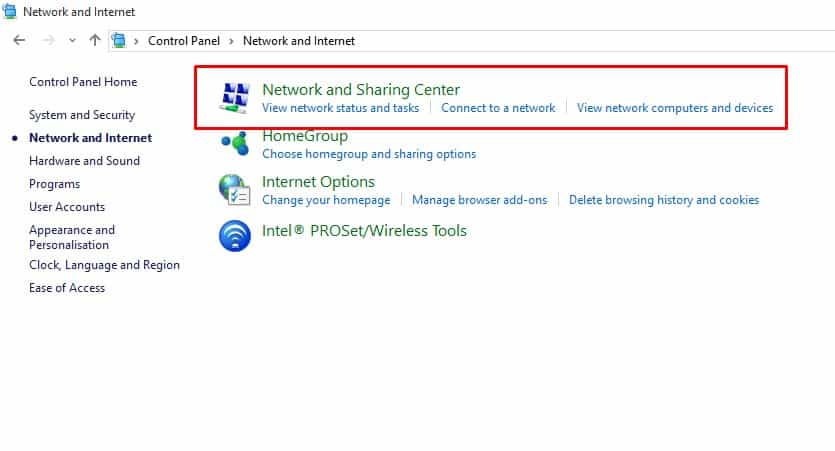
Step 4. Now on the ‘Network and Internet’ page, click on ‘Network and Sharing Center’
Step 5. In the next step, you need to click on ‘Change Adapter Settings’ which is located on the left-hand side menu.

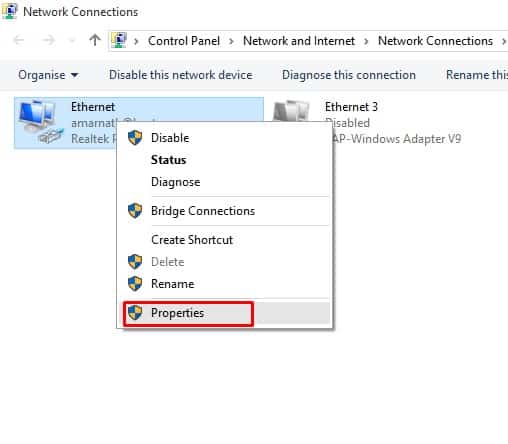
Step 6. Next, you need to right-click on the connected network and click on ‘Properties’
Step 7. Now under the Properties, you need to select the ‘Networking’ tab and then uncheck the ‘Internet Protocol Version 6 (TCP/IPv6)’. Now click on ‘Ok’
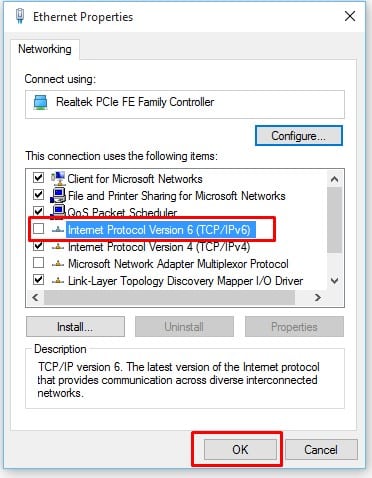
That’s it, you are done! Now just restart your computer and you have disabled the IPv6. If you use more than one network adapters, then you need to do the same for each of them individually.
So, this is how you can disable IPv6 in Windows 10. If you have any other doubts related to this, let us know in the comment box below.


Doesn’t work on mine. Running a traffic capture program like Wireshark still shows plenty of IPv6…..
You are going to see ipv6 from other devices when using wireshark