When prefetch or network prediction is turned on, Google Chrome automatically caches your frequently visited pages. Once cached, Chrome serves the saved pages the next time you visit those sites.
Since Chrome serves the cached page version, you may sometimes have to reload the page to see the new content. Also, the feature can eat up data in the background and slow down your web browser.
If you have a mid or low-end computer, it’s best to disable the prefetch or network prediction feature in Chrome.
1. Disable Prefetch via Chrome’s settings
This method uses Chrome’s settings to enable or disable Network prediction.
1. Open Chrome browser and click on the three dots (Chrome menu).
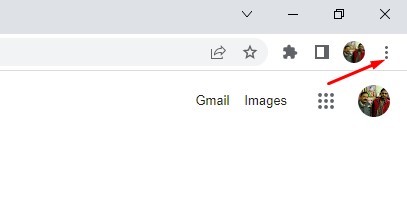
2. Click on Settings.

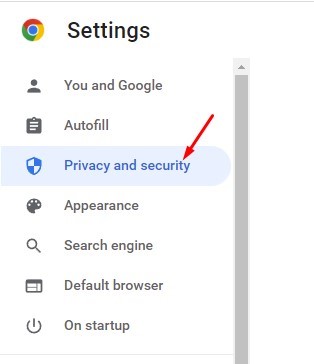
3. Click the Privacy and Security.
4. Click on the Cookies and other site data.

5. Scroll down and find the Preload pages for faster browsing and searching.
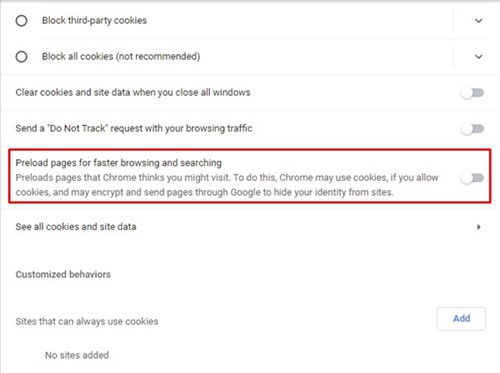
6. You need to use the toggle behind the option to enable or disable the Prefetch feature.

2. Enable or Disable Network Prediction via Registry Editor
You can also use the Registry Editor to enable or disable the Network prediction.
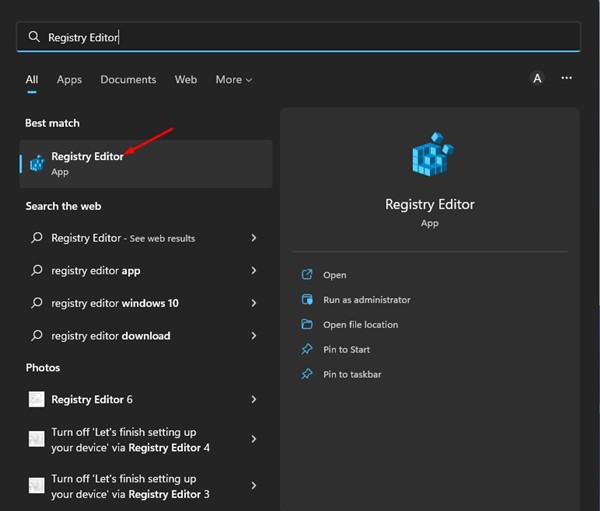
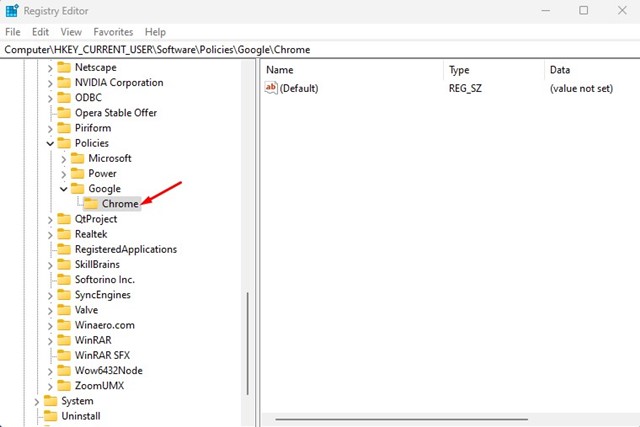
- Open Registry Editor from the Windows Search.
2. Navigate to the following path:
HKEY_CURRENT_USER\Software\Policies\
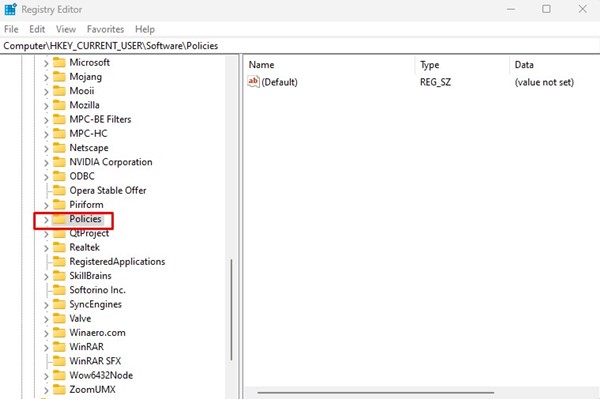
3. Right-click on the Policies and select New > Key.
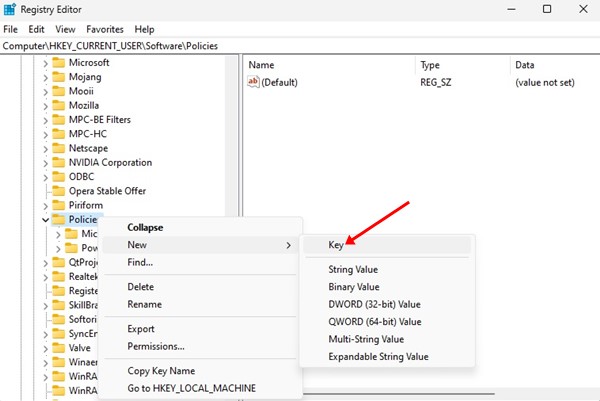
4. Name the new key as Google
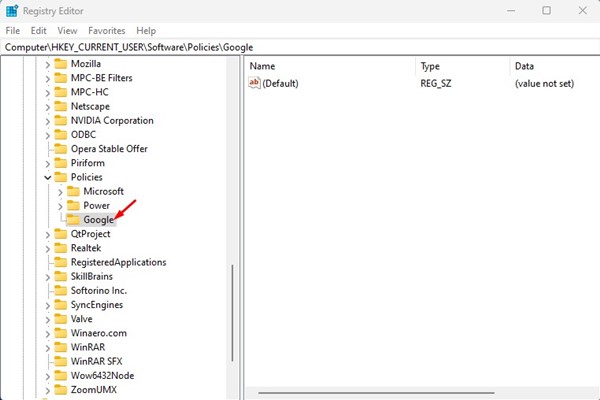
5. Right-click on the Google folder and select New > Key.
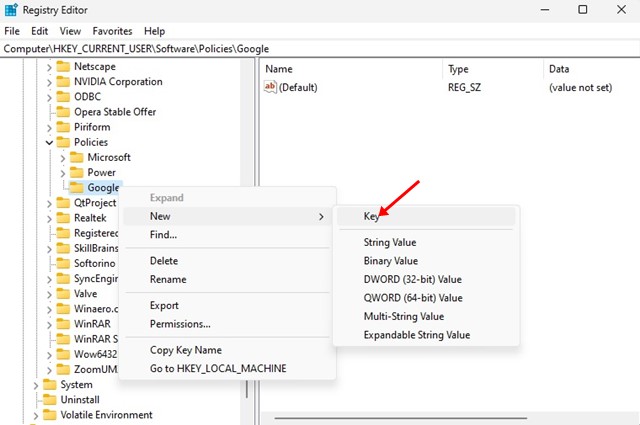
6. Name the new key Chrome.
7. Right-click on the Chrome key and select New > DWORD (32-bit) Value.
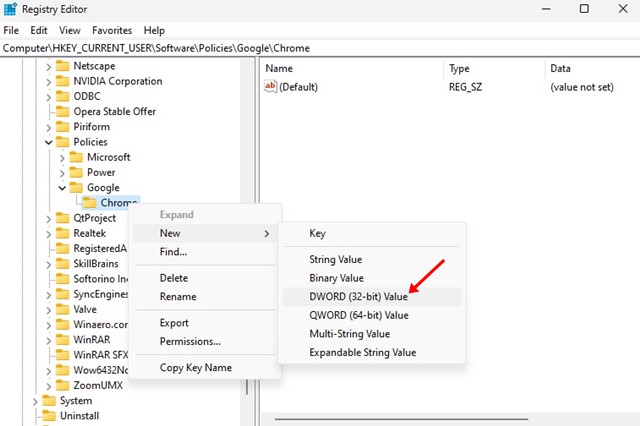
8. Name the new key as NetworkPredictionOptions
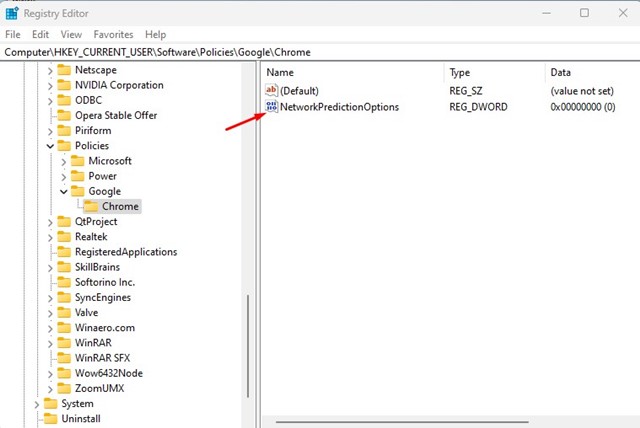
9. Double-click on the NetworkPredictionOptions and enter 2 in the Value data field to disable Network Prediction. If you want to enable Network prediction, enter 0 or 1. Once done, click OK.

Also read: How to Clear/Flush Google Chrome DNS Cache in Windows 11
You should disable the feature if you are experiencing problems while using the Google Chrome browser. If you need more help in this topic, let us know in the comments.


