With the drag-and-drop functionality, you can use your mouse to select files and drag and drop them to your desired location. This will move your selected files.
While the feature is beneficial, sometimes it can misbehave. Many Windows 11 users have recently reported that the drag-and-drop functionality not working. According to the users, Drag and drop not working on Windows 11.
The problem appears when dragging files on the desktop, in File Explorer, or apps. If you are using Windows 11 and experiencing the same problem, here’s why it happens and what you can do.
Why Drag and Drop Not Working in Windows 11?
The drag-and-drop functionality may stop working on Windows 11 for various reasons. While there are no specific reasons, these are often the prominent ones that cause such problems.
- Computer isn’t restarted for a while.
- The app doesn’t support drag and drop functionality.
- Temporary system glitch.
- Windows Explorer is not responding.
- Problematic Mouse or Outdated Mouse drivers.
- Incorrect Windows Registry Settings.
- Corrupted System Installation Files.
- Outdated operating system.
These are the key reasons why drag and drop functionality is not working on Windows 11 computers.
Now that you know all the possible reasons why Drag and Drop stopped working, troubleshooting will be easy. Here are some of the best methods for resolving the issue.
1. Restart your Windows 11
Restarting is a good idea to get started; this will free up all resources and give your device time to cool down.
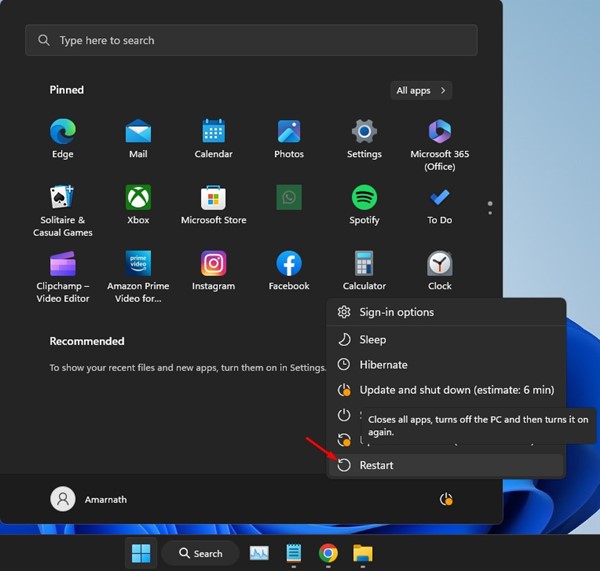
If you haven’t restarted your Windows 11 computer in a while, you should do so now. It’s pretty easy: Click the Windows Start Button, go to the Power Menu, and select Restart.
After the restart, you should be able to use the Drag and Drop function of the Windows 11 computer. If restarting didn’t help, follow the next methods we have shared below.
2. Restart the App
If the drag-and-drop functionality of a specific app does not work, you must also restart that app. Sometimes, glitches and bugs in the app may prevent the drag-and-drop functionality of Windows 11 from functioning properly.
So, before you try the more advanced troubleshooting tricks, it’s best to close and restart the problematic app. Here’s what you need to do.
1. Press the Windows Key + S button on your keyboard to open Windows Search. Type Task Manager on Windows Search and open the relevant app.
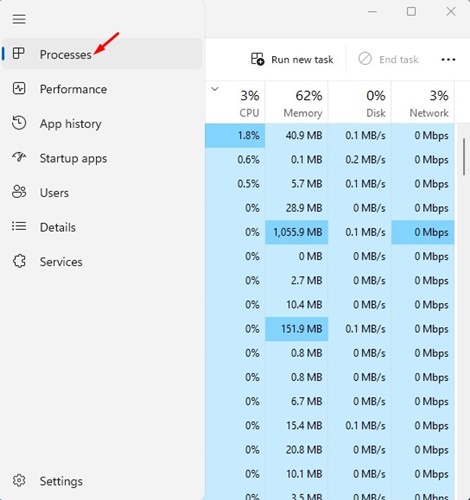
2. When the Task Manager opens, switch to the Processes tab.
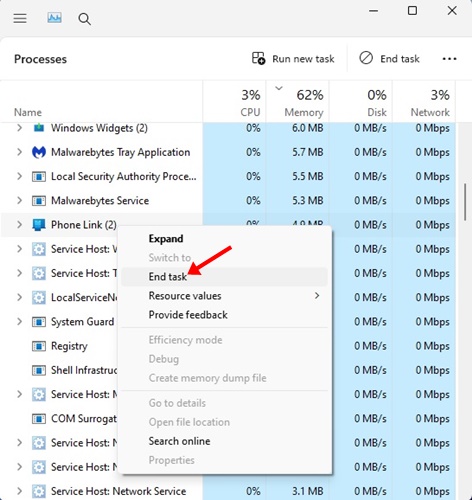
3. Find the problematic app in the Process list. Right-click on it and select End task.
Once closed, open the app again. This will likely fix the issue with the Drag-and-Drop functionality.
3. Restart the Windows Explorer Process
Windows Explorer is a very important process that is responsible for displaying many visual elements. It also enables the GUI support & enables the Drag and Drop functionality.
So, if the Windows Explorer process is not responding, the drag and drop functionality may fail to work. Hence, you also need to restart the Windows Explorer process from the Task Manager. Here’s what you need to do.
1. Press the Windows Key + S button on your keyboard to open Windows Search. Type Task Manager on Windows Search and open the relevant app.
2. When the Task Manager opens, switch to the Processes tab.
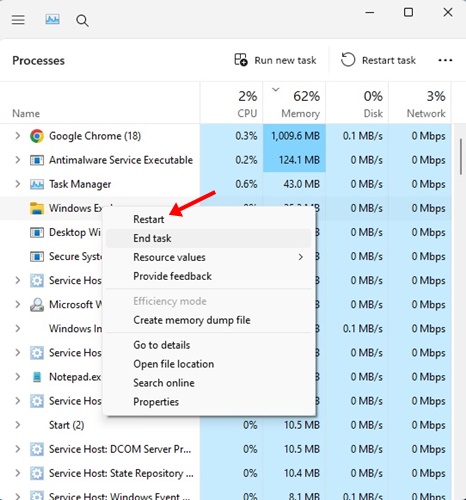
3. Now find Windows Explorer. Right click on the Windows Explorer and select Restart.
4. Cancel the Selected Drag & Drop Interface
Sometimes, bugs & glitches in Windows 11 may prevent you from selecting the new files. This happens when Windows 11 fails to cancel the old selection.
When this happens, you can’t select files or move your selections in the file explorer. To resolve this issue, you must cancel the existing drag-and-drop interface.
For that, click & hold the left mouse button & press the Esc key. This will cancel the Drag and Drop interface and may fix the issue. You can then use the drag & drop feature to move files between locations.
5. Reinstall the Mouse Drivers
Since the mouse requires you to carry out the Drag & Drop function, it’s essential to keep the mouse driver updated. If the mouse drivers are already up-to-date, you need to reinstall them. Here’s what you can do.
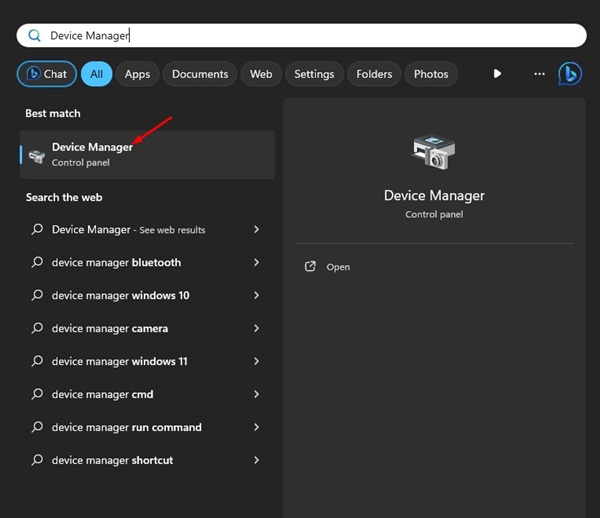
1. Press Windows Search and type in Device Manager. Then, open the Device Manager app from the list.
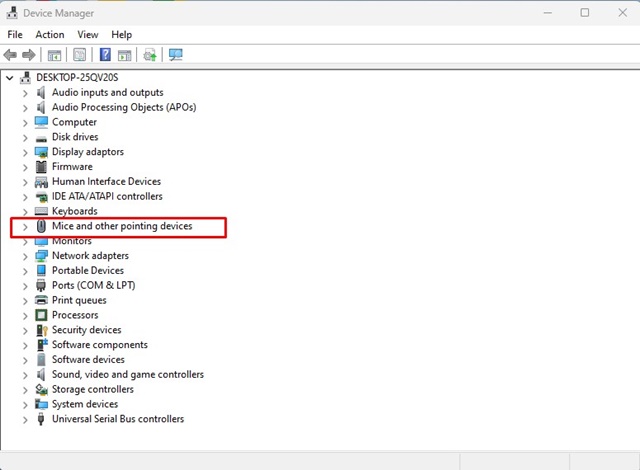
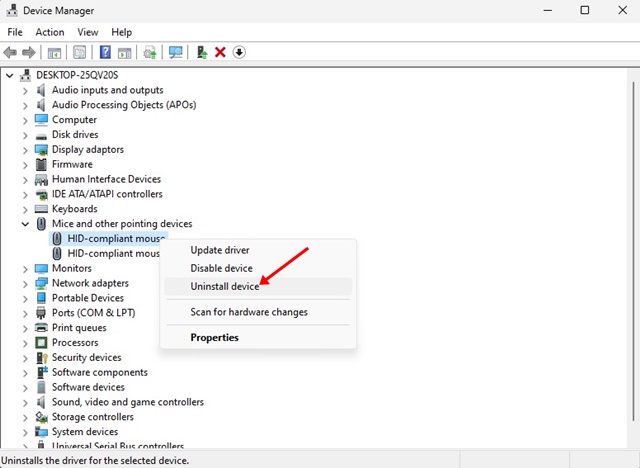
2. When the Device Manager opens, expand the Mice and other pointing devices.
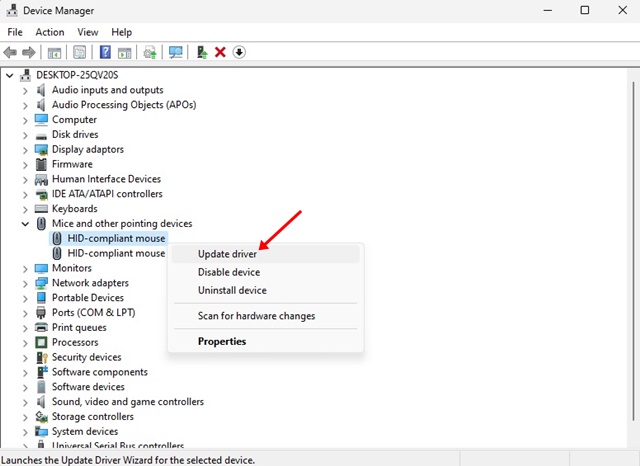
3. Right click on your mouse, and select Update driver.
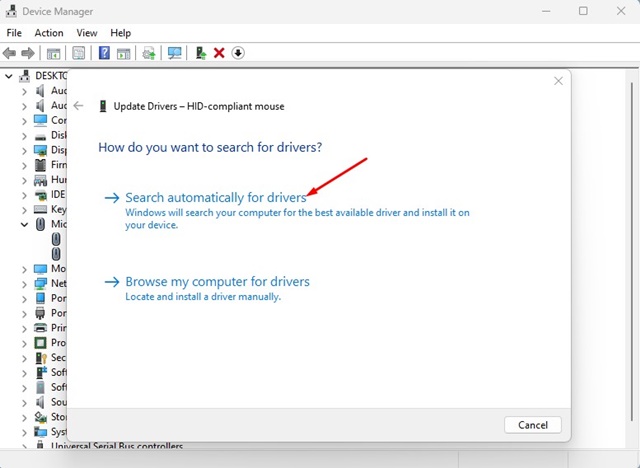
4. On the next screen, select Search Automatically for drivers.
5. If you are using the latest version of Mouse drivers, right click on your Mouse and select Uninstall device.
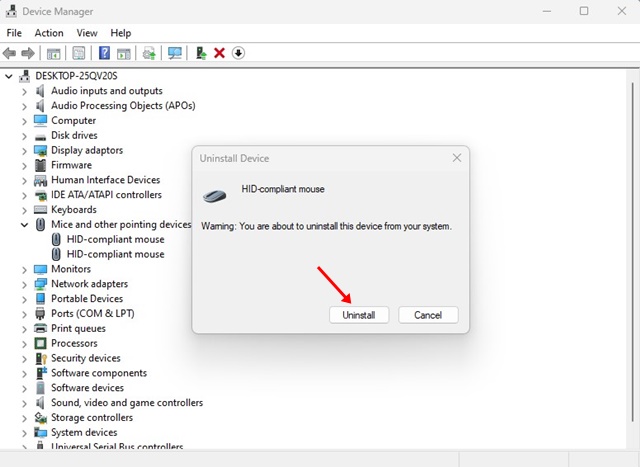
6. On the Uninstall Device prompt, click on Uninstall.
6. Make Changes to the Windows Registry
If the issue is still not fixed, you can tweak the Windows Registry file a bit. You can tweak the Windows Registry file to resolve Drag and Drop not working on Windows 11 computers.
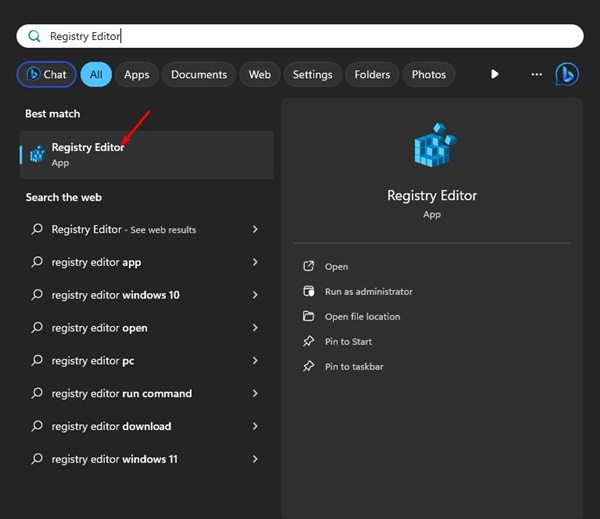
1. Search for Regedit on the Windows Registry. Now open the Registry Editor app from the list.
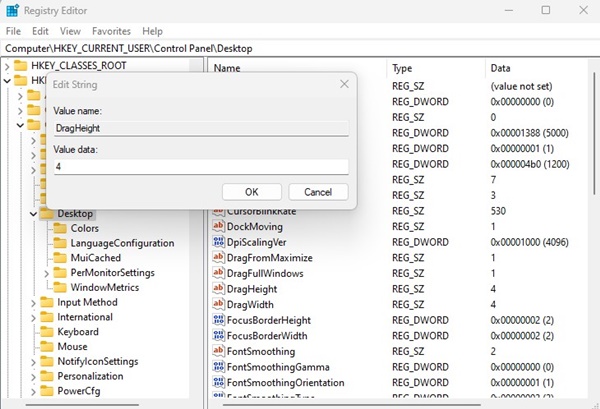
2. When the Registry Editor opens, navigate to this path:
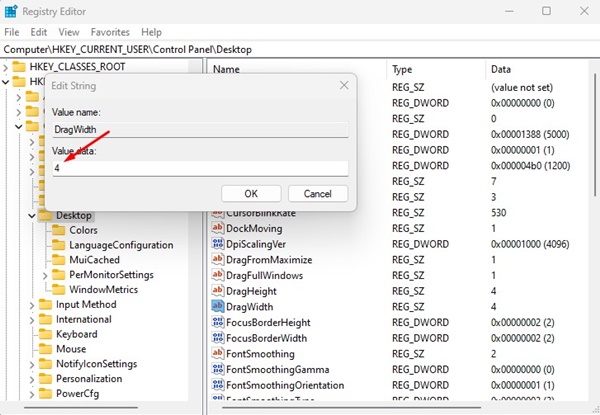
HKEY_CURRENT_USER\Control Panel\Desktop
3. On the right side, double click on the DragHeight.
4. On the Edit String prompt, type 4 on the Value Data field and click Ok.
5. Now double click on the DragWidth. Type 4 in the Value data field and click Ok.
7. Run the Hardware & Devices Troubleshooter
Many Windows 11 users have reported fixing Drag & Drop not working just by running the Hardware and Devices troubleshooter. Hence, you can try running that troubleshooter as well. Here’s how to run it.
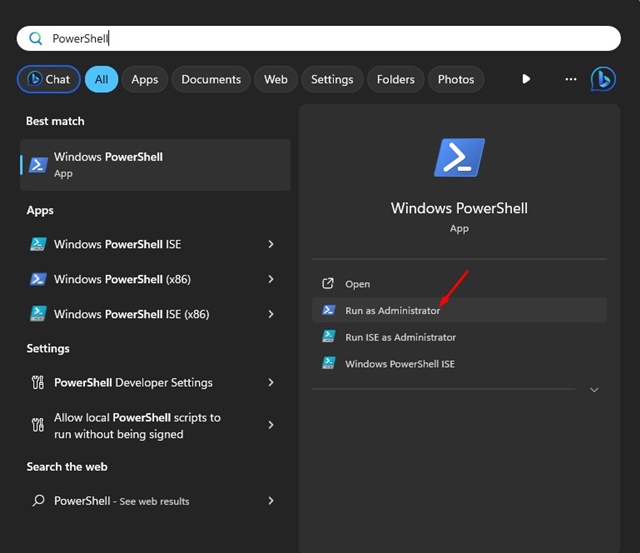
1. Search for PowerShell in Windows Search. Right-click on the PowerShell app and select Run as Administrator.
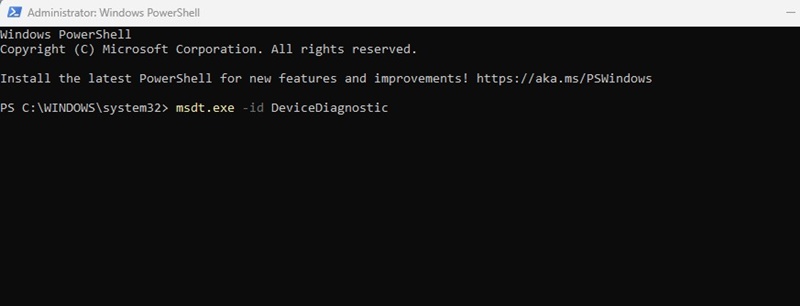
2. When the PowerShell opens, type this command and press Enter.
msdt.exe -id DeviceDiagnostic
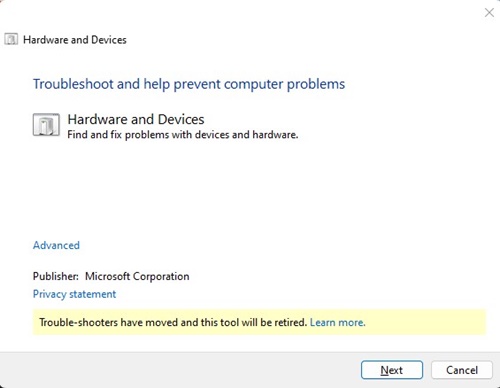
3. This will launch the Hardware Troubleshooter. Click on the Next button.
4. Follow the on screen instructions to complete the troubleshooting process.
8. Run the SFC & DISM Command
SFC and DISM commands are both used to repair the system file corruption. So, you can run these two command line tools to repair corrupted system files and resolve the Drag and Drop not working issue. Here’s how to run these two tools.
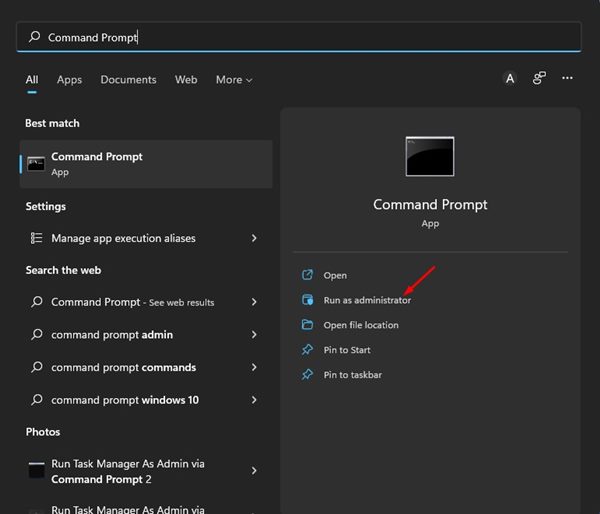
1. Type CMD in Windows Search, right-click on the Command Prompt app, and select Run as administrator.
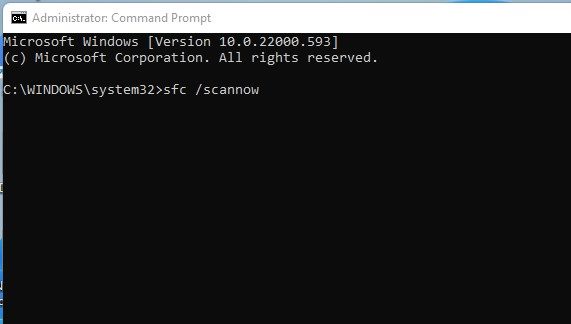
2. When the Command Prompt opens, type the command and press Enter.
SFC /scannow
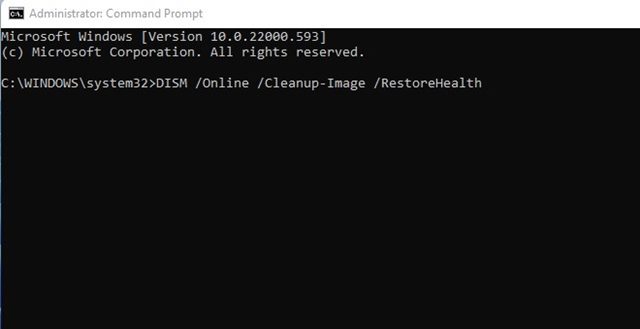
3. This will run the System File Checker tool. If the tool returns with an error, execute these commands one by one:
DISM /Online /Cleanup-Image /CheckHealth
DISM /Online /Cleanup-Image /ScanHealth
DISM /Online /Cleanup-Image /RestoreHealth
The process may take a few minutes to computer. Once the scan is complete, close the Command Prompt and restart your PC to apply the changes.
9. Update Windows 11
The next best thing you can do to resolve Windows 11 drag and drop not working is to update the operating system.
Maybe the version of Windows 11 you are using has a bug that conflicts with the functionality of Drag and Drop.
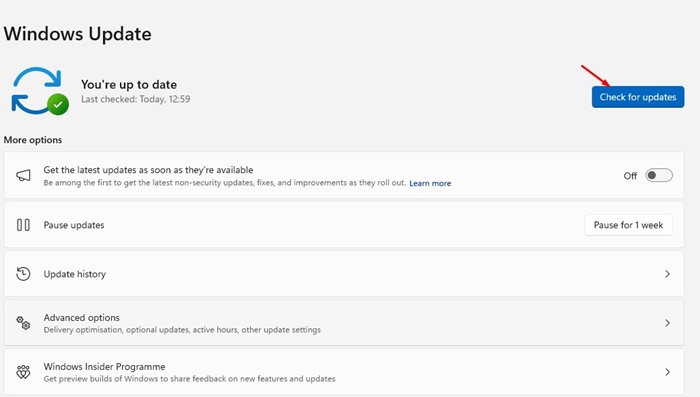
The best way to deal with such bugs is to update the operating system version. Go to Settings > Windows Update. On the right side, click the Check for updates button.
If any update is available, it will be downloaded & installed automatically on your computer. Updating Windows 11 will likely fix the issue.
10. Reset Windows 11
If nothing worked in your favor, resetting Windows 11 is your only option. If you are willing to lose your app data, resetting is the best option to deal with such issues.
There are multiple ways to reset Windows 11; the easiest one is to use the Settings app. Here’s how to reset Windows 11 from the Settings app.
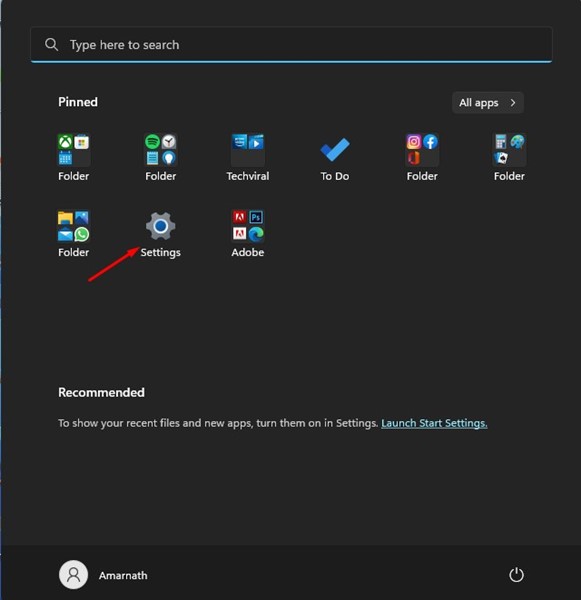
1. Click on Windows 11 Search and select Settings.
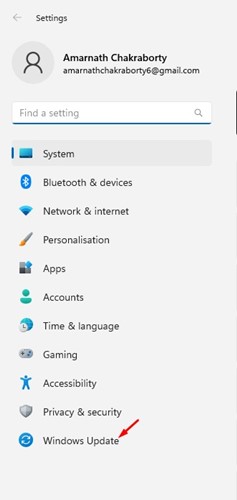
2. When the Settings app opens, switch to the Windows Update tab.
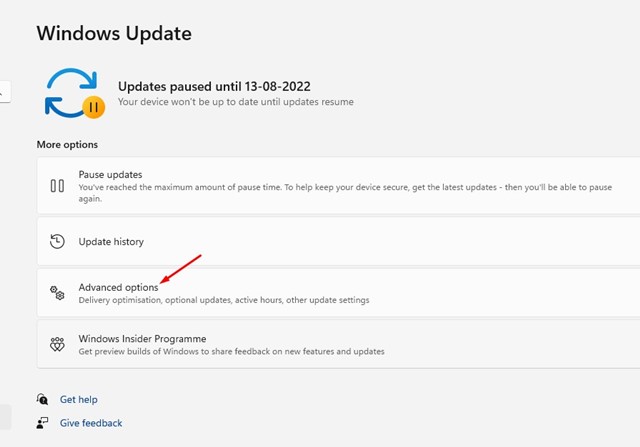
3. On the right side, click on the Advanced options.
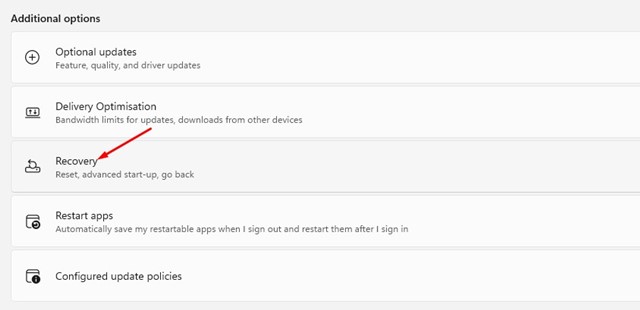
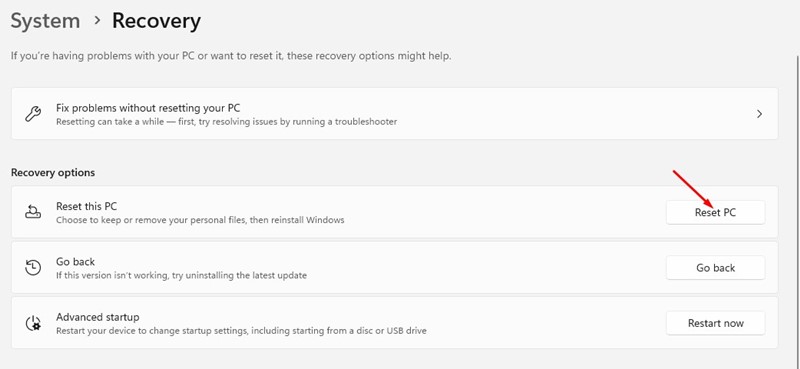
4. Under the Additional options, click on the Recovery.
5. Now click on the Reset PC option.
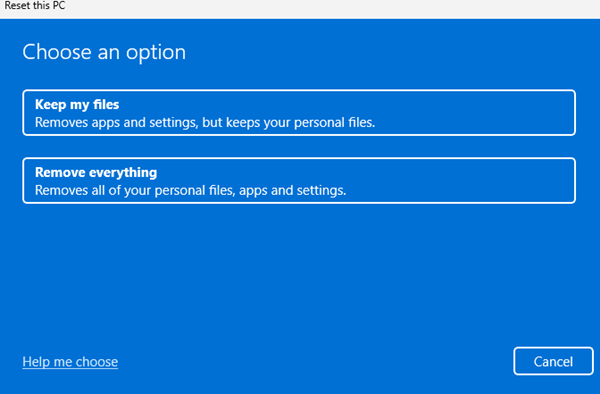
6. On the Choose an option prompt, select Keep my files.
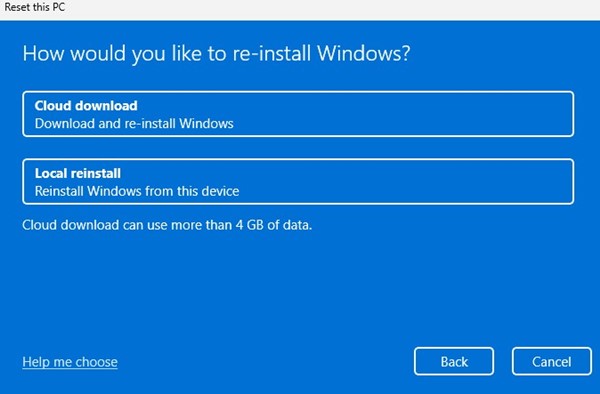
7. On the next screen, select Cloud Download.
8. On the next screen, click on the Reset button.
The reset will take a few minutes to complete (depending on your hardware specs). After the reset, you should be able to Drag and Drop your files.
Drag and Drop feature not working on Windows 11 may be frustrating, but you can follow all these methods to resolve the issue. If the problem is fixed, let us know which method worked for you.
