If you ask us about the most used function on every computer, we would say it’s copy/paste. While working on the computer, we often have to copy and paste images, text, and other content types.
If you have used Windows for a while, you might know that the default clipboard stores only one item. That means that the next copied item always replaces the previous clipboard contents. Since Microsoft knows that users can copy & paste multiple items, they have introduced a new clipboard manager in Windows 10.
Windows 10 has a useful feature called ‘Clipboard history.’ The feature lets you see a list of items that you have copied to the clipboard recently. The Clipboard history stores a maximum of 25 entries, with the oldest items disappearing as the new ones appear.
The only downside of the Clipboard history is that every time you restart your PC, the saved items will be cleared. Another thing is that it only keeps the text items.
Also Read: How to Set Alarms & Timers in Windows 10 PC
Steps to Enable & Use the Hidden Clipboard History on Windows 10
This article will share a detailed guide on how to enable and use the Clipboard History feature of Windows 10 computer. Let’s check out.
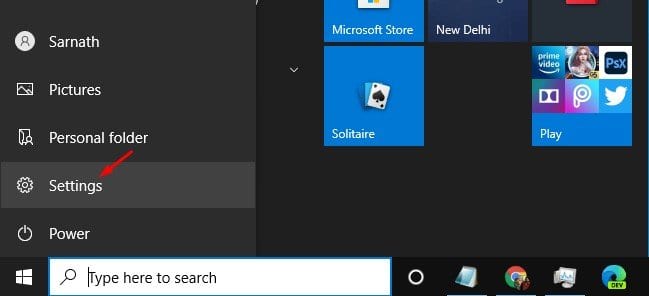
Step 1. First of all, click on the Start button and select ‘Settings.’
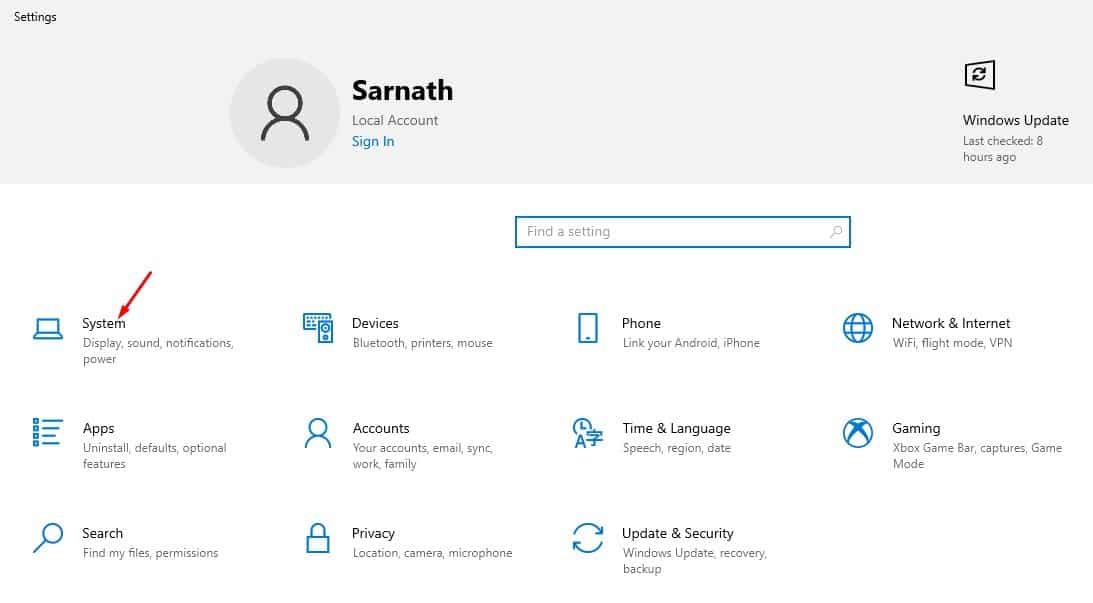
Step 2. On the Settings page, click on the ‘System.’
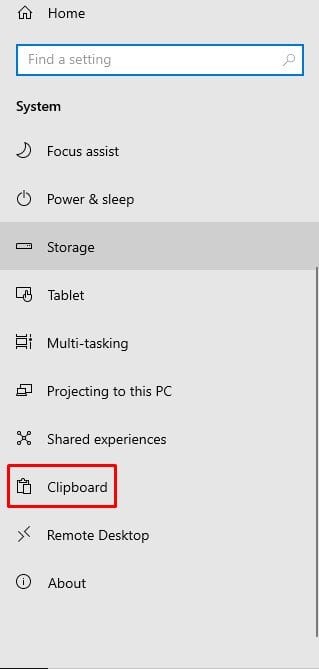
Step 3. On the System Settings, click on the ‘Clipboard’ option.
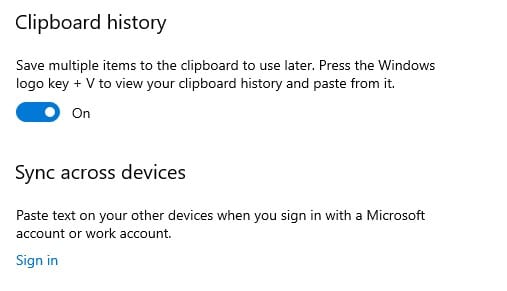
Step 4. Now on the right-side pane, toggle the Clipboard History switch to ‘On.’
Step 5. Once done, the clipboard history will be enabled. Now just copy several texts.
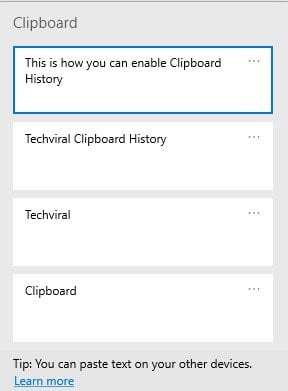
Step 6. To access the clipboard history, press Windows Key + V button.
Step 7. A small window will pop-up, showing the text items you’ve copied.
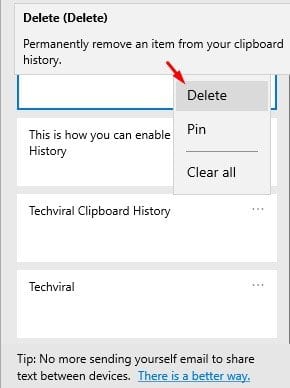
Step 8. To remove an item from the Clipboard History, click on the three dots, and select ‘Delete.’ If you wish to clear all items, click on the ‘Clear all’ option.
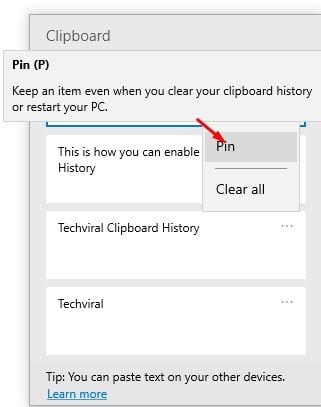
Step 9. If you want any particular clipboard item to stay on the list even if you reboot the PC, select the ‘Pin’ button.
That’s it! You are done. This is how you can enable and use the Clipboard history in Windows 10.
So, this article is all about how to enable and use Clipboard History on Windows 10 computers. I hope this article helped you! Please share it with your friends also. If you have any doubts related to this, let us know in the comment box below.