If you have used an older version of Windows, such as Windows 7, Windows 8, or Windows 10, you may be familiar with the Control Panel. Control Panel is basically a hub that lists all the essential settings for your computer. Unfortunately, Microsoft is trying to remove the Control Panel from its new operating system – Windows 11.
Windows 11 includes a control panel, but it’s hidden under the Settings. To access the Control Panel on Windows 11, you need to use the Windows 11 Search feature. Windows 11 also features an additional control panel that includes more settings and options and it’s called God Mode.
What is God Mode in Windows 11?
God Mode in Windows 11 gives system administrators more power to access settings that were hard to access. God Mode is often termed as a secondary control panel, but it’s a different utility that lists both basic and complex system configurations.
If you enable God Mode on your Windows 11 PC, you will be able to access all Windows Settings in one place. As of now, the God Mode folder provides you access to more than 200 different Windows administrative tools and settings. The actual name of God Mode is Windows Master Control Panel, and it’s very useful.
God Mode is available on every version of Windows, including Windows 7, Windows 8, Windows 10, Windows 11, and in this article, we will share the steps to enable and use God Mode in Windows 11. Let’s check out.
Steps to Enable & Use God Mode Folder on Windows 11
If you are interested to enable God Mode in Windows 11, you need to follow some of the simple steps we have shared below. Here’s how you can enable God Mode in Windows 11.
1. First of all, right-click anywhere on your desktop screen and select New > Folder.
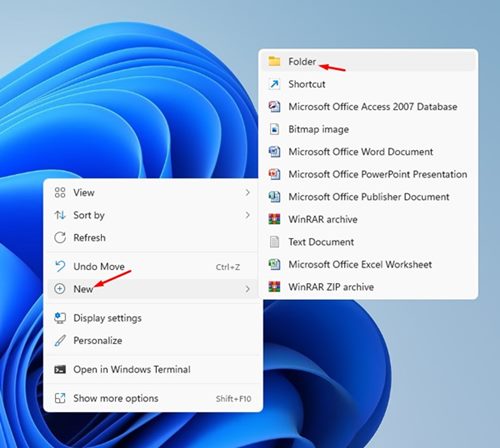
2. Now right click on the New Folder that you have created and select the Rename option.

3. Now, you need to rename this new folder with the following unique code and hit the Enter button
GodMode.{ED7BA470-8E54-465E-825C-99712043E01C}

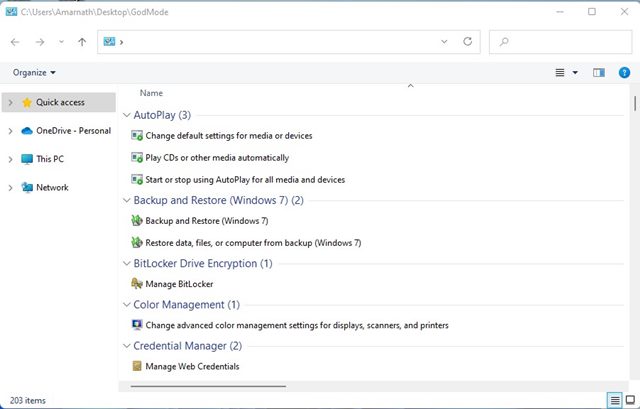
4. As you press the Enter button, the folder’s name will disappear. Now, refresh your PC, and you will notice that the folder’s icon has changed to the Control Panel icon.

5. Simply double-click on the folder to access 200+ settings.
That’s it! You are done. This is how you can enable the God Mode folder on Windows 11 computer.
How to Use God Mode in Windows 11
Well, the God Mode in Windows 11 lists 200 different settings and controls, as we have mentioned above, and all of the tools were organized into different categories.
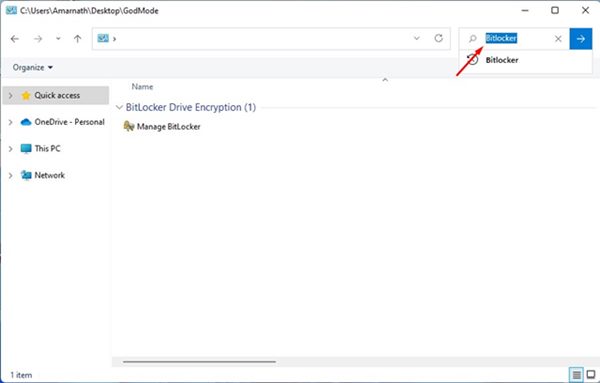
To use any particular settings of feature, you just need to double-click on the options. If you cannot find a specific setting, you can utilize the Search field to find it.
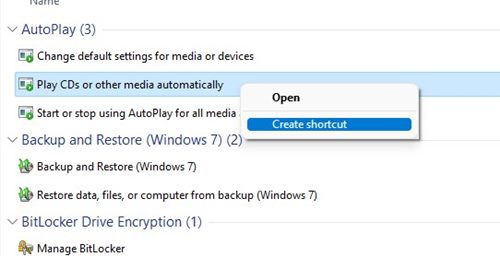
You can also create a desktop shortcut for a command or setting that you use often. For that, right-click on the setting and select the ‘Create Shortcut’ option. Then, on the confirmation prompt, click on the Yes button.
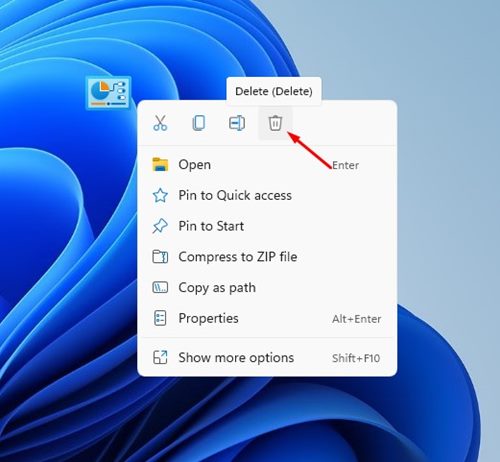
If you don’t want to use God Mode in Windows 11, you need to right-click on the God mode folder and select the Delete option.
God Mode is indeed a great feature of the Windows operating system as it saves you time from searching for controls & settings in the Start Menu or Search. I hope this article helped you! Please share it with your friends also. If you have any doubts related to God Mode in Windows 11, let us know in the comment box below.


