If you have used older versions of Windows, such as Windows 7 or 10, you may know that the OS had the mouse pointer shadow enabled by default. Many users find the mouse pointer shadow very useful as it improves the visibility of the mouse pointer.
However, the mouse pointer shadow is said to increase resource consumption and create performance issues in low-end computers. For this reason, Microsoft disabled the Mouse Pointer Shadow in its new Windows 11.
On Windows 11, the Mouse Pointer Shadow is disabled by default, but you can enable it manually via Settings. Hence, if you are interested in allowing the Mouse Pointer Shadow in Windows 11, read the right guide.
Also read: Download Windows 11 Full Version
Enable or Disable Mouse Pointer Shadow in Windows 11
In this article, we are going to share some of the two best ways to enable or disable the mouse pointer shadow in Windows 11. The methods will be straightforward; follow them as mentioned. Let’s get started.
1) Enable or Disable Mouse Pointer Shadow via Control Panel
Here we will use the Control Panel utility to enable the mouse pointer shadow. Follow some of the simple steps we have shared below.
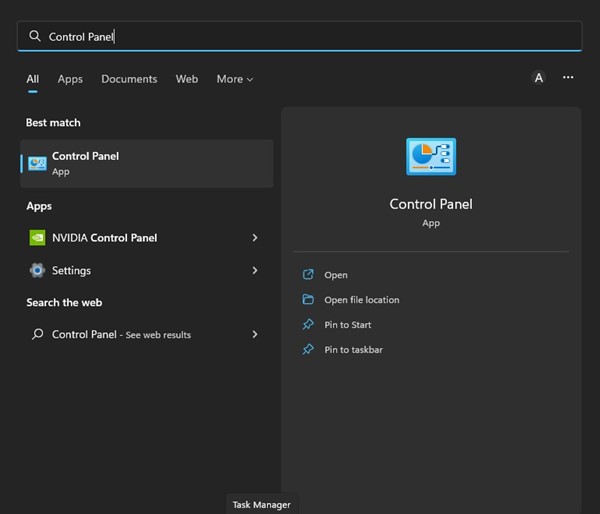
1. First, click the Windows 11 search and type in Control Panel. Next, open the Control Panel app from the list of options.
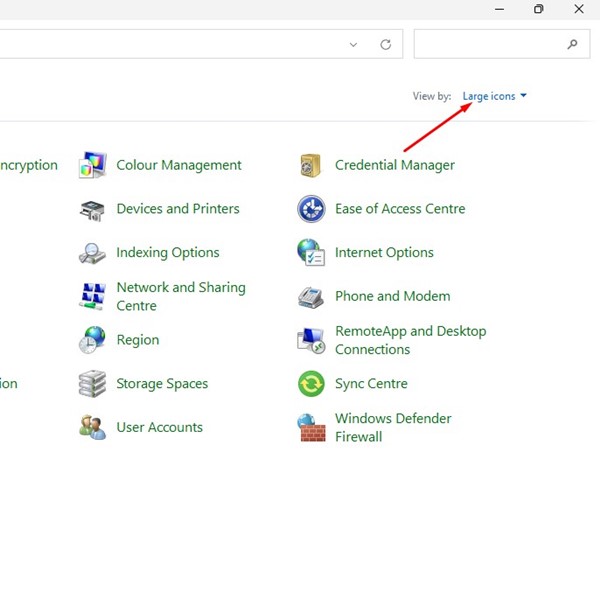
2. On the Control Panel, click on the View by: option and select Large Icons.
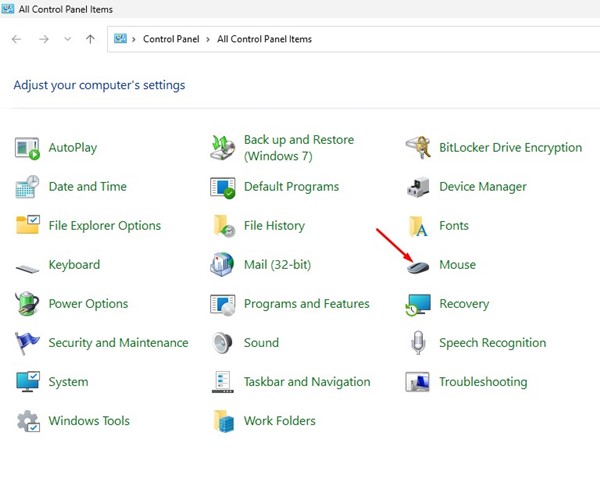
3. Next, click on the Mouse on the Control Panel.
4. This will open the Mouse Properties; switch to the Pointers tab as shown below.
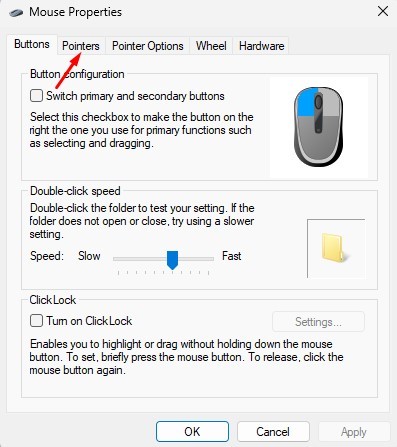
5. On the Pointers screen, check the option ‘Enable pointer shadow’ and click on the Ok button.
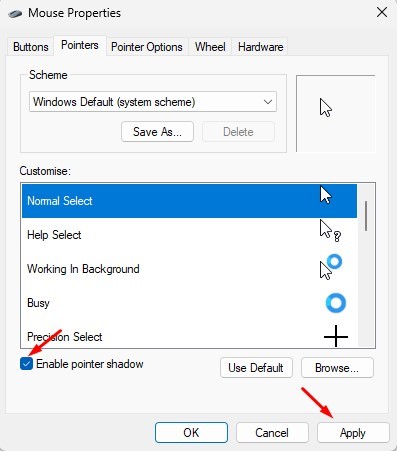
6. This will enable the pointer shadow on your Windows 11 computer. To disable the Pointer shadow, uncheck the ‘Enable pointer shadow’ on Mouse Properties.

That’s it! This is how you can enable or disable Mouse Pointer shadow on Windows 11.
2) Enable or Disable Mouse Pointer Shadow via Settings
If you cannot access the Control Panel, you can use the Settings app to achieve the same. Here’s how you can enable or disable Mouse Pointer Shadow via Settings.
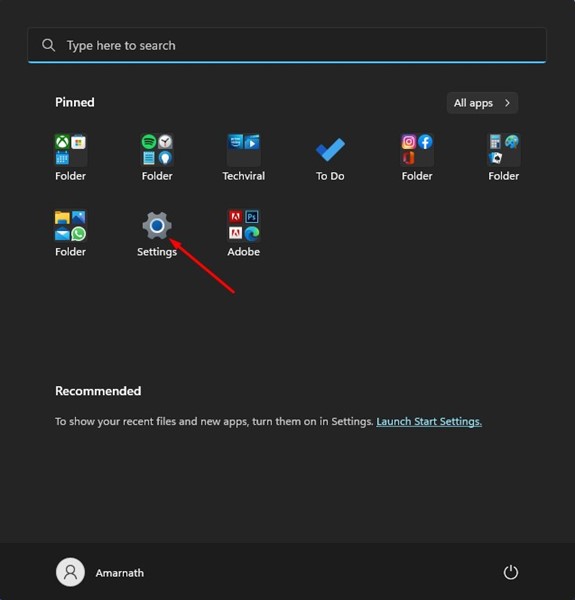
1. First, click on the Windows 11 Start menu and select Settings.
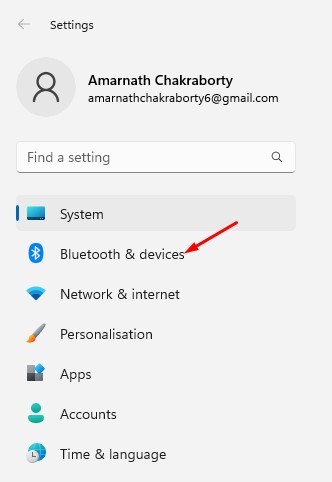
2. On the Settings app, click on the Bluetooth & devices section on the left.
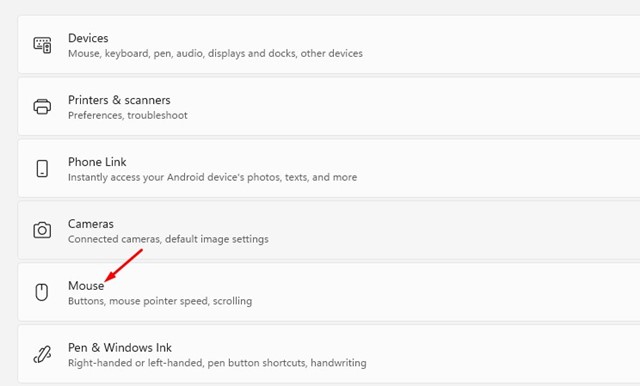
3. On the right, scroll down and click on the Mouse.
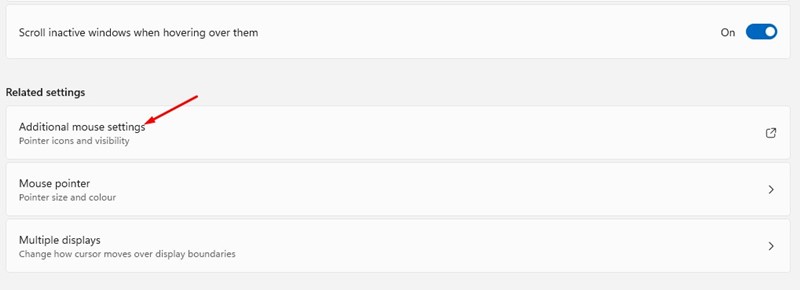
4. On the Mouse Settings screen, click on the Additional Mouse Settings.
5. This will open the Mouse Properties. Switch to the Pointers tab and check the ‘Enable pointer shadow’ option. Once done, click the Ok button to enable the mouse pointer shadow.
6. If you wish to disable the pointer shadow, uncheck the ‘Enable pointer shadow’ option in the above step.
That’s it! This is how you can enable or disable mouse pointer shadow in Windows 11 via Settings.
Also Read: Enable BitLocker Auto Unlock on Windows 11
Mouse Pointer shadow is an excellent feature as it makes the pointer more visible. So, these are the two best ways to enable or disable mouse pointer shadow in Windows 11. If you need more help customizing the Mouse pointer’s appearance, let us know in the comments below.


