If you are a Windows user, you may already know about the Windows Recovery Environment. Windows Recovery Environment, also known as WinRE, is a simplified version of Windows installed with the regular Windows operating system.
What is Windows Recovery Environment?
The Windows Recovery Environment kicks in when your PC fails to load. It provides access to various recovery tools to diagnose and fix problems with your Windows operating system.
You can use Windows Recovery Environment to repair your Windows Startup, run CMD without booting the computer, return to the previous Windows version, and more. It’s a simplified version of Windows that’s designed for technical users.
While the Windows Recovery Environment is enabled on all desktop editions of Windows 11, sometimes malicious software can disable it for evil purposes. If Windows Recovery Environment is disabled, you will see an error message while you attempt to Reset your PC.
The error message will read “Could not find the recovery environment”, ‘Insert your Windows installation or recovery media, and restart your PC with the media’. The message will only appear if WinRE is disabled.
Also Read: How to Access Advanced Startup Options in Windows 11
Steps to Enable Windows Recovery Environment in Windows 11
If you get the same error message, you must manually enable Windows Recovery Environment on your Windows 11 computer. Below, we have shared a step-by-step guide on how to enable Windows Recovery Environment in Windows 11. Let’s check out.
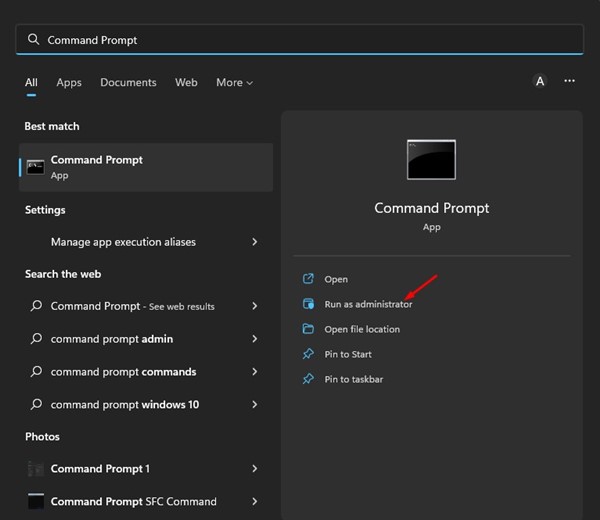
1. Click on the Windows 11 search and type in Command Prompt. Next, right-click on the Command Prompt and select Run as administrator.
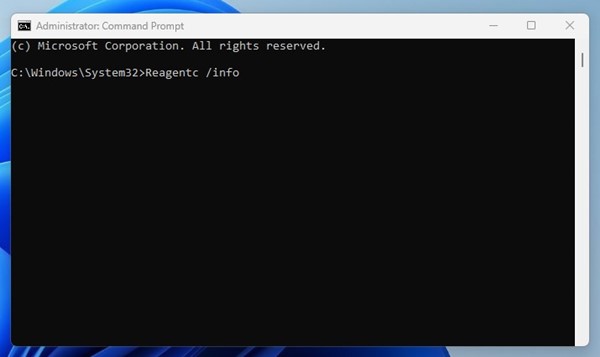
2. On the Command Prompt, type Reagentc /info and press the Enter button.
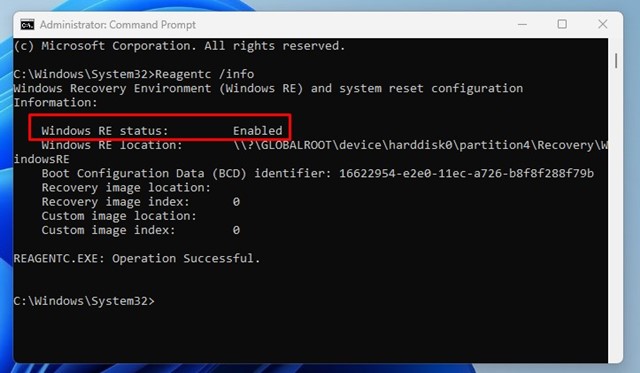
3. The above command displays Windows Recovery Environment (RE) information. You need to look at the Windows RE Status. If it says Disabled, you need to enable it.
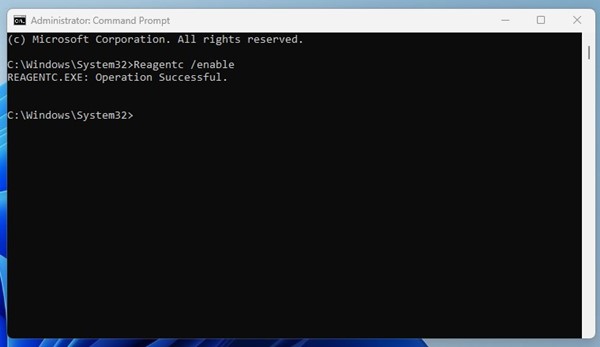
4. If Windows Recovery Environment is disabled, you must type Reagentc /enable and hit the Enter button.
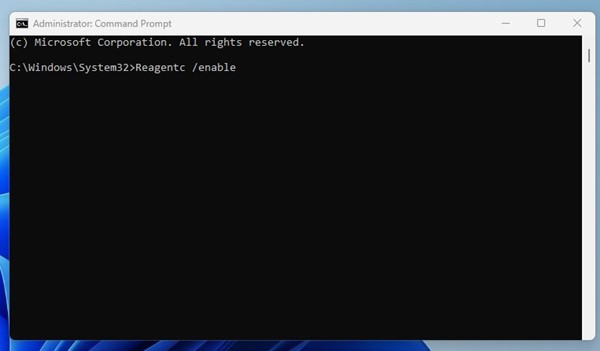
5. Upon successfully executing the command, you will see a success message, Operation Successful.
That’s it! This is how you can enable the Windows Recovery Environment on Windows 11 computer or laptop.
Also read: 10 Best Data Recovery Software for Windows 10
How to Access Windows 11 Recovery Environment?
To check whether Windows Recovery Environment has been enabled, follow these steps. Here’s how you can access Windows 11 Recovery Environment.
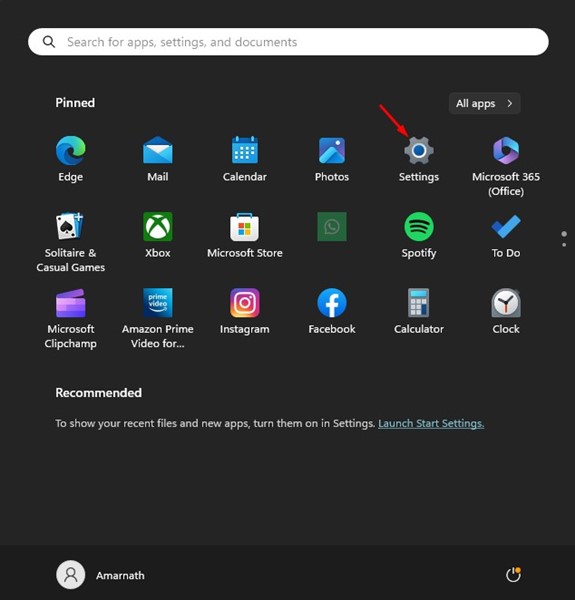
1. Click on Windows 11 Start button and select Settings.
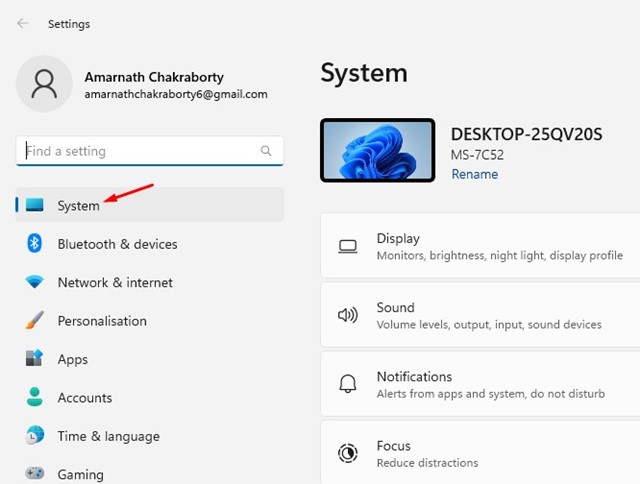
2. On the Windows 11 Settings, switch to the System tab.
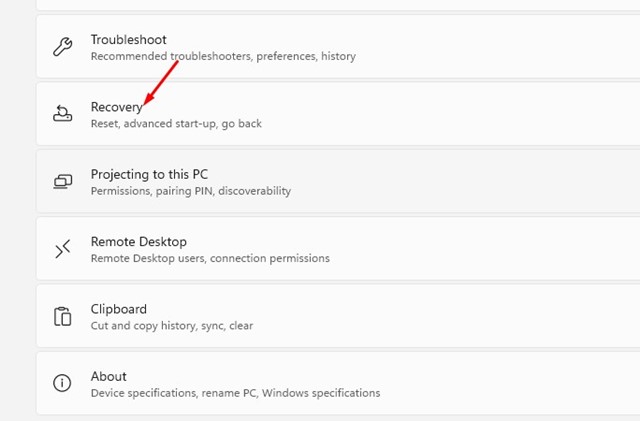
3. Now, on the right side, click on Recovery.
4. Under the Recovery options, click the Restart Now button beside Advanced Startup.
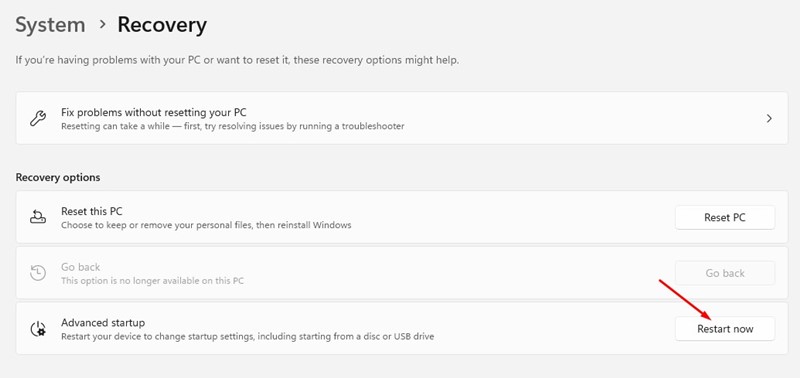
That’s it! This will restart your Windows 11 and will boot into the Recovery Environment.
Windows Recovery Environment is installed in a separate partition on your hard drive; hence, you may need to enable it manually. You can follow our shared easy steps to enable WinRE on your Windows 11 computer. If you need more help related to WinRE, let us know in the comments below.