If you are already a Windows 11 user using the 22H2 build, you are already witnessing the very useful ‘File Explorer Tabs’. Yes, the Windows 11 22H2 build has tab support for File Explorer, and it’s a very useful multitasking feature.
However, the problem is that many Windows 11 cannot find the new File Explorer tabs even after updating their Windows 11 version to build 22621.675.
Many Windows 11 users installed the latest updates to experience the new tabs in File Explorer, but some were disappointed. Many users have reported missing tabs in Windows 11 File Explorer. If you’ve been facing the same problem, here’s what you can do.
1. Make sure you are using the correct Windows 11 build
Not every build of Windows 11 has file explorer tabs. To experience the new file explorer tabs, ensure your PC runs on Windows 11 Build 22621.675 or later.
If you have installed the update delivered on October 18 – KB5019509, you should see the tabs in the file explorer. Here’s how to ensure your PC runs on Windows 11 Build 22621.675 or above.
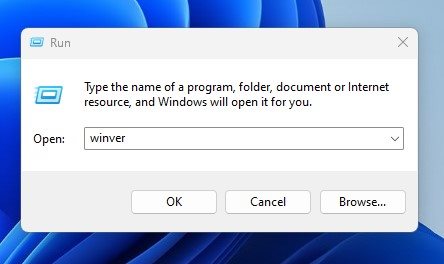
1. Press the Windows + R button on your keyboard to open the RUN Dialog box.

2. When the RUN dialog box opens, type in winver and press the Enter button.
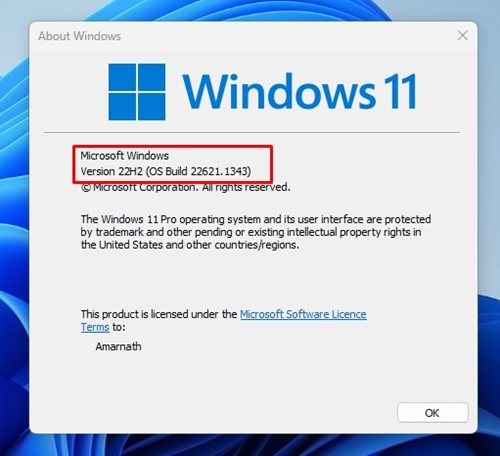
3. This will open the Above Windows app. Here, you need to check the Windows 11 version.
2. Update your Windows 11
If your PC is not running Windows 11 Build 22621.675 or above, you should update its operating system. Installing the Windows 11 22H2 update is easy. Here’s what you need to do.
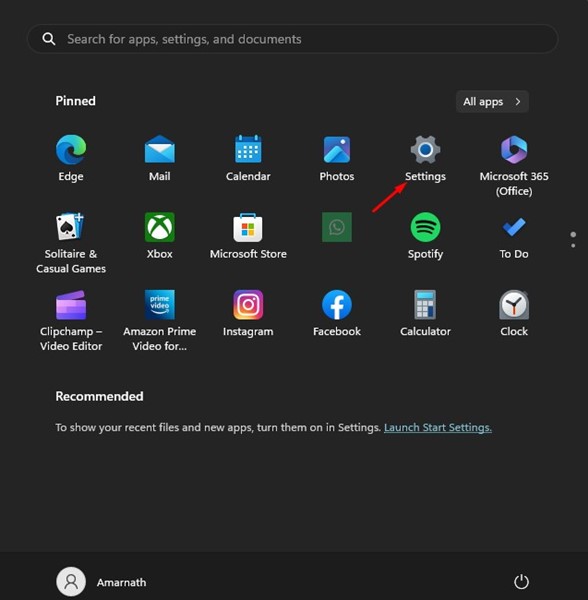
1. First, click the Windows 11 Start button and select Settings.
2. On the Settings app, switch to Windows Updates.
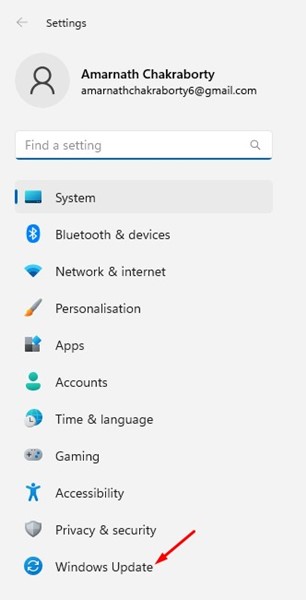
3. On the right side, click the Check for updates button.

4. Now you need to download & install all pending updates. If your PC is compatible with Windows 11 22H2, the version update will appear on the Windows update screen.
3. Restart your Windows Explorer
If you don’t restart your PC often, it’s best to restart only the Windows Explorer process from the Task Manager.
New file explorer features may fail to appear due to processes running in the background. When you restart your computer or Windows Explorer, all background processes likely preventing the File Explorer tabs from appearing will be terminated.
It’s easy to restart Windows Explorer on Windows 11. Follow the simple steps we have shared below.
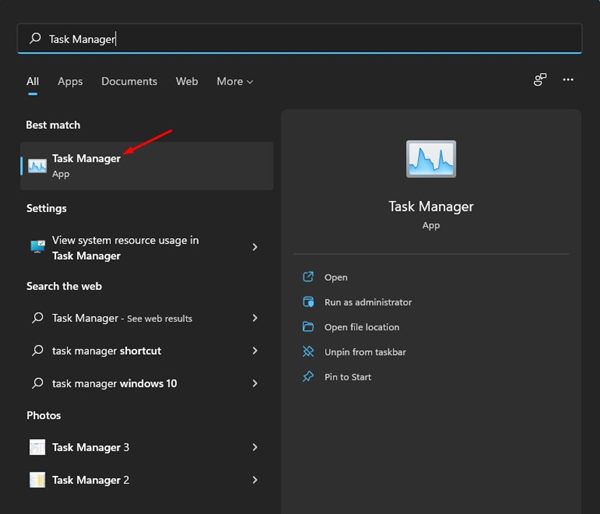
1. First, click on Windows 11 search and type in Task Manager. Next, open the Task Manager app from the list.
2. When the Task Manager opens, switch to the Processes tab.
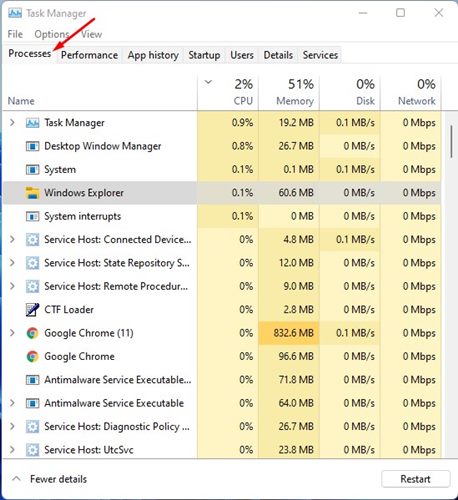
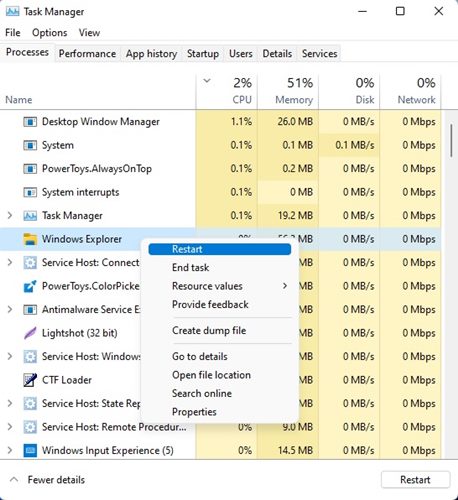
3. Find and select the Windows Explorer process on the right side. On the top-right corner, click on Restart. Or else, right-click on Windows Explorer and select Restart.
This will restart File Explorer on your Windows 11 computer. Once restarted, open File Explorer and check whether tabs are appearing.
4. Enable Tabs in File Explorer via ViveTool
Well, a method enables tabs in Windows 11 File explorer forcefully. But that requires using the ViveTool.
We have already shared a detailed guide on enabling tabs in File Explorer using ViveTool. The method requires joining Windows Insider, downloading the ViveTool ZIP file, and executing a few commands on the Command Prompt.
Follow that guide to force enable tabs in the Windows 11 File Explorer using Vivetool.
5. Clear the File Explorer Cache
If everything is right on your end, but if File Explorer tabs are still not showing in Windows 11, you must clear the File Explorer Cache.
Windows 11 22H2 file explorer tabs not showing problem may be because of a corrupted file explorer cache. Hence, you can enable Windows 11 Explorer tabs by clearing the cache file of File Explorer. Here’s what you need to do.
1. First, open File Explorer on your Windows 11. You can press the Windows + E button to open it.
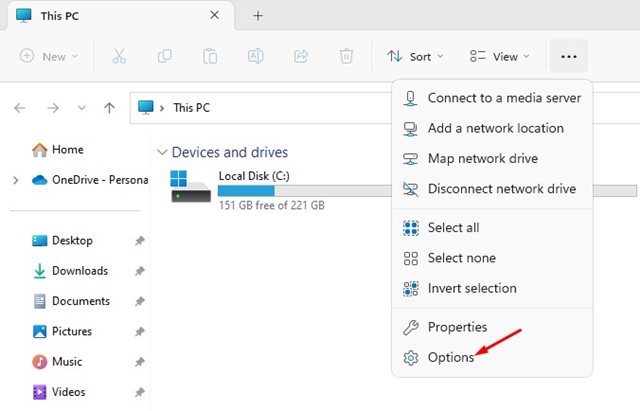
2. On the top menu, click the three dots shown in the screenshot below.

3. Select ‘Options‘ from the list of options that appear.
4. On the Folder options, switch to the General tab. Next, click on the Clear button in the Privacy section.

6. Run the SFC command
SFC or System File Checker is a utility that scans and repairs corrupted system files. If the system files that handle the functionality of File Explorer are corrupted, the tabs won’t show up.
Also, you will need help with using the features of Windows 11 File Explorer. Hence, you can run the SFC command to fix File Explorer tabs not appearing on Windows 11.
1. Click on Windows 11 search and type in Command Prompt. Next, right-click on the Command Prompt and select Run as administrator.
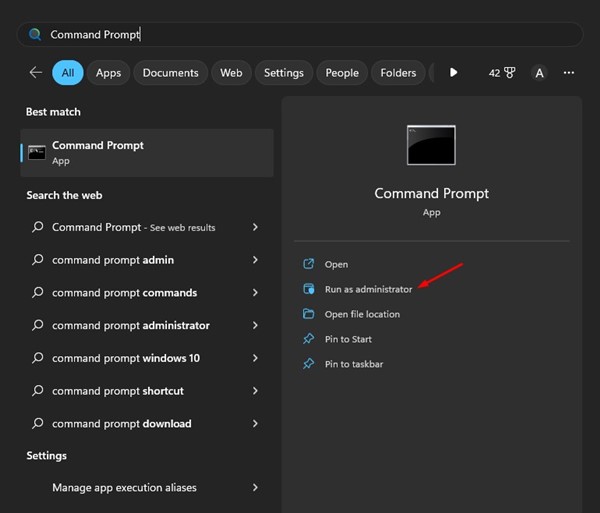
2. When the Command Prompt opens, type in the given command and press the Enter button.
SFC /scannow
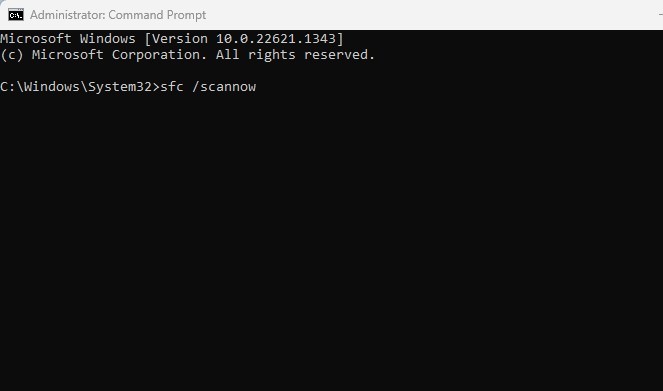
3. Now, you need to wait patiently until the scan completes.
7. Reinstall the Windows 11 22H2 Update
If you have followed every method exactly as they are described, chances are that the missing File Explorer tabs on the Windows 11 issue might be fixed. If nothing worked for you, the remaining option is to reinstall the Windows 11 22H2 update. Here’s what you need to do.
1. First, click the Windows 11 Start button and select Settings.
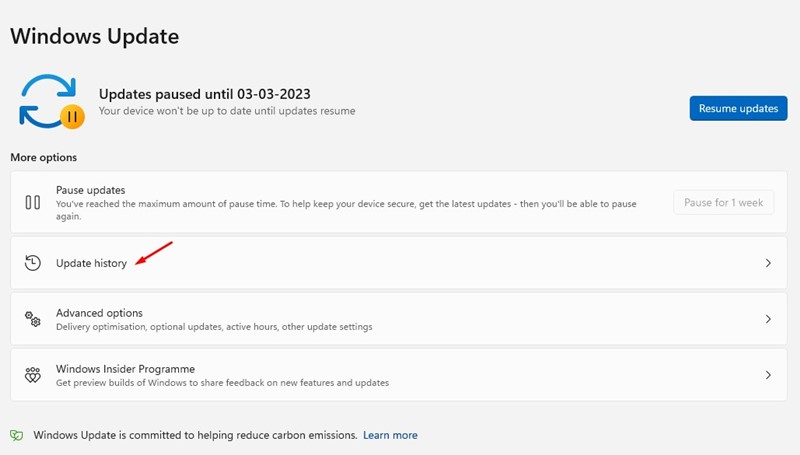
2. On Settings, switch to Windows Update.
3. Next, on the right side, click on Update history.
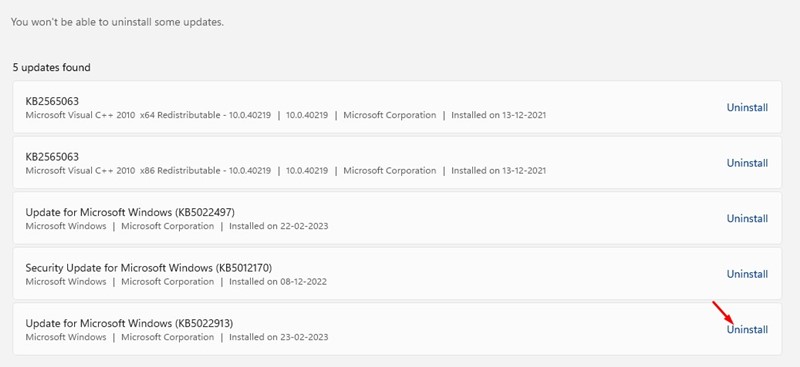
4. On the Update history screen, click on Uninstall updates.

5. Now, find the recent updates and look for the 22H2 build. Click on the Uninstall button next to it.
6. Once uninstalled, restart your computer and check for updates again. This time install the Windows 11 22H2 update again.
Also read: Windows 11 ISO Free Download
These are easy ways to fix missing file explorer tabs on Windows 11. If you need more help fixing the no file explorer tabs Windows 11 problem, let us know in the comments. Also, if the article helped you, share it with your friends.


