The Control Panel is a hub that lists many tools for accessing or adjusting various operating system settings. For example, the Control Panel allows you to access User Account Settings, Network & Sharing options, BitLocker encryption, Accessibility options, and more.
Recently, many users have reported that the Control Panel does not open after installing the Windows 11 update. If you are also experiencing such issues on your Windows 11 computer, you are reading the right guide.
How to Fix Control Panel Not Opening in Windows 11
This article will share a few of the best methods to fix the Control Panel Not opening on Windows 11 PCs. We have shared the basic methods to help you deal with almost all Control Panel related problems on your PC. So, let’s check how to fix the Control Panel not opening on Windows 11.
1. Restart the Windows Explorer
A problem with the Windows Explorer process can sometimes prevent the Control Panel from opening. To fix this, you need to restart the Windows Explorer process from the task manager. Here’s what you need to do.

- Launch the Task Manager from the Windows Search.
- When the Task Manager opens, find Windows Explorer.
- Right click on it and select Restart.
2. Restart Your PC

When you restart your PC, all processes and apps running in the background are closed. So, if any process prevents the Control Panel from opening, it will be fixed.
However, before restarting your PC, save all your tasks, as all your unsaved tasks will be lost during the restart.
3. Update Windows 11
Many Windows 11 users have claimed to resolve the issue of the Control Panel not opening by updating their operating system.
There is a chance that the version of Windows 11 you’re using has a bug or glitch that may be preventing the Control Panel from opening. Hence, updating your Windows 11 PC is recommended. Here’s how to update Windows 11.
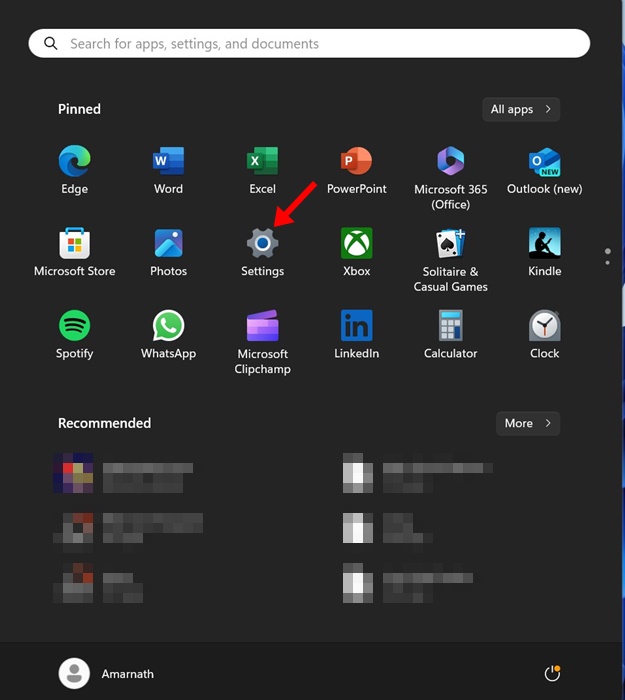
1. Click on the Windows 11 Start button and select Settings.
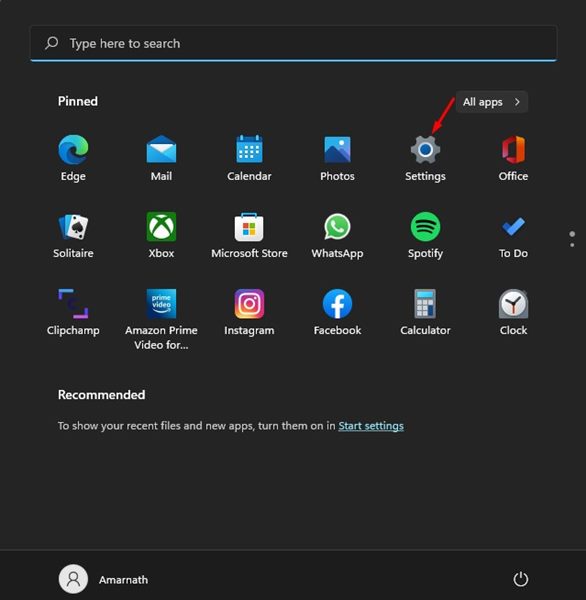
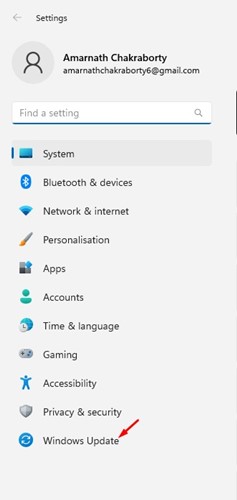
2. When the Settings app opens, switch to the Windows Update tab.
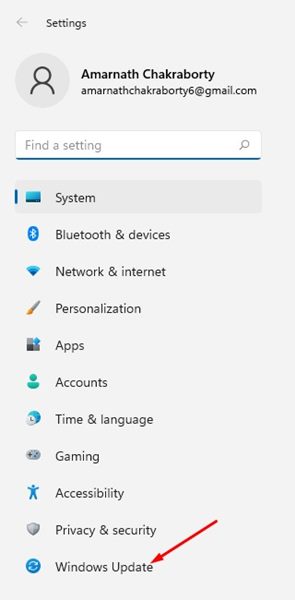
3. On the right side, click the Check for Updates button.

4. If any update is available, click the Download & Install button.
4. Open the Control Panel using the Run command
If you cannot open the Control Panel from the Windows Search, you can use a run command to run it. Here’s how to open Control Panel on Windows 11 using the Run command.
1. Press the Windows Key + R button on your keyboard.
2. This will open the Run dialog box. Type appwiz.cpl and press Enter.
This will directly open the Control Panel on your Windows 11 computer. You can now uninstall programs.
5. Uninstall the Newly Installed app
If the Control Panel does not open after you install a new app on your system, uninstall it as soon as possible. Some apps may interfere with its functioning and prevent it from starting.
If you can’t recall the apps you have recently installed on your system, go through the App settings and manually review the apps. If possible, remove all suspicious apps that you feel are linked with the Control Panel.
6. Check the Important Windows Services
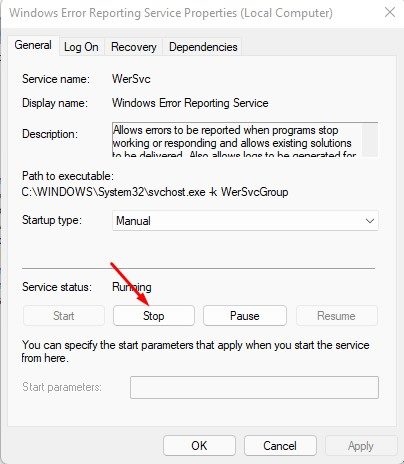
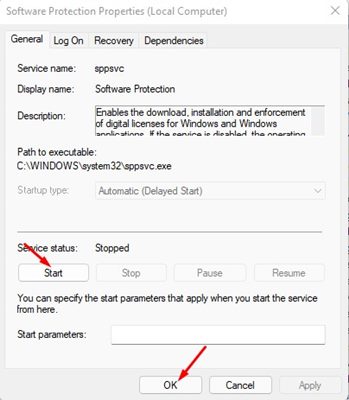
The Windows Error Reporting service sometimes prevents the Control Panel from opening on Windows 11. In addition to the Windows Error Reporting service, the service sppsvc is often responsible for the Control Panel not opening on Windows 11. Here are a few things you need to check.
1. First, click on the Windows 11 Search and type in Services. Next, click on the Services app from the list.
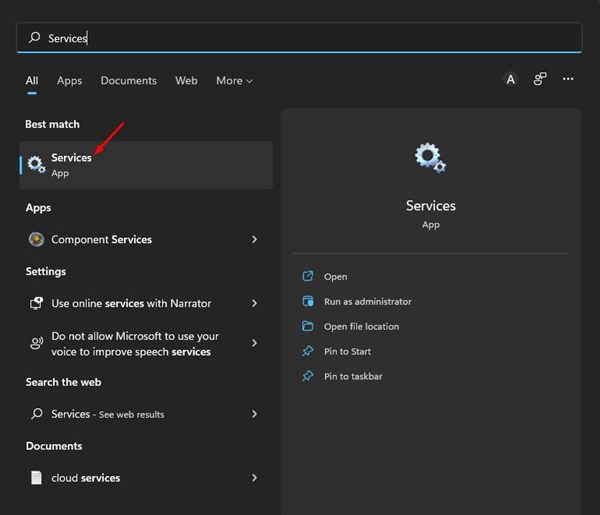
2. On the Services, find and double-click on the Windows Error Reporting service.
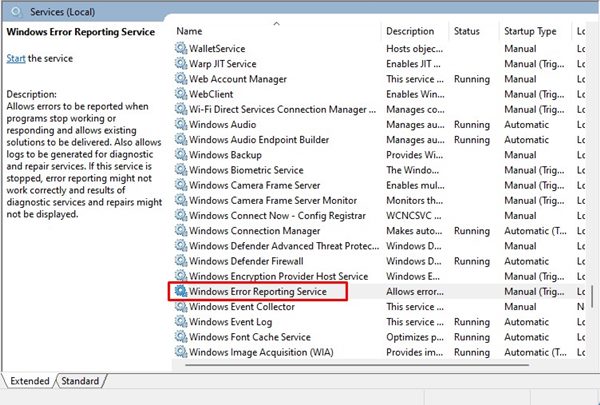
3. On the Windows Error Reporting Service Properties, click the Stop button and then the OK button.
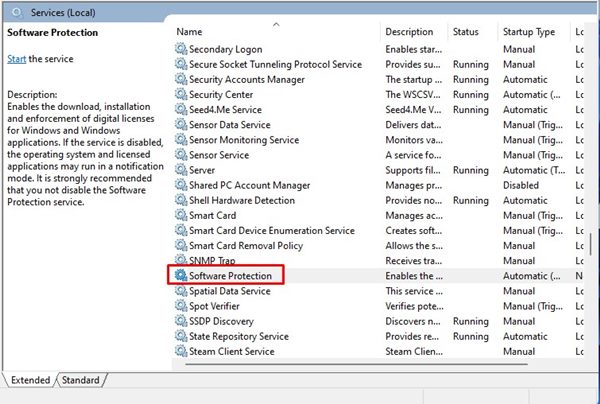
4. Next, find the Software Protection service and double-click on it.
5. On the Software Protection Properties, click Start under the Service Status and the OK button.
After making the above changes, restart your Windows 11 PC to fix the Control Panel not opening problem.
7. Delete the BagMRU and Bags Registry Key
If the Control Panel is still not opening after following the above methods, you must change the Windows Registry. Please create a restore point or export the registry file so that you can restore it later if anything goes wrong.
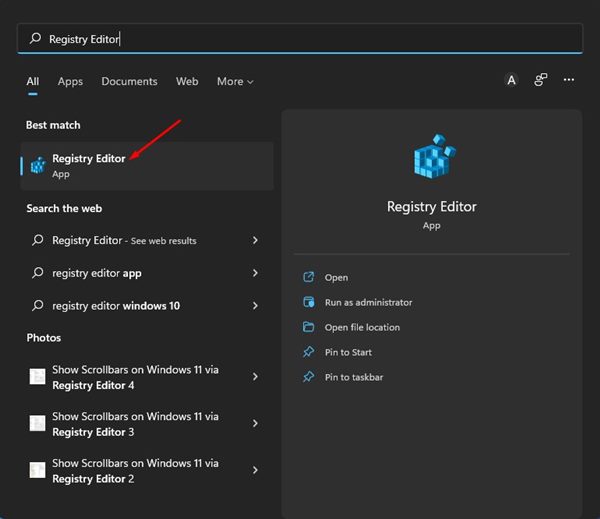
1. First, click on the Windows 11 search and type in Registry. Next, open the Registry Editor from the list.
2. On the Registry Editor, navigate to the following path:
HKEY_CURRENT_USER\Software\Classes\Local Settings\Software\Microsoft\Windows\Shell
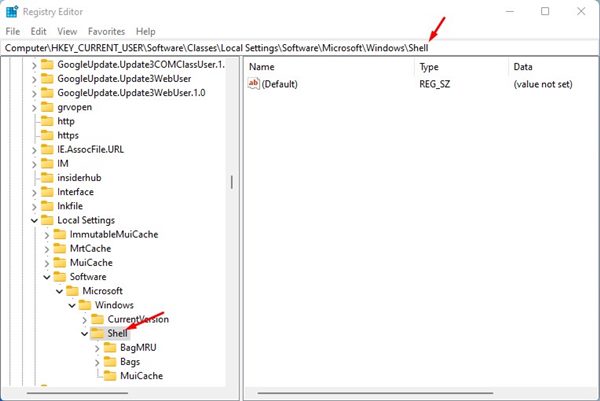
You can copy and paste the path on the Address bar of Registry Editor to jump to the folder directly.
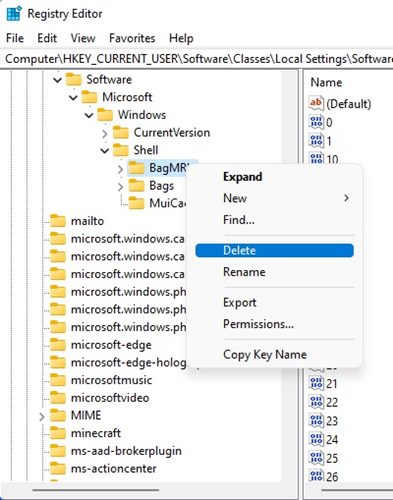
3. Now, right-click on the BagMRU key under the Shell folder and select the Delete option.
4. Next, right-click on the Bags registry key under the Shell folder and select the Delete option.
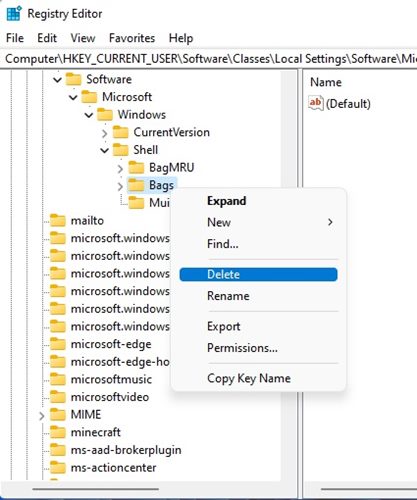
After deleting the two folders, restart your PC. This will probably fix the Control Panel problem on Windows 11 computers.
8. Check the Local Group Policy Settings
In this method, we will make a few changes to the Local Group Policy editor to enable the Control Panel on the Windows 11 operating system. Follow some of the simple steps we have shared below.
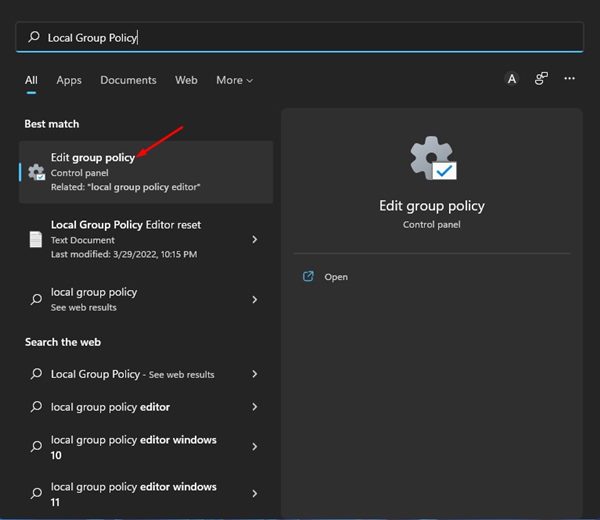
1. First, click on the Windows 11 search and type in Local Group Policy. Next, click on the Local Group Policy Editor from the list of options.
2. On the Local Group Policy Editor, navigate to the path:
User Configuration > Administrative Templates > Control Panel
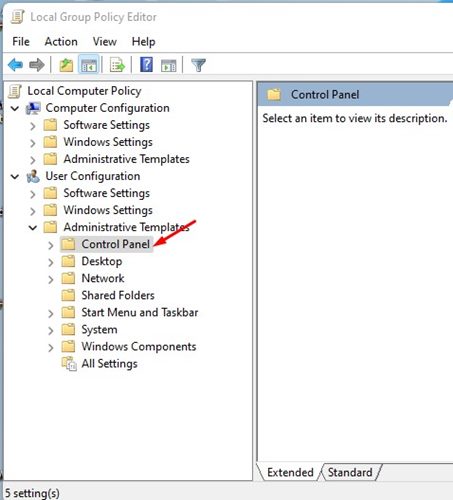
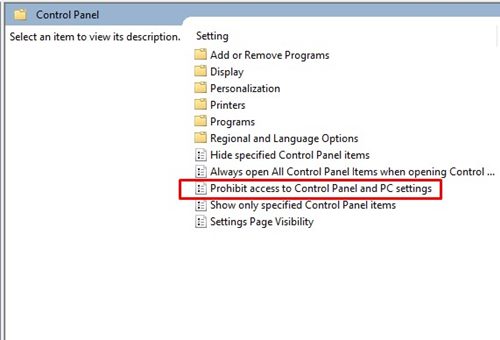
3. Now select the Control Panel folder, and on the right pane, double-click on the ‘Prohibit access to Control Panel and PC Settings’ policy.
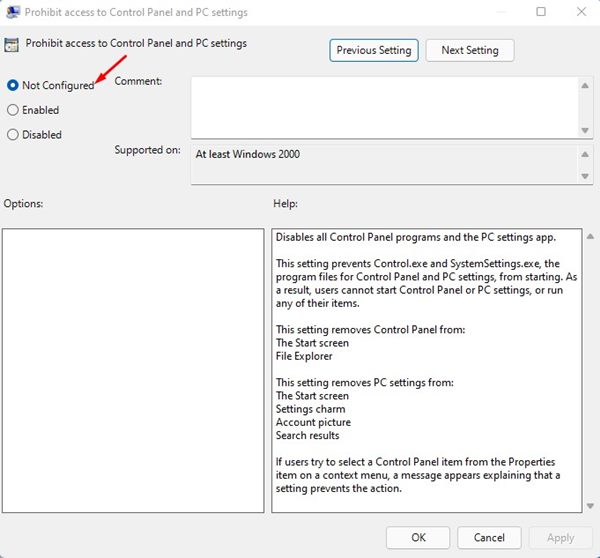
4. In the Prohibit access to Control Panel and PC Settings window, select Not configured and then click the Apply button. Once you’ve done this, click the OK button to close the window.
After making the above changes, restart your Windows 11 PC to fix the Control Panel not opening on Windows 11.
9. Run a Full Virus/Malware Scan
If you often download files from the internet, there is a higher chance that your PC is infected with viruses, malware, or spyware that may prevent you from accessing the Control Panel.
So, run a full PC scan before you proceed to the next methods. The built-in Windows Security app can run the full PC Scan.
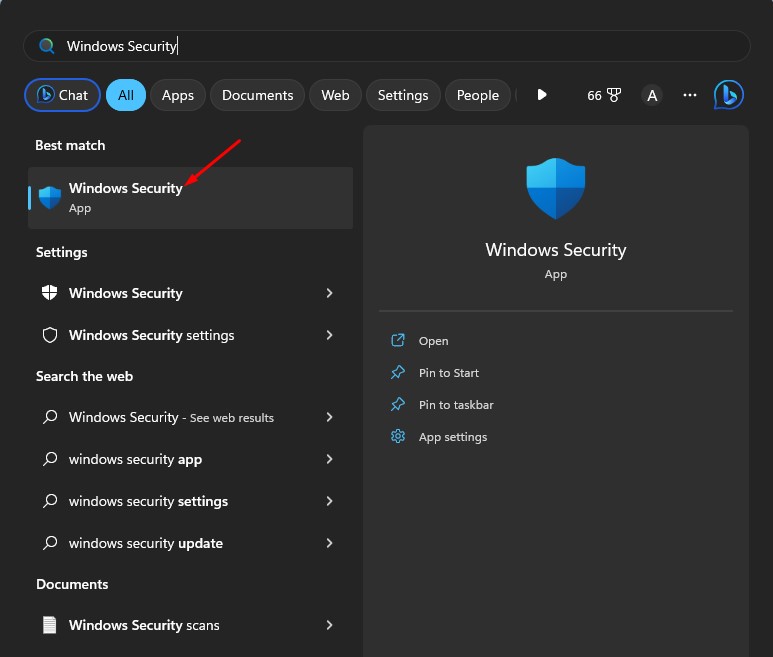
1. Click on Windows Search and type in Windows Security. Open the Windows Security app from the list.
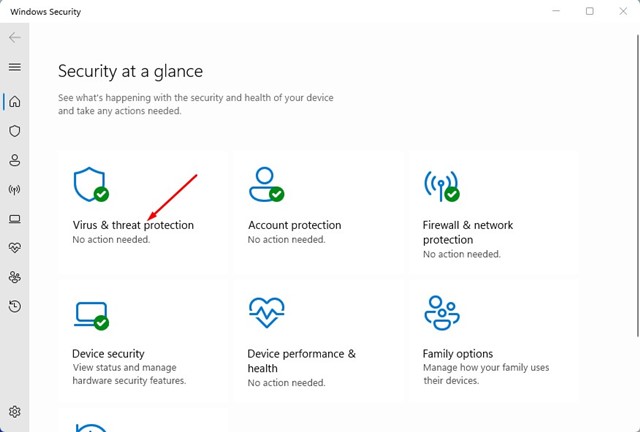
2. When the Windows Security app opens, click on Virus & Threat Protection.
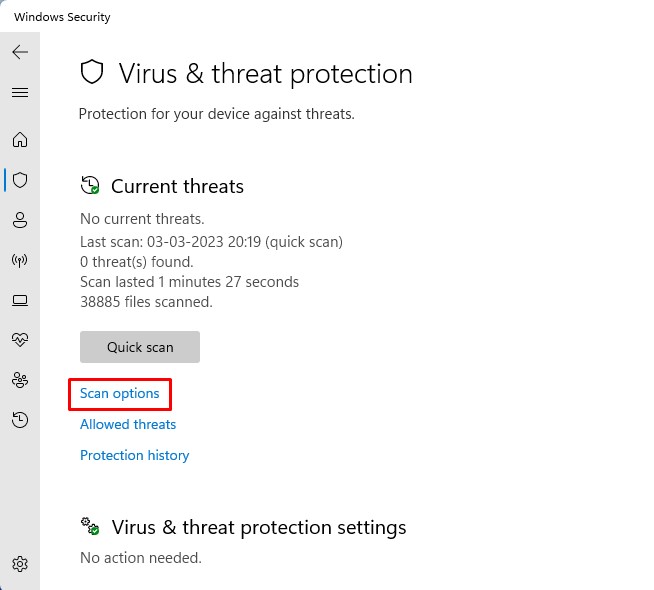
3. On the Virus & threat protection, click on the Scan options.
4. Now select Full Scan and click on Scan Now.
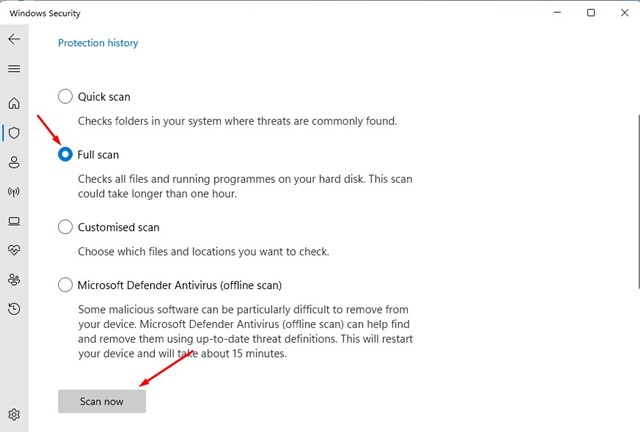
That’s it! Wait until Windows 11 scans your PC for hidden viruses/malware.
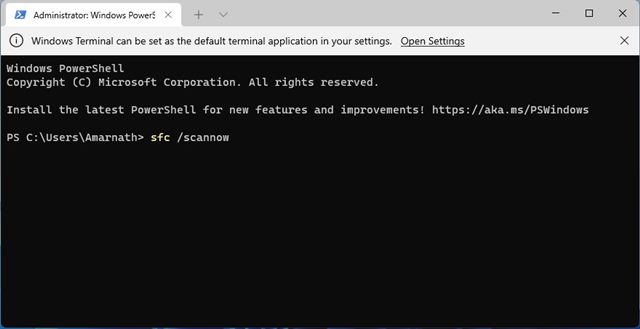
10. Run SFC and DISM Command
System file corruption is another prominent reason why the Control Panel is not opening on Windows 11. Hence, you must run both SFC and DISM commands on your Windows 11 to fix the issue of the Control Panel not opening. Here’s what you need to do.
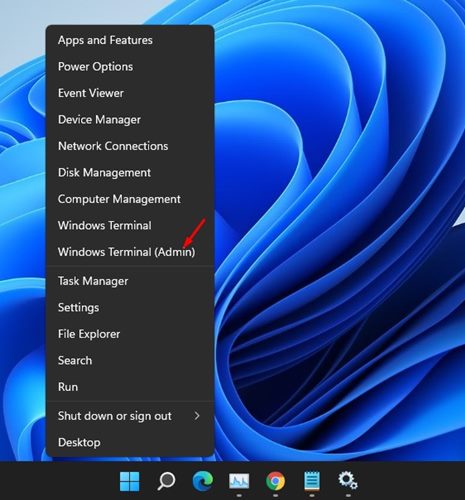
1. Right-click the Windows 11 Start Button and select Windows Terminal (Admin).
2. On the Windows Terminal, type in sfc /scannow and hit the Enter button on your keyboard.
3. If the SFC commands find any problem, you must run the DISM command. To run the DISM command, you need to re-run the Windows Terminal and execute the three commands we have shared:
DISM /Online /Cleanup-Image /CheckHealth
DISM /Online /Cleanup-Image /ScanHealth
DISM /Online /Cleanup-Image /RestoreHealth
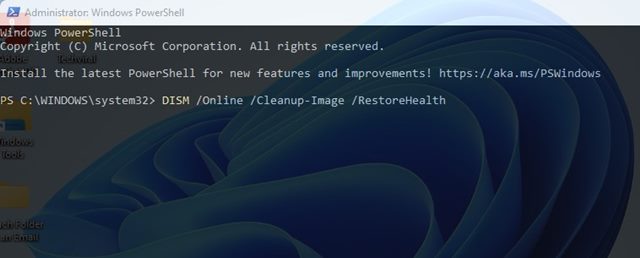
This is how you can run the SFC and DISM commands on Windows 11 to fix the Control Panel not opening problem.
11. Reset Windows 11
If you can afford to lose your saved settings, the best option to fix the Control Panel not opening issue is the system reset.
Many users on the Microsoft Forum have claimed to resolve Control Panel not opening Windows 11 issue just by resetting their device to factory state.
So, if nothing has worked to fix your Control Panel not opening issue, Resetting Windows 11 could be your last resort. Here’s how to reset Windows 11.
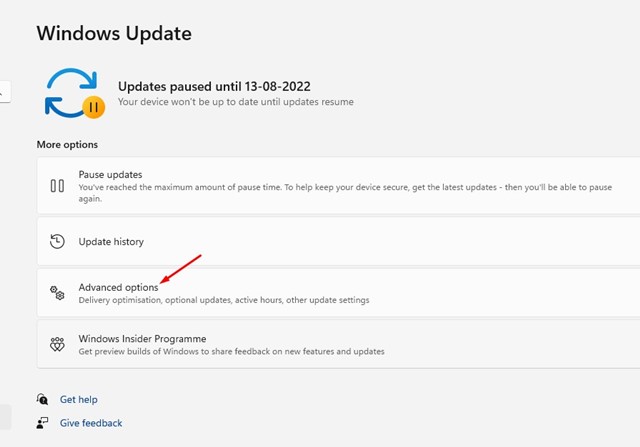
1. Open the Settings app on your Windows 11 PC.
2. When the Settings app opens, switch to the Windows Update.
3. On the right side, click on Advanced options.
4. On the Additional options, click Recovery.
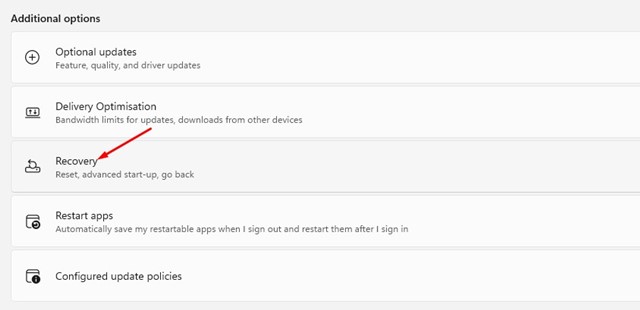
5. On the Recovery options, click on Reset PC button.
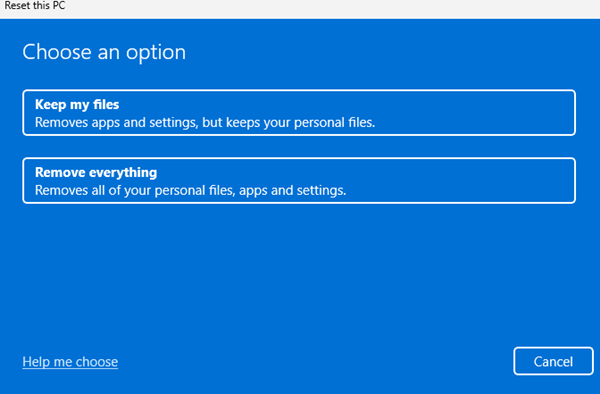
6. On the Choose an option Window, select Keep My Files.
7. On the next screen, select Cloud Download.
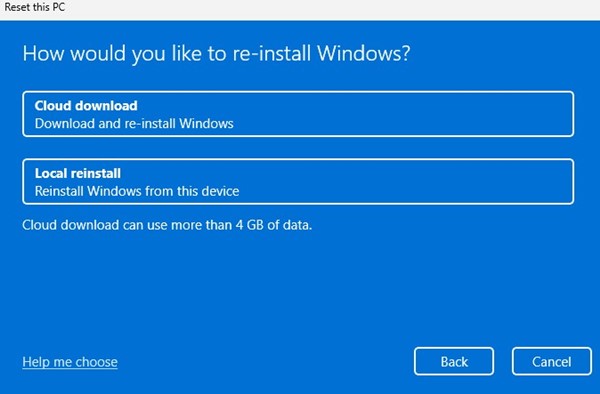
Finally, click the Reset button on the Ready to Reset this PC screen. This will reset your Windows 11 to factory settings.
If the problem remains unresolved, you must raise a question in the Microsoft Support forum. Otherwise, you must look for ways to reset or reinstall Windows 11 on your PC. I hope this article helped you! Please share it with your friends, too. If you have any doubts, let us know in the comment box below.


