DNS or Domain name system is a database consisting of different domain names and their IP Address. Whenever you enter a URL on the web browser, the DNS servers look for the IP Address associated with the domain name.
It matches the IP Address with the domain and comments to the webserver of the visiting site. Therefore, DNS plays a vital role in connecting to the website. However, sometimes users get DNS issues like DNS not found, DNS server not responding, etc.
These errors occur mostly due to outdated or corrupted DNS cache. So, if you are also getting DNS errors and unable to access the internet, then you have landed on the right page.
8 Methods to Fix DNS Errors and Regain Access to the Internet
In this article, we are going to share some of the best methods to fix DNS errors and regain access to the internet.
1. Flush the DNS Cache (Windows, MAC, Linux)
The computer tends to save up the website link or the URLs that you visit. This thing is done to prevent searching for the DNS every time. This is stored on your computer in the form of caches.
So, if the Cache is outdated or corrupted, you would get DNS-related errors. So, in this method, we are going to remove the DNS cache to regain access to the internet.
Flush DNS Cache in Windows
To flush DNS cache on Windows Computer, open command prompt, type in “ipconfig /flushdns” and then hit the enter button. This will flush away all the DNS cache from your Windows computer.

Flush DNS Cache in MAC
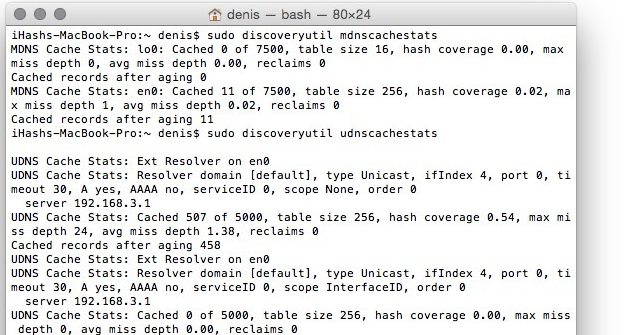
To execute the same command in Mac OS X, enter the command “dscacheutil -flushcache; sudo killall -HUP mDNSResponder” (OSX 10.10.4+) or “sudo discoveryutil mdnsflushcache; sudo discoveryutil udnsflushcache;” (OSX 10.10.10.10.3) in the terminal app and hit up enter.
Flush DNS Cache in Linux
In Linux type in the command “/etc/init.d/nscd restart” in the command window and then hit enter.

2. Disable Unused Networks
If you have multiple networks on your Windows computer then you need to disable It. Windows operating system creates extra connections even if you never use them. However, this type of network often causes problems.
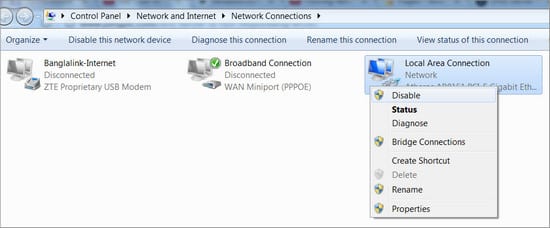
To Disable the unused networks on your Windows computer, you need to open the start menu and then type in “ncpa.cpl” and then press enter. This will open up the network connections settings. Here you need to disable all the other networks.
3. Reinstall the Network adapter drivers
Well, some users have claimed that they have fixed DNS errors and regained access to the internet by reinstalling their network adapter drivers. So, in this method, users need to reinstall the network adapter drivers to fix DNS-related errors. Follow some of the simple methods given below to reinstall the Network adapter drivers.
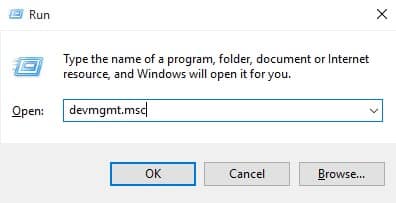
1. Press Windows Key + R on your keyboard to open the Run dialog box. On the Run Dialog box, type in ‘devmgmt.msc’ and hit enter.
2. Now on the Device Manager page, expand the ‘Network adapter’ option.
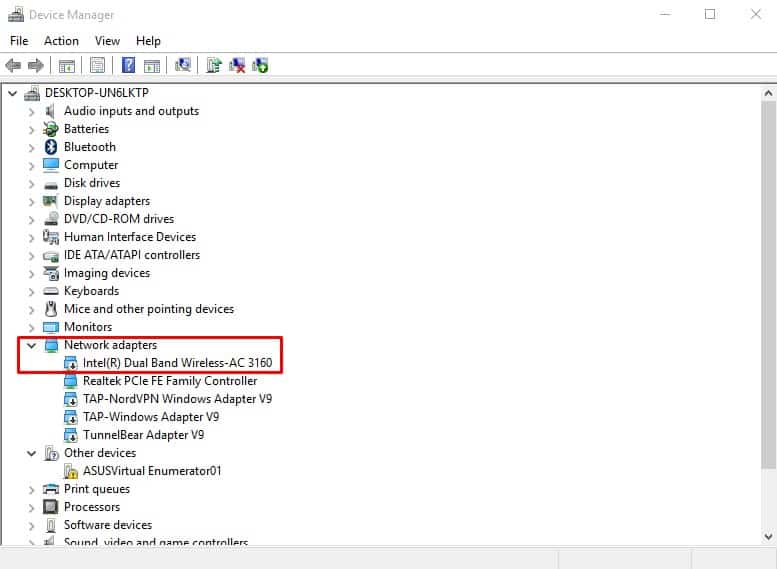
3. Right-click on the current network adapter and select ‘Uninstall’
That’s it, you are done! Now just restart your Windows 10 computer to fix DNS errors and regain access to the internet.
4. Unplug your Router
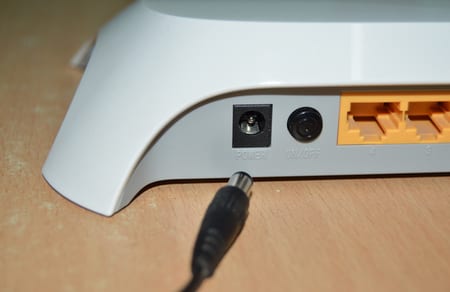
If you have a router that is attached to the power source and your computer then you need to unplug it for at least 1 minute. Simply remove the power source and unplug the router from your computer for 1 minute and then plugin.
By doing this, your router will clear all the memory and release the residual charge. Now see if the problem is solved or not.
5. Using Public DNS Server
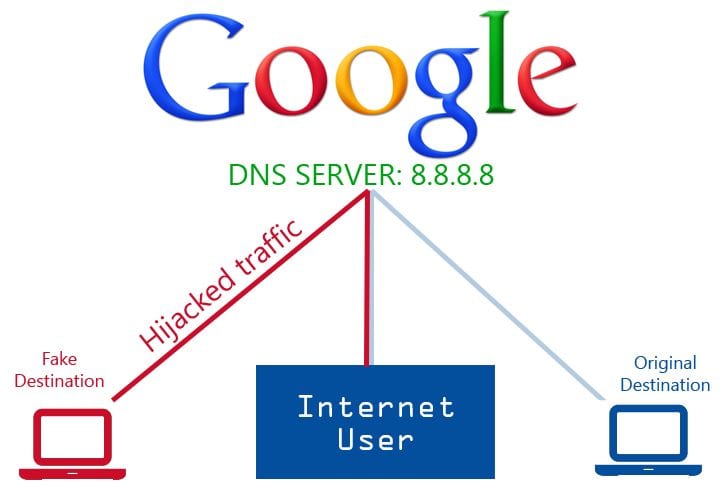
Try to change up your server as the issue may be prevailing because of your server being dead or not working correctly. Just change your server for example “8.8.8.8″ to “8.8.4.4” from the settings of your web browser.
Try to change up the adapter settings too for the DNS server instead of using up the default one.
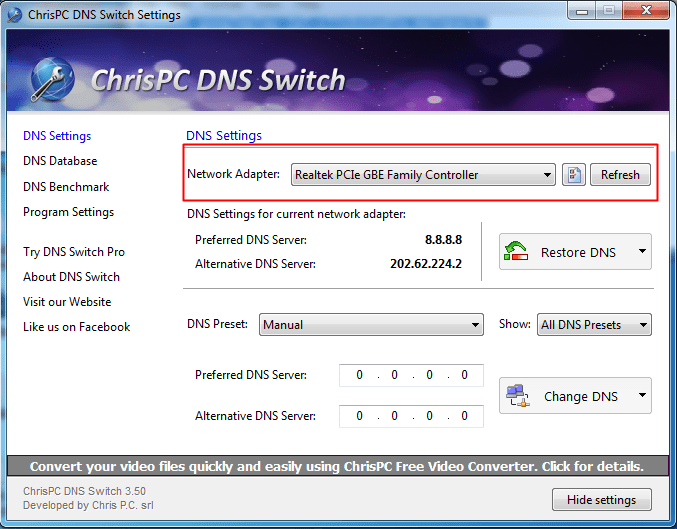
6. Using Chris-PC DNS Switch
Well, this is one of the best tools which help a user to change their DNS address. This tool is designed to make DNS change easier and faster. It had different sets of DNS preloaded which you can apply on your computer.
1. First of all, you need to download and install the Chris-PC DNS switch on your Windows computer and then launch the app.
2. Here you need to select your connected network under the Network Adapter drop-down menu.
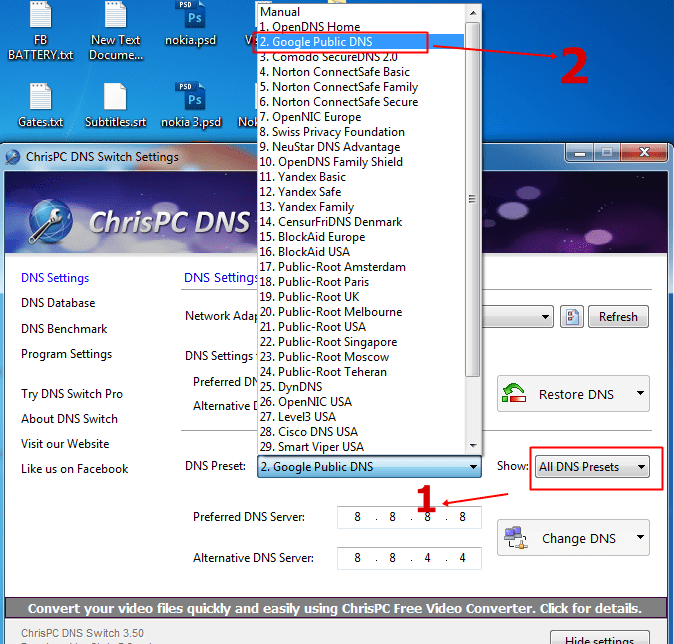
3. Now you need to select the DNS Preset. Here you will get to see lots of options to choose from. Just choose the options Google Public DNS from the drop-down. You can also choose Open DNS or others from the drop-down.
4. Finally, click on Change DNS to use the new DNS settings on your computer.
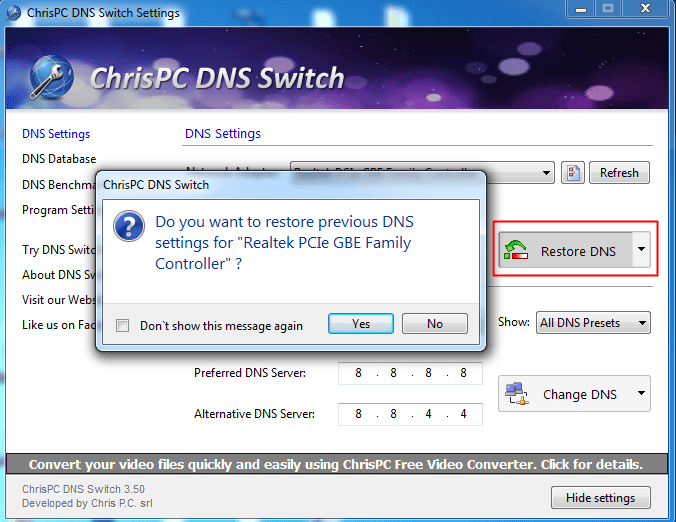
That’s it, you are done! This is how you can use ChrisPC DNS Switch to change DNS on your computer.
7. Switch to the Fastest DNS Server
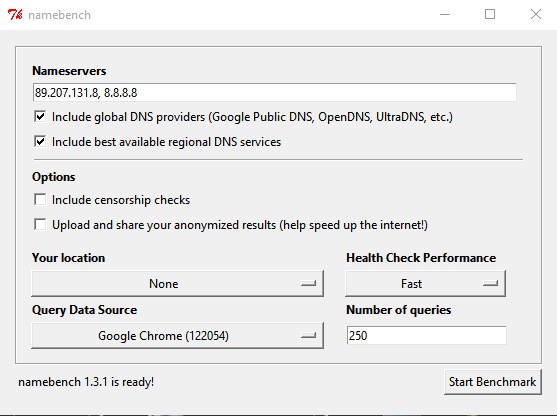
Well, if you are connected to a slow DNS server, you might experience connection drop issues. So, it’s best to find and connect to the fastest DNS server.
It’s pretty easy to find the fastest DNS server for Windows 10. For that, you need to use a free tool called Namebench.
We have shared a detailed guide on how to find the fastest DNS server for your PC. You need to follow that guide to switch to the fastest DNS server based on your location.
8. Disable your Computer’s Security Firewalls

Sometimes, firewall and Antivirus programs conflict with the DNS, leading to various DNS errors. So, in this method, you need to disable the Firewall and Antivirus program to check whether the DNS problems were fixed or not. If it’s working without a firewall and Antivirus, then you need to check the firewall & security settings.
So, this article is all about how to fix DNS errors and regain access to the internet. I hope this article helped you! Share it with your friends also. If you have any doubts related to this, let us know in the comment box below.


