Let’s admit, while browsing the web, we often came across a site that doesn’t load. Even though the site seems to be working fone on other devices, it fails to loads on PC. This mostly happens due to outdated DNS cache or DNS cache corruption.
The new operating system from Microsoft, Windows 11, is not entirely free from bugs and errors. Many Windows 11 users have claimed that they are having problems accessing some websites or apps. So, if you are also running Windows 11 and facing problems while accessing websites or apps, you are reading the right article.
Steps to Flush DNS Cache in Windows 11
In this article, we will share a few best methods to flush DNS cache in Windows 11. Flushing Windows 11 DNS cache can fix most of the internet connectivity issues.
So, let’s check out how to flush the DNS cache in Windows 11.
1. Flush DNS Cache via CMD
In this method, we are going to use the Windows 11 CMD to flush the DNS cache. Follow some of the simple steps given below.
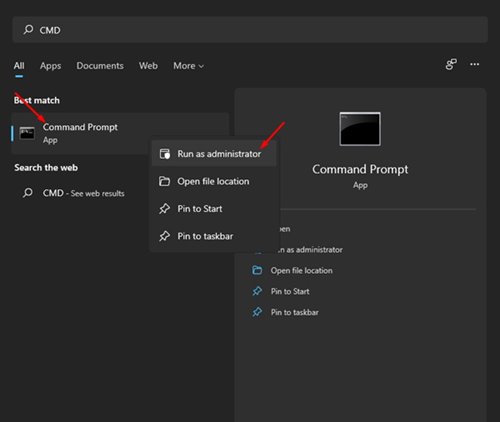
Step 1. First of all, open the Start menu and type in ‘CMD.’ Right-click on the CMD and select ‘Run as administrator’
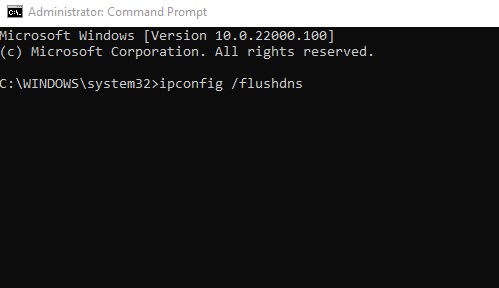
Step 2. On the Command Prompt, you need to execute the following command and hit the Enter button.
ipconfig /flushdns
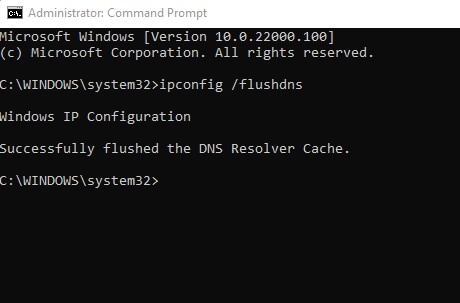
Step 3. Once executed, you will get a message saying the task is successful.
That’s it! You are done. This is how you can flush Windows 11’s DNS Cache via Command Prompt.
2. Flush Windows 11 DNS Cache using PowerShell
Just like the Command Prompt, you can even utilize the PowerShell to flush the DNS Cache. You need to implement some of the simple steps given below.
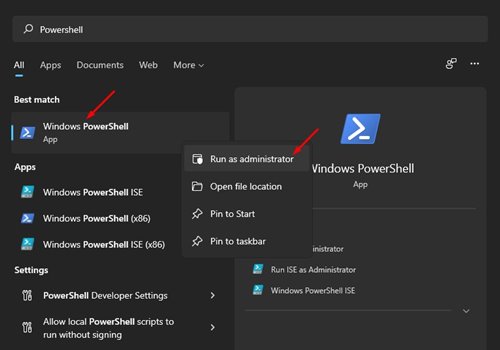
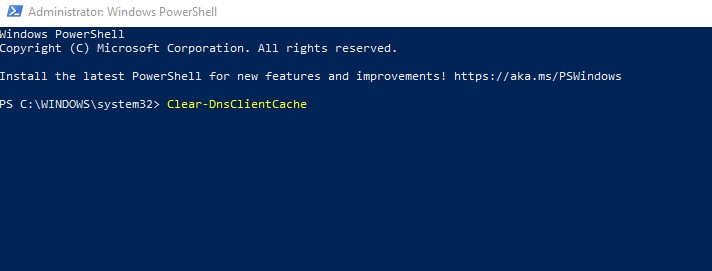
Step 1. First of all, open Windows search and type in ‘PowerShell.’ Then, right-click on Windows Powershell and select the ‘Run as Administrator’ option.
Step 2. On the PowerShell Window, copy and paste the following command and hit the Enter button.
Clear-DnsClientCache
That’s it! You are done. This is how you can clear the DNS cache of your Windows 11 computer.
3. Flush DNS Cache using RUN Command
In this method, we will use the Run dialog box to flush the DNS cache in Windows 11. Just follow some of the simple steps given below to flush DNS Cache.
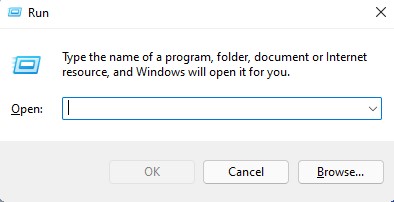
Step 1. First of all, press Windows Key + R on your keyboard. This will open the Run dialog box.
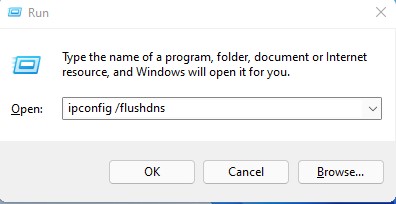
Step 2. On the Run dialog box, enter ‘ipconfig /flushdns’ and hit the Enter button.
That’s it! You are done. The above command will flush the DNS cache on Windows 11.
4. Clear DNS Cache in Chrome
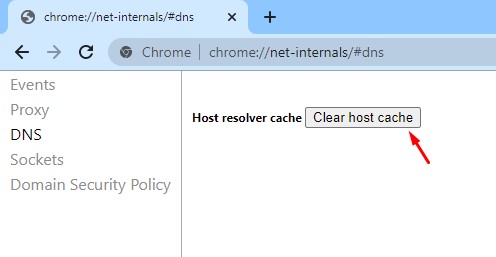
Well, few Windows apps like Google Chrome maintain their own DNS Cache. The DNS Cache of Chrome is different from the DNS Cache stored on your OS. So, you would need to clear the DNS Cache of the Chrome browser as well.
Step 1. First of all, open the Google Chrome web browser.
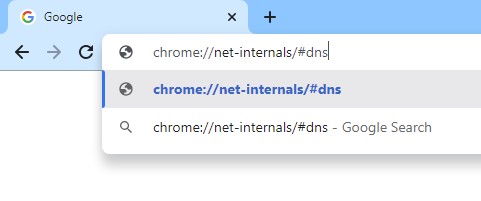
Step 2. On the URL Bar, enter chrome://net-internals/#dns and hit the Enter button.
Step 3. On the landing page, click on the ‘Clear host cache’ button.
That’s it! You are done. This is how you can flush DNS Cache in Windows 11.
So, this guide is all about how to flush DNS Cache in Windows 11. I hope this article helped you! Please share it with your friends also. If you have any doubts related to this, let us know in the comment box below.
