Let’s admit, we all have some private photos stored on our laptop/computer that we don’t want to share with others. However, there are times when we have to lend our personal laptops to others. No matter what content you keep on your computer, you will always find reasons to hide certain files, folders, or photos.
Although you can easily hide files and folders by using vault apps, what about the photos & videos? The Windows 10 operating system allows users to hide files & folders, but hiding isn’t as secure as password protection.
Also Read: 10 Best Cartoon or Sketch Making Software for PC
3 Best Methods to Lock Photos in Windows 10
When it comes to protecting private photos & videos, password protection is always the best option. So, in this article, we have decided to share a detailed guide on how to hide and lock photos on Windows 10. You can implement the two methods to hide other file types like PDF files, Video files, Document Files, etc. Let’s check out.
1. Hide Photos from the File Explorer
Windows 10 operating system allows you to hide files & folders. For that, you don’t even need to install any additional app. Just follow the simple steps given below.
1. First of all, locate the photo you want to hide.
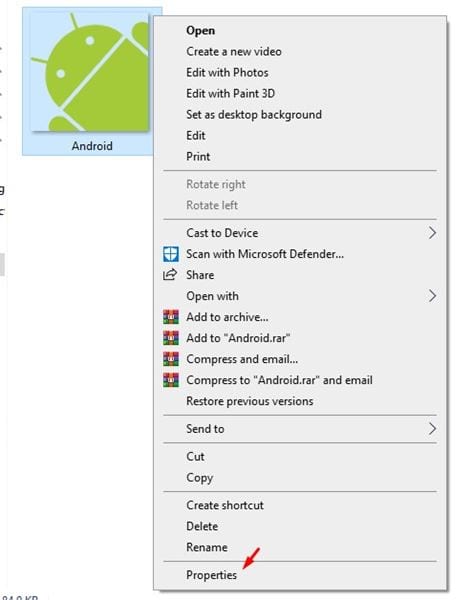
2. Right-click on the photo and select ‘Properties’
 3. Under the Attributes, select ‘Hidden’
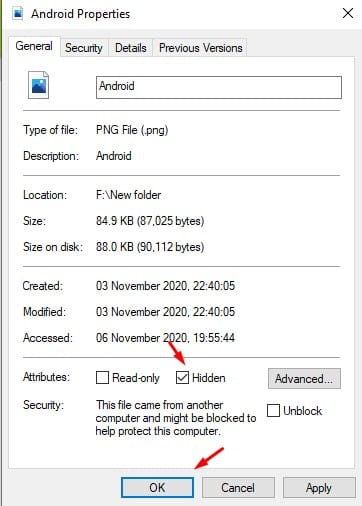 4. Once done, click on the ‘Ok’ button.
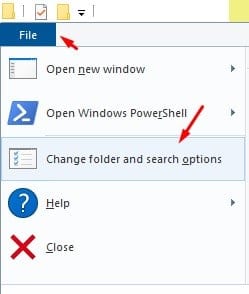
5. The photo will be hidden. To bring back the photo, click on the ‘File > Change Folder and search options’.
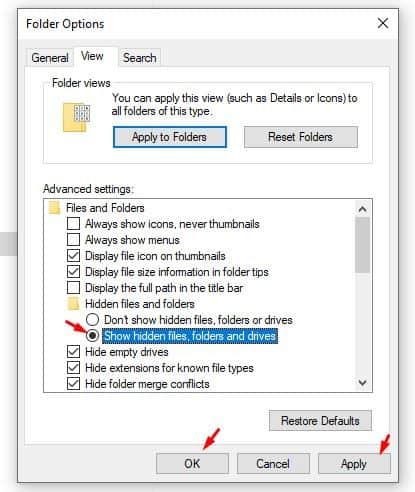
6. Now select the ‘View’ tab and enable the ‘Show hidden files, folders and drives’
 7. Select ‘Read-only’ under the photo attributes to unhide the photo.

That’s it! You are done. This is how you can easily hide photos on Windows 10.
2. Lock & Hide Photos via CMD
To lock photos on Windows 10, you need to follow some simple steps given below. The process will be lengthy, so make sure to follow each step carefully.
1. First of all, right-click inside the folder you want to hide and select New > Text Document.

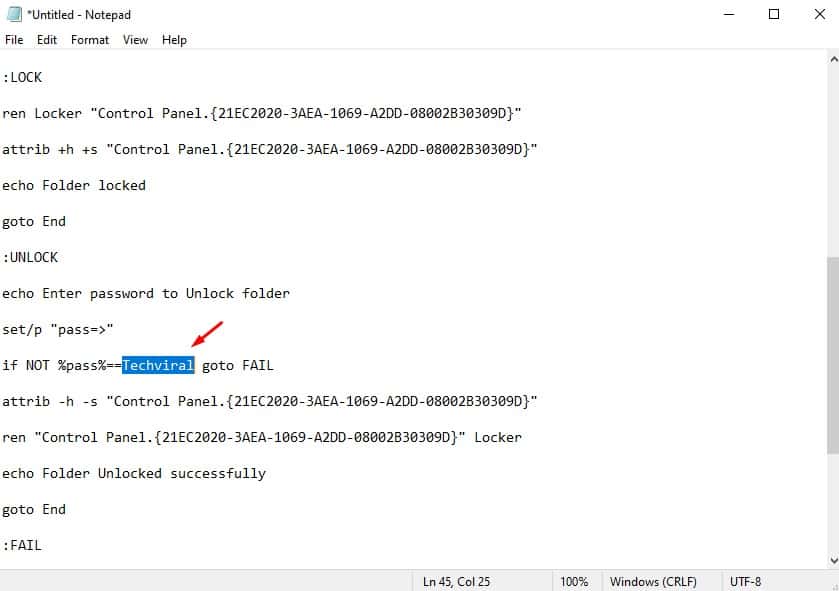
2. Name the text file whatever you want. Now paste the below text into the text file.
cls
@ECHO OFF
title Folder Locker
if EXIST "Control Panel.{21EC2020-3AEA-1069-A2DD-08002B30309D}" goto UNLOCK
if NOT EXIST Locker goto MDLOCKER
:CONFIRM
echo Are you sure u want to Lock the folder(Y/N)
set/p "cho=>"
if %cho%==Y goto LOCK
if %cho%==y goto LOCK
if %cho%==n goto END
if %cho%==N goto END
echo Invalid choice.
goto CONFIRM
:LOCK
ren Locker "Control Panel.{21EC2020-3AEA-1069-A2DD-08002B30309D}"
attrib +h +s "Control Panel.{21EC2020-3AEA-1069-A2DD-08002B30309D}"
echo Folder locked
goto End
:UNLOCK
echo Enter password to Unlock folder
set/p "pass=>"
if NOT %pass%==Techviral goto FAIL
attrib -h -s "Control Panel.{21EC2020-3AEA-1069-A2DD-08002B30309D}"
ren "Control Panel.{21EC2020-3AEA-1069-A2DD-08002B30309D}" Locker
echo Folder Unlocked successfully
goto End
:FAIL
echo Invalid password
goto end
:MDLOCKER
md Locker
echo Locker created successfully
goto End
:End
Note: Replace ‘Techviral’ with the password you want to set.
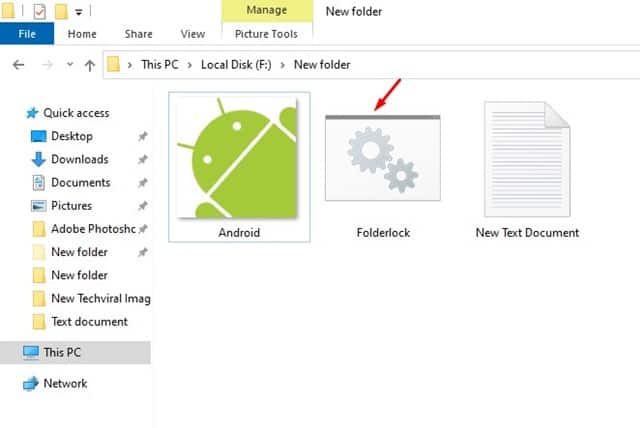
3. Once done, click on File > Save As. Under the Save as type, select ‘All Files’ and name the file name to ‘Folderlock.bat’

4. Once done, click on the ‘Save’ button.
5. Now, double-click on the FolderLock file to enable the folder lock.
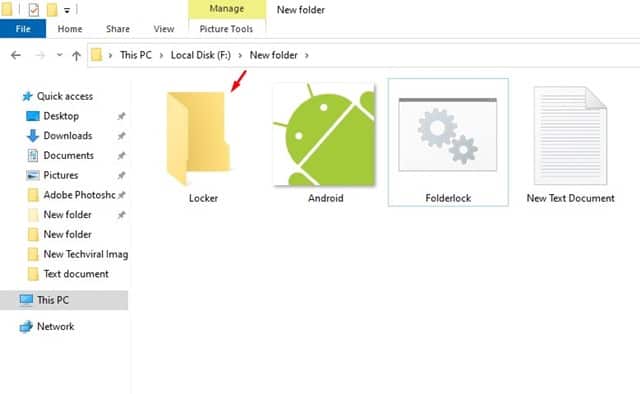
6. Now, you will find a new ‘Locker’ folder. Move the files that you want to lock on the Locker folder.
7. Once done, double click on the ‘Folderlock’ file.
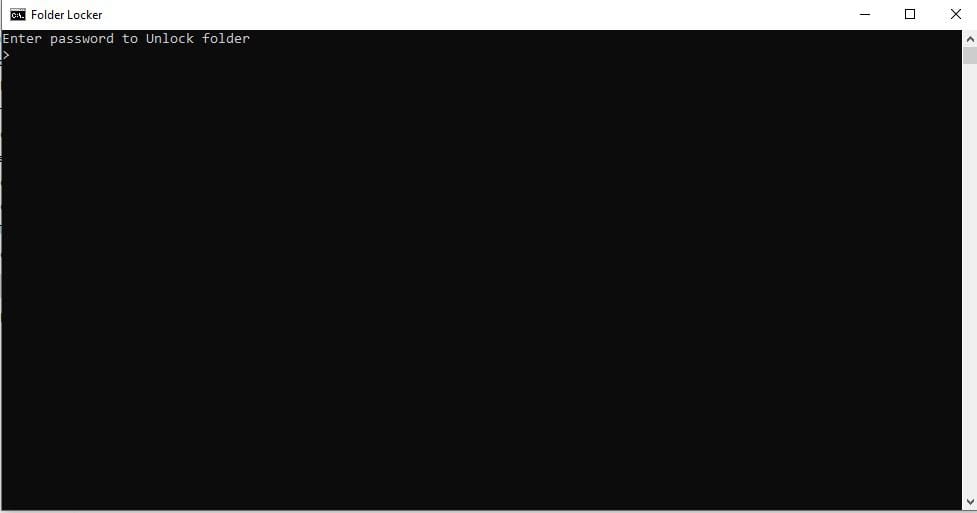
8. It will open a command prompt window; just type in ‘Y’ and hit Enter. The Locker folder will disappear.

9. To bring the folder back, double click on the ‘FolderLocker’ and enter the password that you have set.
That’s it! You are done. This is how you can lock folders in Windows 10. You can store your private photos inside the Locker folder to lock the photos.
3. Using Folder lock Applications
There are many folder lock applications available for Windows 10 that can be used to lock or hide any file or folder. You can use those apps to hide or lock your important photos on your PC.
We have shared a list of the best folder lock applications for Windows 10. You can use any of them to hide or lock your pictures in Windows 10.
After following the above three methods, you will be able to hide or lock your photos in Windows 10. I hope this article helped you! Please share it with your friends also. If you know of other methods to hide/lock photos, let us know in the comment box below.


ive moved locker to new folder and lost the photos in it