For some reason, you might wish not to show all of these users’ accounts and would likely think of hiding them from the user login screen on Windows.
It’s actually possible to hide user accounts from the login screen on Windows 10 without deleting them. This way, you can maintain your privacy and prevent security issues.
Steps to Hide User Accounts on the Windows 10 Login Screen
However, hiding user accounts from the login screen is not that easy; you would have to tweak some registry keys to achieve the goal. Here’s how to hide the user account on Windows 10’s login screen.
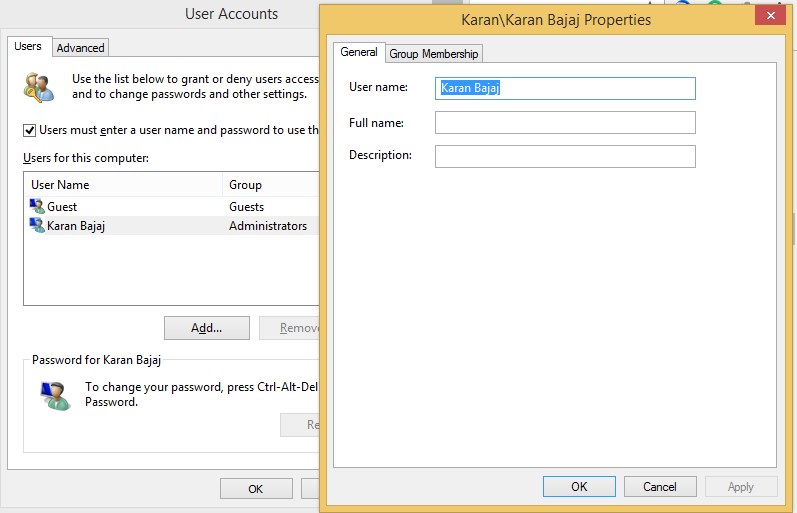
1. Open the run command panel by pressing the Win + R key on your Windows 10. Next, type “netpliwz” and then click on the OK button. This will open the User accounts window panel.
2. Now, from the list of all your accounts that have been created before choosing the one you want to hide, click on the properties button below on the panel. Copy the Username for that account from the further window panel.
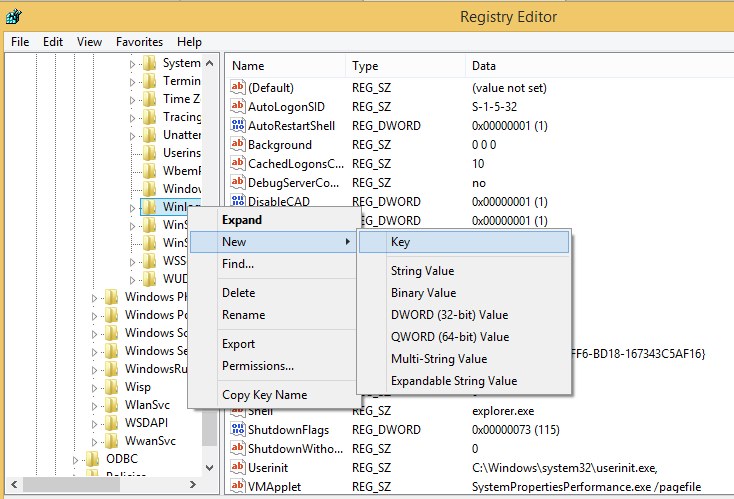
3. Now close all the windows and again open the Run command, type in “Regedit” and then click on the OK button. After that, browse the path given below on your computer:
"HKEY_LOCAL_MACHINESOFTWARE\Microsoft\WindowsNT\CurrentVersion\Winlogon"
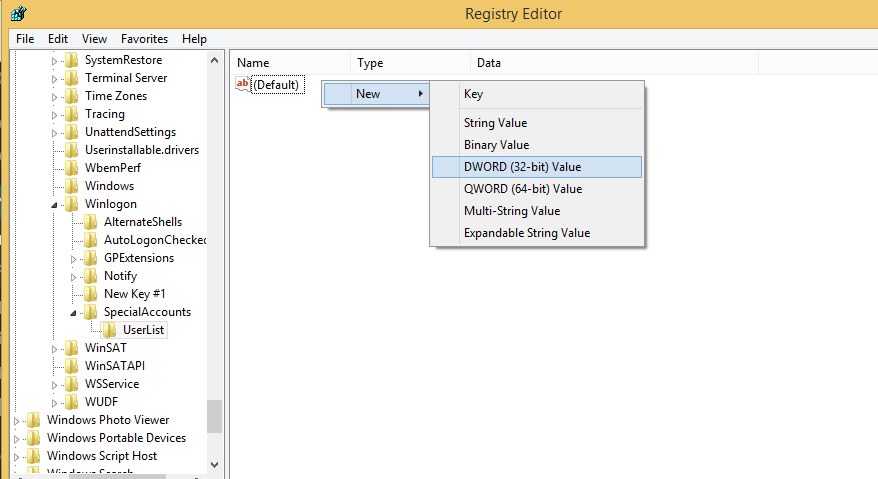
4. Right-click on the Winlogon and select New. After that, click on the Key. Name up the new Key “SpecialAccounts“. Now click on the SpecialAccounts key and select New > Key; name the new key UserList. And after that, right-click on the UserList, and select New > DWORD(32-bit) Value.
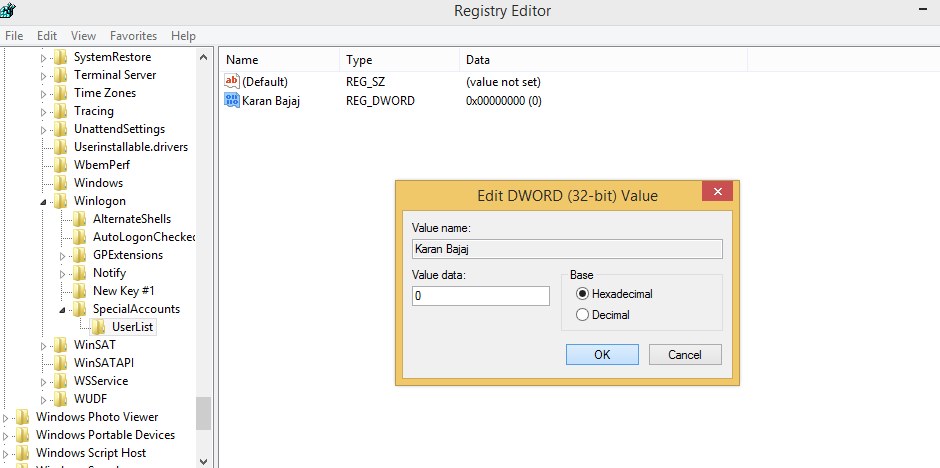
5. Name the DWORD Key the same as the name of the user account you want to hide, double-click on the DWORD Key, and make sure that the data value is set to 0.
You can now sign out and check that the particular designated user account will no longer be visible on the login screen.
So, these are the steps to hide user accounts on the Windows 10 Login screen. The method we have shared may not work with every build of Windows 10. If you need more help hiding user accounts on the login screen, let us know in the comments below.


