The Hypervisor Error usually appears when system files have a problem with Hyper-V settings. It could be incorrect Hyper-V Settings, corrupted system files, outdated drivers, or faulty RAM. If you get the same error, here’s what you should do.
1. Restart your PC
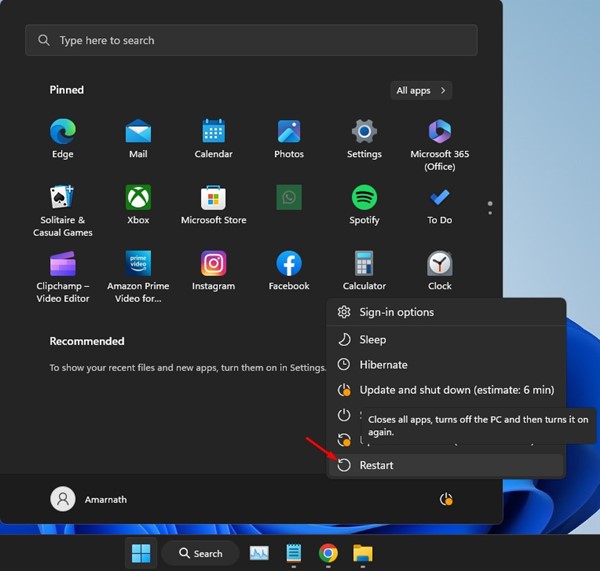
Restarting will install the pending updates and remove bugs and glitches.
Click the Windows Start button, then click the Power Menu. On the Power Menu, select Restart. After the restart, follow the next methods.
2. Turn off the Hypervisor
If you don’t plan to use any virtual machine, you should turn off the Hypervisor.
1. Open the Control Panel from the Windows Search.
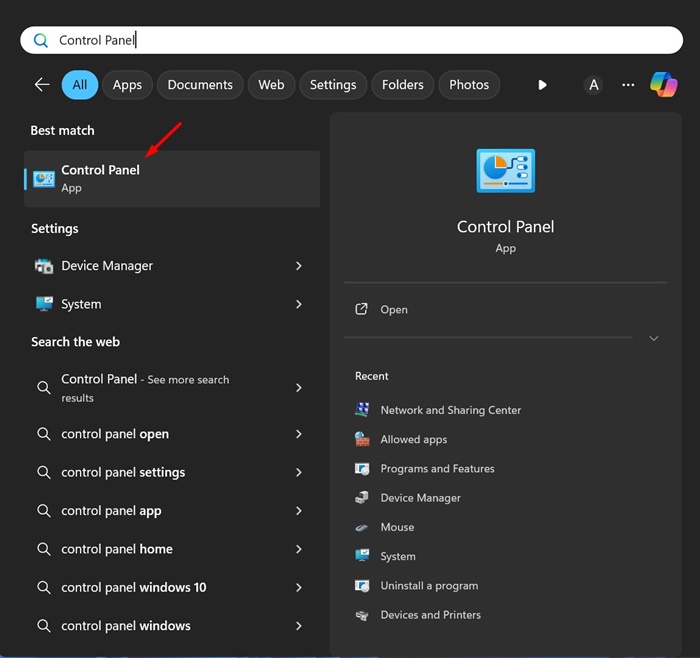
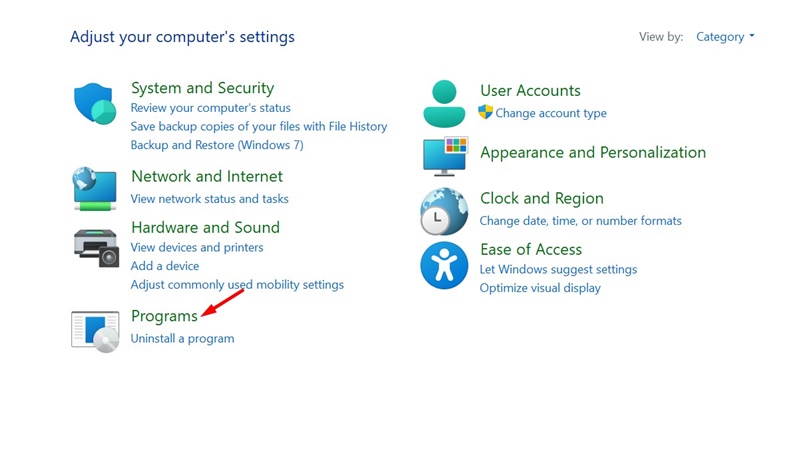
2. Click on Programs.
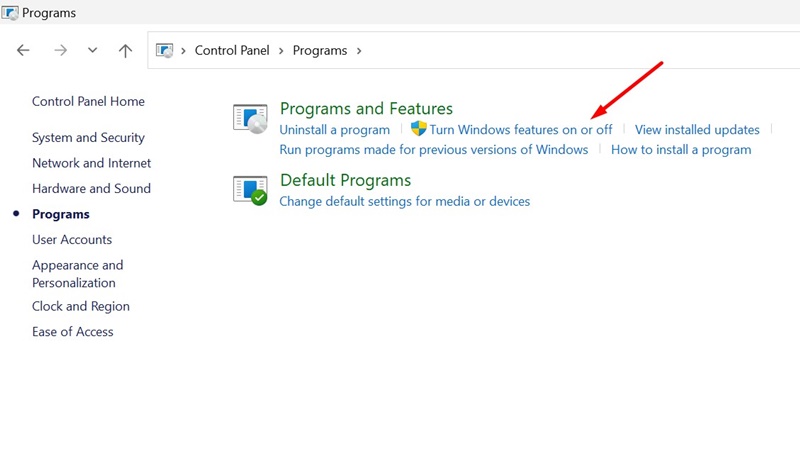
3. Click Turn Windows Features On or Off.
4. Find the Windows Hypervisor Platform. Simply unclick it and click OK.
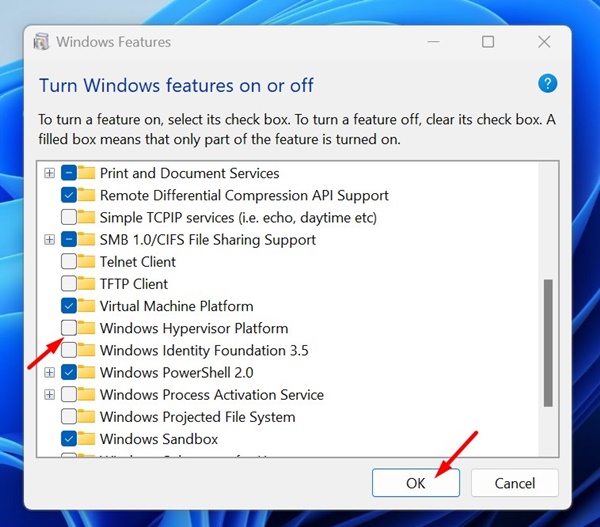
After making the changes, restart your Windows 11 PC. This should fix the HYPERVISOR ERROR BSOD on Windows 11.
3. Restart the Hyper-V Services on Windows 11
The next thing you should do to resolve the HYPERVISOR ERROR is to restart the Hyper-V Services.
1. Open the Services app from the Windows Search.
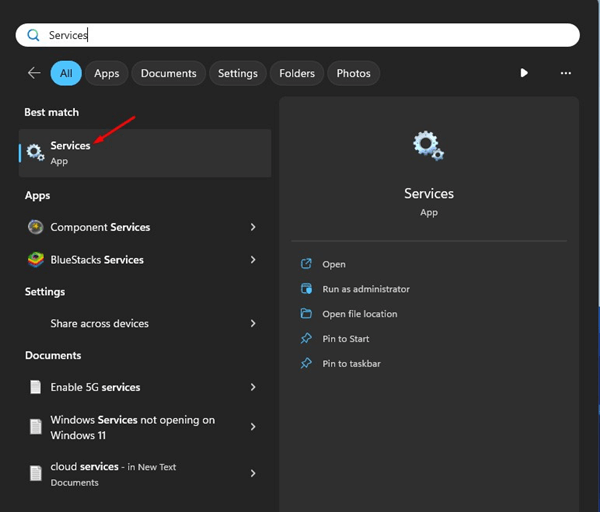
2. Find all Hyper-V Services.
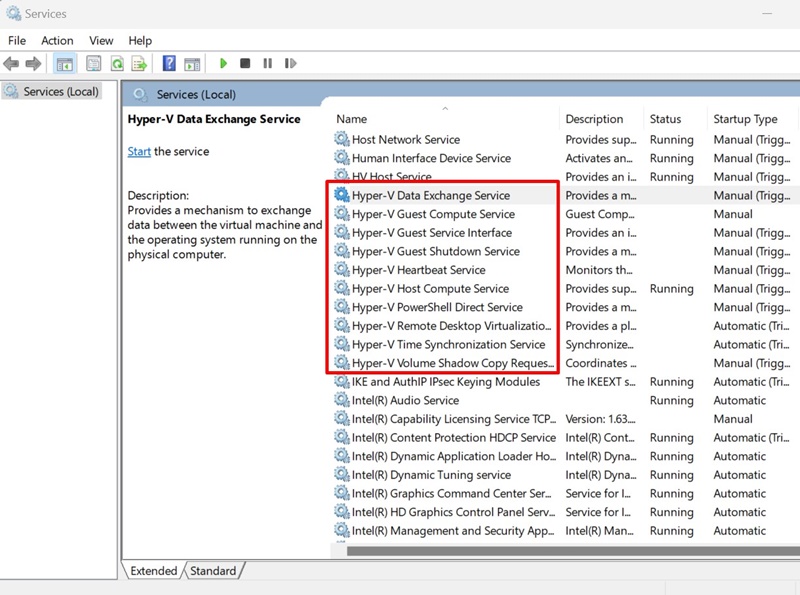
3. Right-click on each Hyper-V service and select Restart.
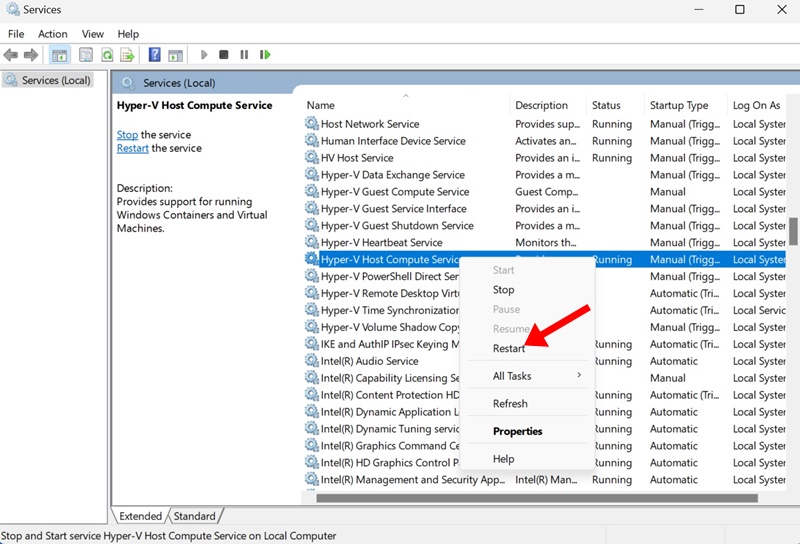
4. If the Restart option is not available, select Stop. Then, right-click on the service again and select Start.
You need to repeat the steps for all Hyper-V services that appear.
4. Rule out the Memory Issues
Since memory issues are a prominent reason for HYPERVISOR ERROR, you can try running the Windows Memory Diagnostic Tool.
Important: Before running the Windows Memory Diagnostic Tool, save your unfinished work, which will require a restart.
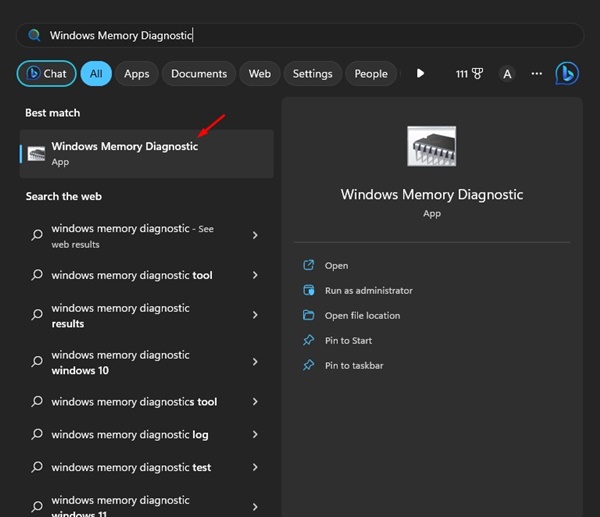
1. Open the Windows Memory Diagnostic Tool from the Windows Search.
2. Click on Restart now and check for problems.
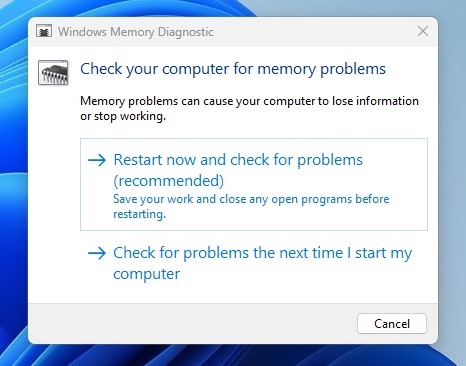
3. Your PC will restart, and the Memory Diagnostic tool will run.
Once your PC restarts, you will see the results in a notification. If the tool returns with problems, you must fix your problematic RAM.
5. Check your Drive for File System Errors
If the drive where Windows is installed has file system errors, your PC may crash with unknown errors. You should check your drive for file system errors.
- Launch File Explorer.
- Right-click the Windows Installation drive and select Properties.
- Switch to the Tools tab and click Check on the Error Checking section.
- Select Scan Drive to rule out the file system errors.
6. Run the DISM Tool
To rule out the possibility of corrupt system files, you should run the Deployment Image Servicing Scan through the Command Prompt.
1. Open Command Prompt with administrative rights
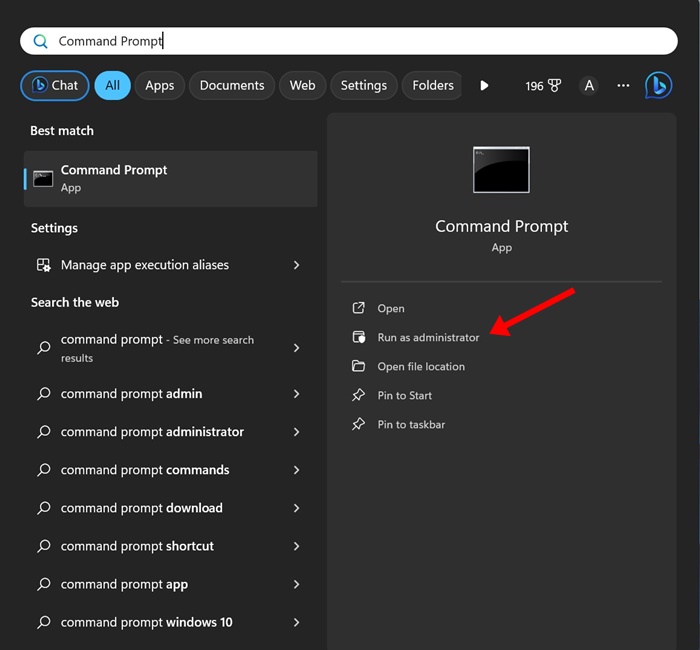
2. Execute this command:
DISM.exe /Online /Cleanup-image /Restorehealth
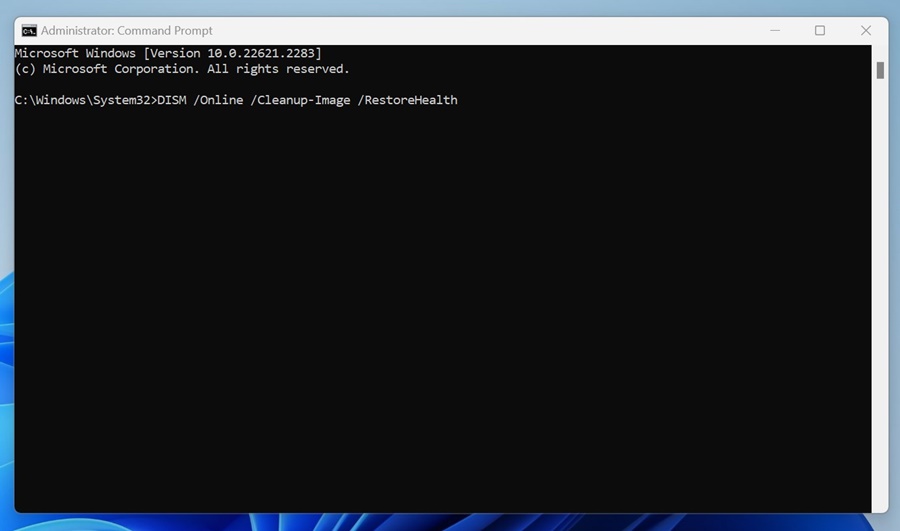
Wait until the scan completes. Once completed, restart your Windows PC. This should fix the HYPERVISOR_ERROR BSOD on Windows 11.
7. Update your Windows 11
If you still get the error, you should update your Windows 11 PC. Here’s how to update it.
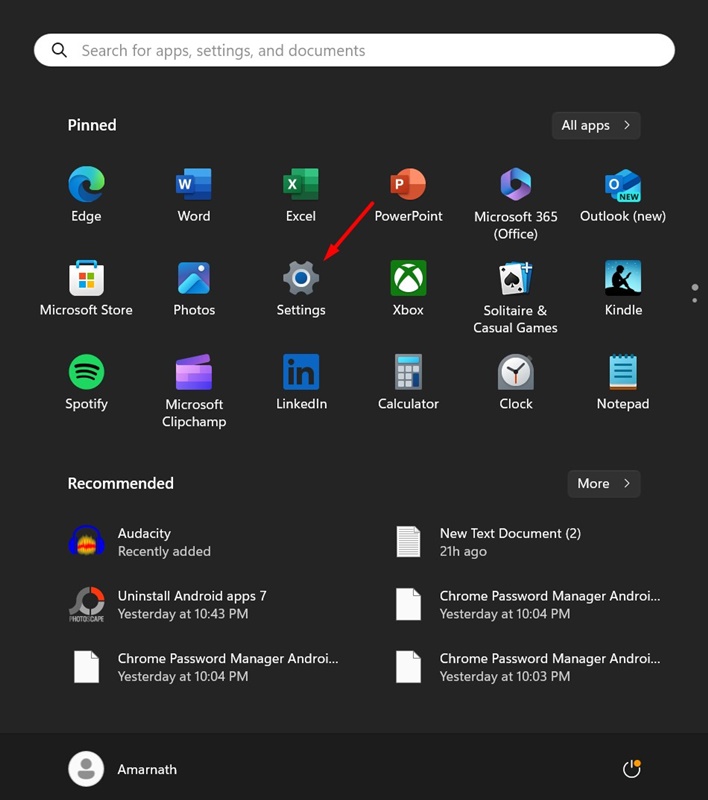
1. Click on the Windows 11 Start button and select Settings.
2. Click on Windows Update.
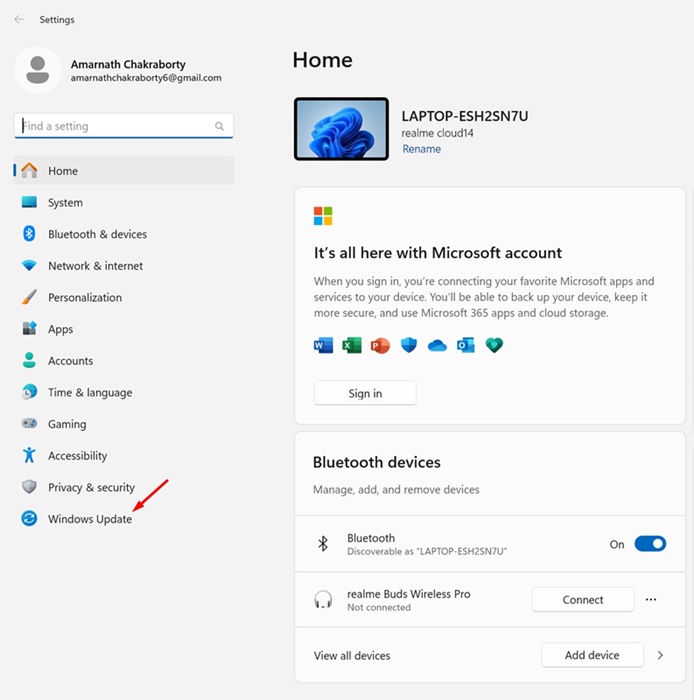
3. Click Check for Updates.
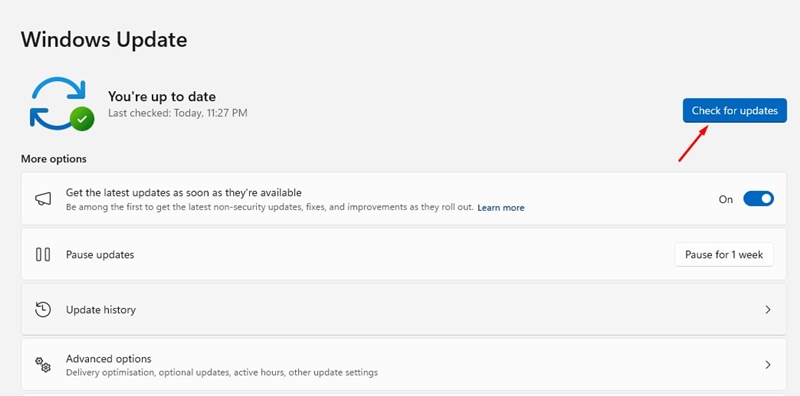
4. The update tool will find any pending updates. If an update is available, download and install it.
8. Reset Windows 11
Resetting a Windows 11 PC should be your last resort, especially if everything else failed to fix the HYPERVISOR_ERROR stop code. Here’s how you can reset Windows 11.
1. Click on the Windows 11 Start button and select Settings.
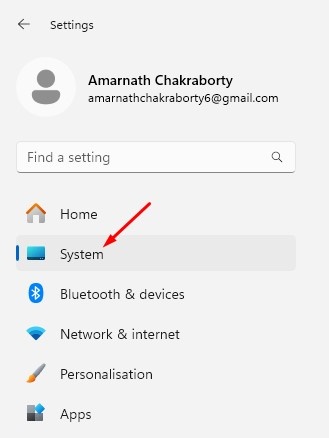
2. Switch to System.
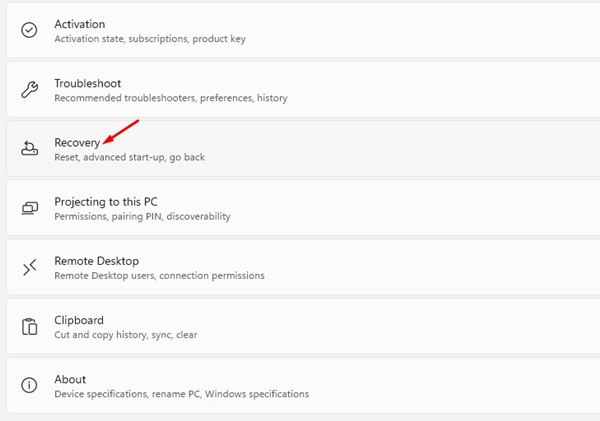
3. Click on Recovery.
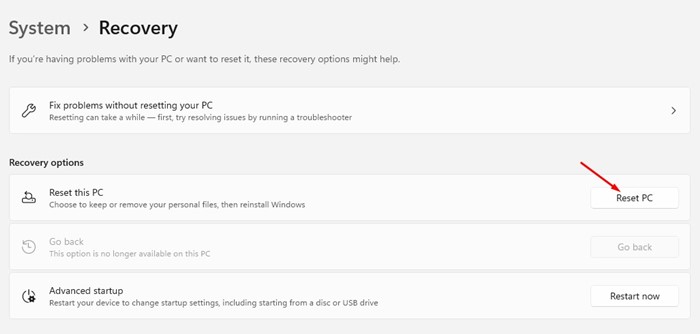
4. Click on Reset PC.
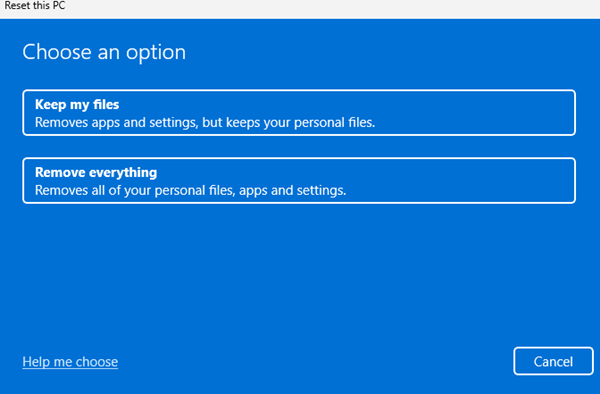
5. Select Keep My Files.
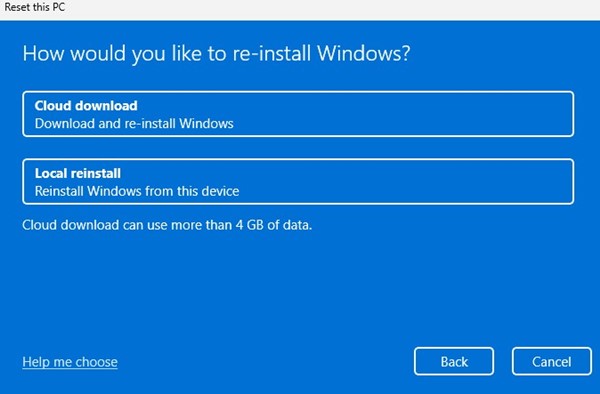
6. Choose whether to reinstall from a Cloud Download or Local Reinstall.
7. On the Ready to reset this PC screen, click Reset.
This will start the Windows 11 Reset tool. The reset process may take a while; avoid restarting or shutting down during that period.
These are a few methods to fix the HYPERVISOR_ERROR stop code on Windows 11. If you need more help resolving this BSOD, let us know in the comments.