If your SSD performance has become slower than ever after updating to Windows 11, here’s what you should do.
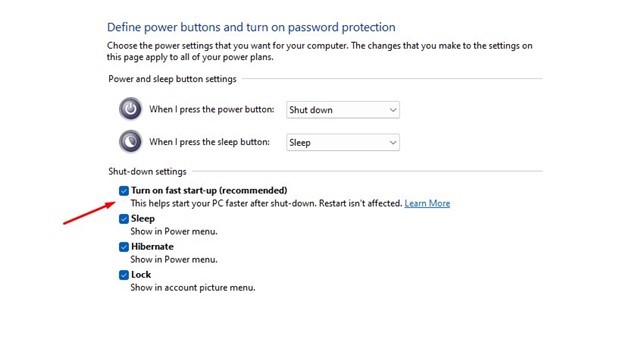
1. Enable the Fast Startup
You can make a few changes to enhance your SSD performance even further.
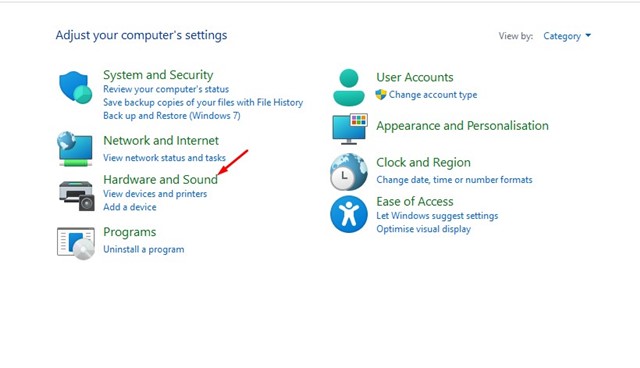
1. Open the Control Panel on your Windows 11 and click on Hardware and Sound.
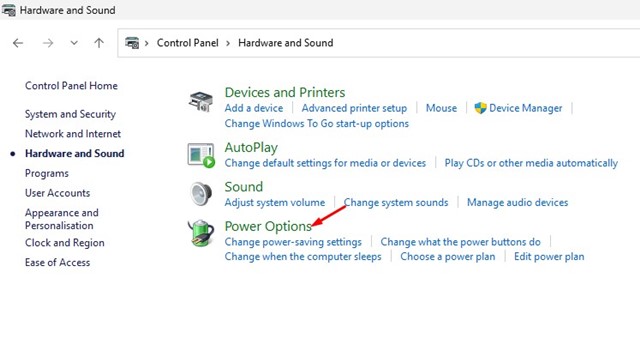
2. Click Power Options.
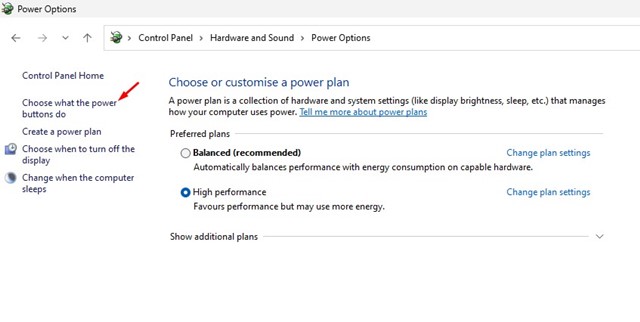
3. Click the Choose what the power button does.
4. Click the Change settings that are currently unavailable.
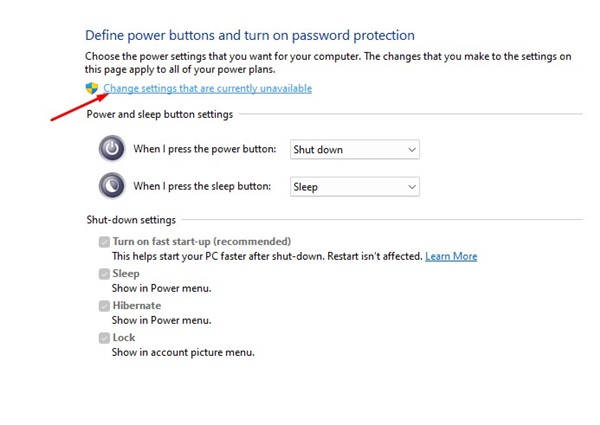
5. Check Turn on fast startup. Once you have done this, click Save Changes.
2. Disable Startup Programs on Windows 11
Unnecessary startup programs can slow down the boot time of your Windows 11. Even if you have an SSD, you will notice a drop in performance if you have many Startup Programs enabled.
1. Open Task Manager from the Windows Search.

2. Switch to the Startup Apps.
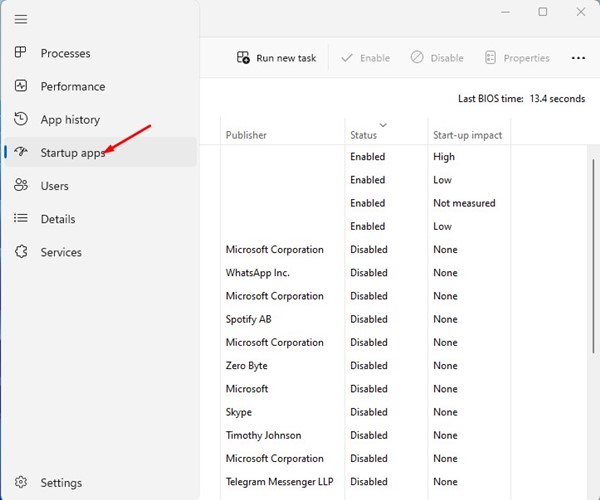
3. Click on the Status section to sort enabled apps. Right-click on all unnecessary apps and select Disable

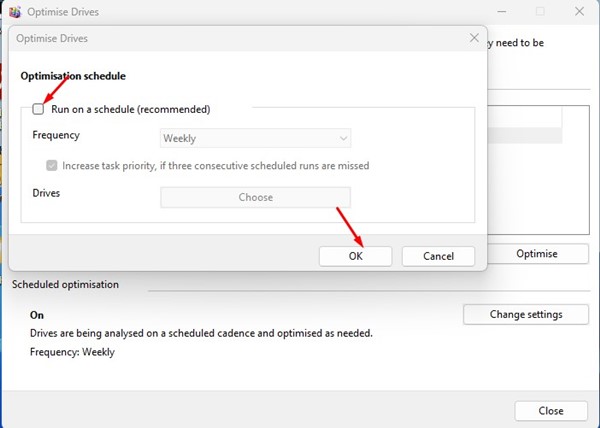
3. Disable the SSD Defragmentation
The Windows disk Defragmentation tool allows you to free up storage space and speed up an aging drive. The tool fills empty gaps and brings the stored data closer for faster access.
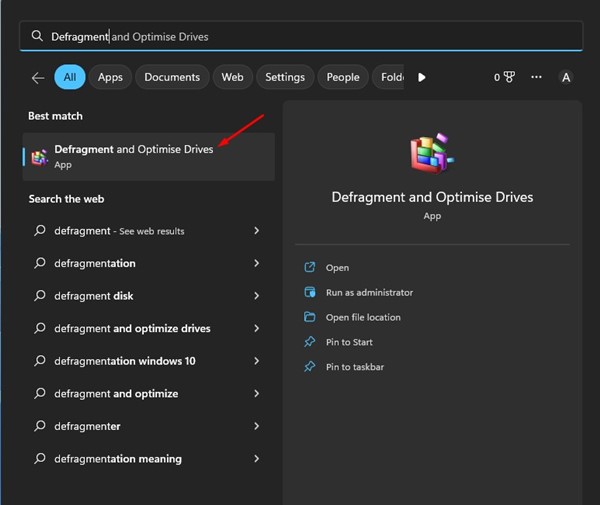
1. Click on the Windows 11 search and type Defragment. Launch the Defragment and optimize drives tool from the list of matching results.
2. Click on the Change settings button under the Scheduled Optimization.
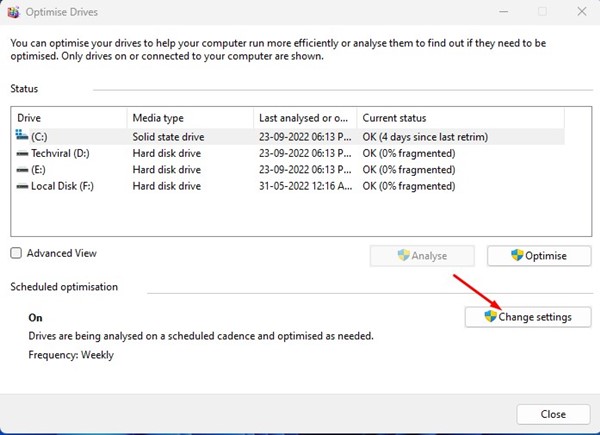
3. Uncheck the Run on a schedule option. Once you’ve done this, click OK.
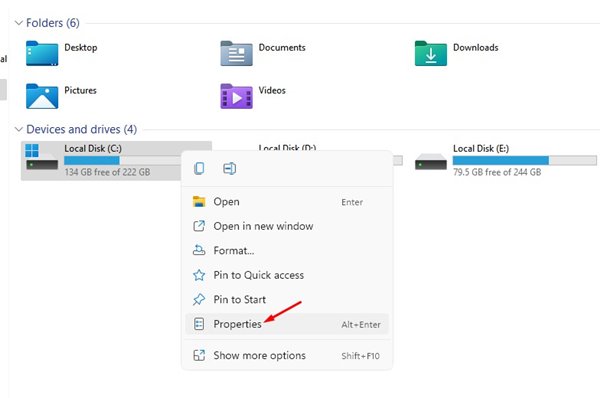
4. Disable Indexing
The indexing in Windows is done to speed up file searches. However, this can often affect the speed and performance of the SSD.
1. Open the Windows 11 File Explorer. Right-click on your SSD drive and select Properties.
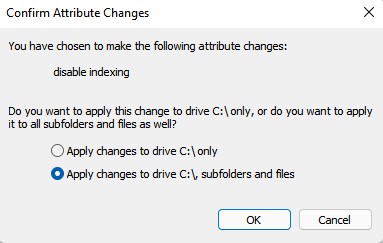
2. Uncheck the Allow files on this drive to have contents indexed in addition to file properties.
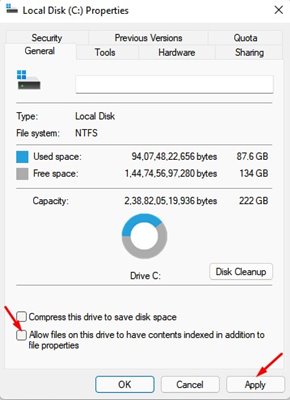
3. Once done, click Apply. On the Confirm attribute change prompt, select Apply changes to subfolders and files and click OK.
Also read: Windows 11 Free Download
These are some of the best ways to speed up your SSD on your Windows 11 computer. In the comment box below, let us know if you know of any other ways to speed up a slow SSD on Windows 11.


