Everyone experiences different types of problems while using a computer. You may experience slow boot issues, file explorer lags, and more. If you are using Windows 11, you might face more problems.
Recently, a few users have reported problems while shutting down their Windows 11 PC. Usually, Windows 11 shuts down very quickly when everything is working correctly, but you may also experience slow shutdown speed.
Windows 11 Shutdown Speed
Like every other version of Windows, Windows 11 can also take an unusually long time to close all open applications. It won’t shut down until and unless Windows 11 closes all opened programs. This process can take up to a few seconds or minutes.
Windows 11 is designed to wait a specific time to close all open apps, stop the background processes, and update some system files. Still, you can make some changes to the Registry file to avoid that waiting period.
Also Read: How to Set Windows Security Scan Shortcuts in Windows 11
Steps to Increase Shutdown Speed in Windows 11
Below, we have shared a step-by-step guide on increasing shutdown speed on Windows 11. Hence, if you are looking for ways to improve the shutdown speed of your Windows 11 PC, you may find this guide very useful. Let’s check out.
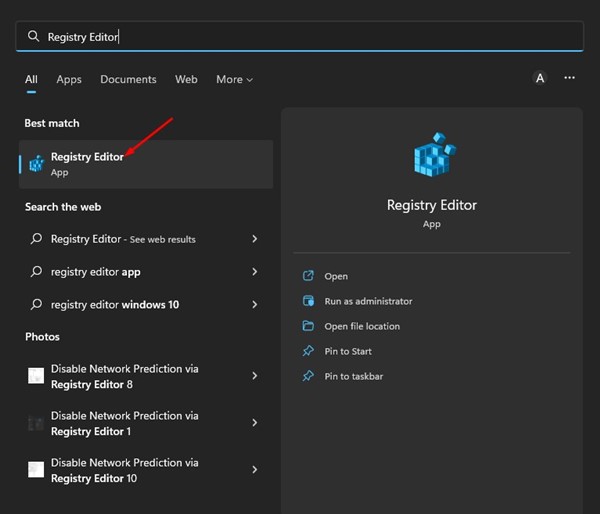
1. First, click on the Windows 11 Search and type Registry. Next, open the Registry Editor app from the list of options.
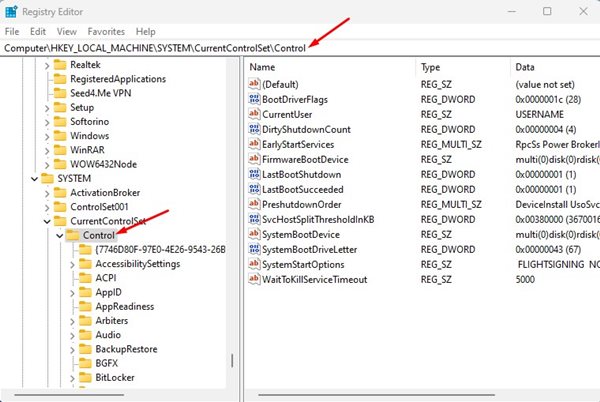
2. When the Registry Editor opens, navigate to this path:
Computer\HKEY_LOCAL_MACHINE\SYSTEM\CurrentControlSet\Control
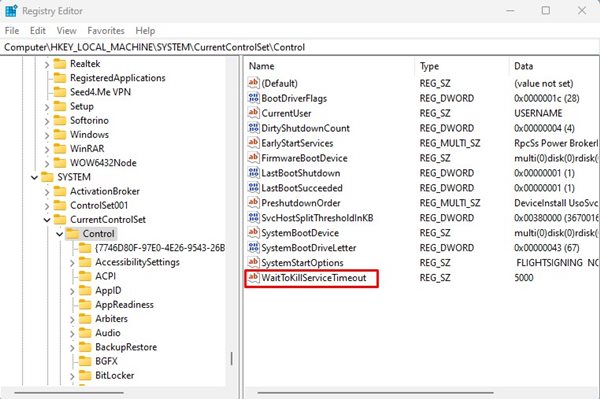
3. Now, double-click on the WaitToKillServiceTimeout key on the right side.
4. On the Value data field, replace 5000 with 2000. Once done, click on the Ok button.
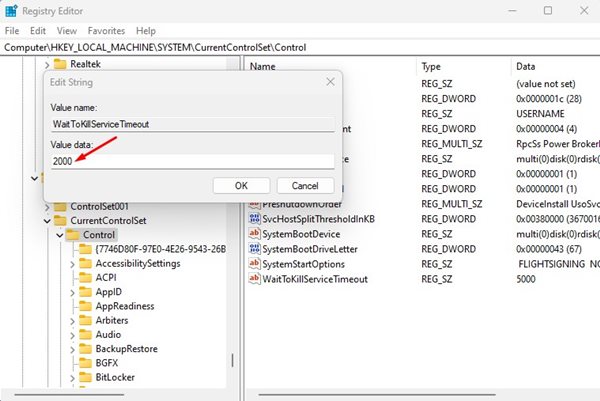
5. This will force your Windows 11 to wait for apps & services for only 2ms instead of the default 5ms. Don’t set the parameter lower than 2ms, as it will corrupt your essential app data.
6. Now, on the Registry Editor, navigate to this path:
Computer\HKEY_CURRENT_USER\Control Panel\Desktop

7. Right-click on the Desktop folder and select New > String Value.
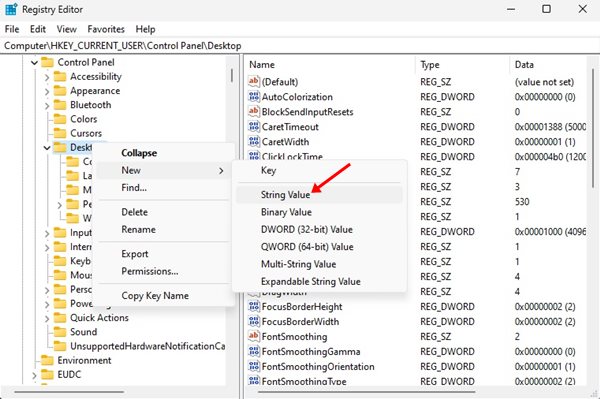
8. Name the new String Value as WaitToKillAppTimeOut.
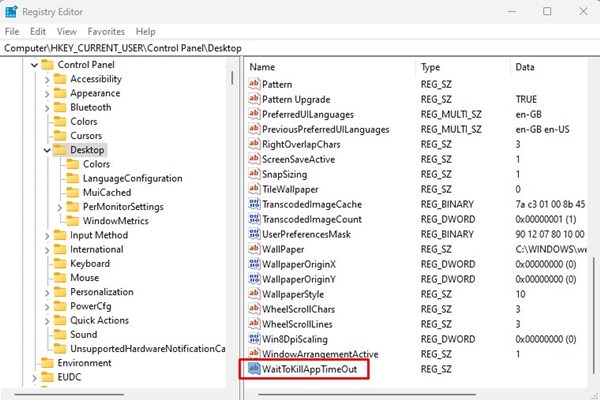
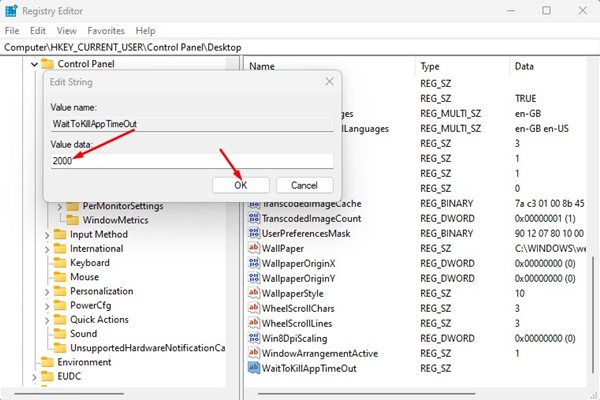
9. Double click on the WaitToKillAppTimeOut key and enter 2000 in the Value data field. Once done, click on the Ok button.
10. Now, right-click on the Desktop key folder again and select New > String Value.
11. Name the new String value as HungAppTimeout.
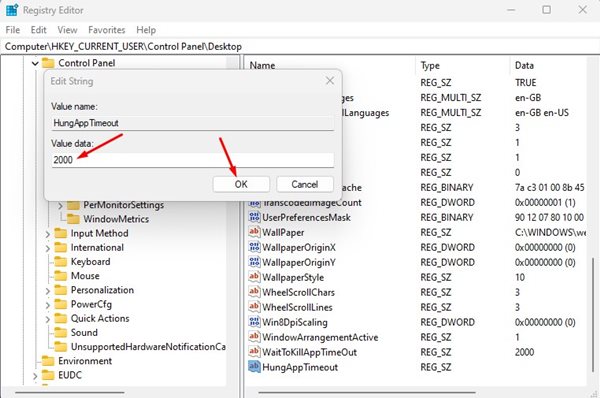
12. Double click on the HungAppTimeout key and set 2000 in the Value data field. Once done, click on the Ok button.
13. Again, right-click on the Desktop key folder and select New > String Value.
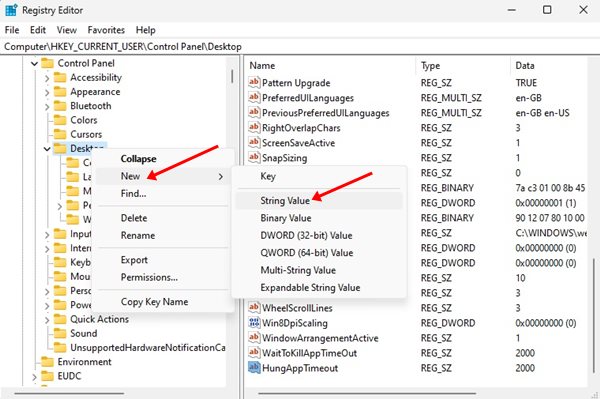
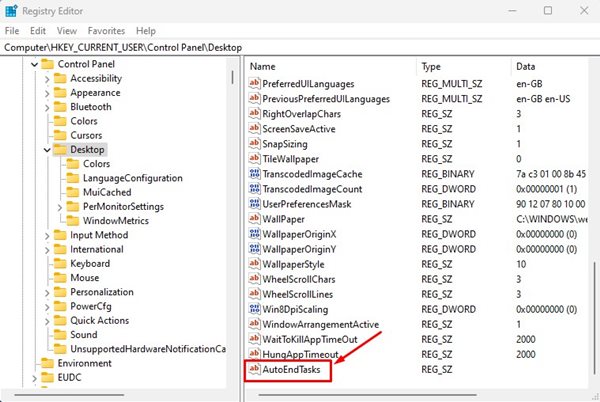
14. Name the new String Value as AutoEndTasks.
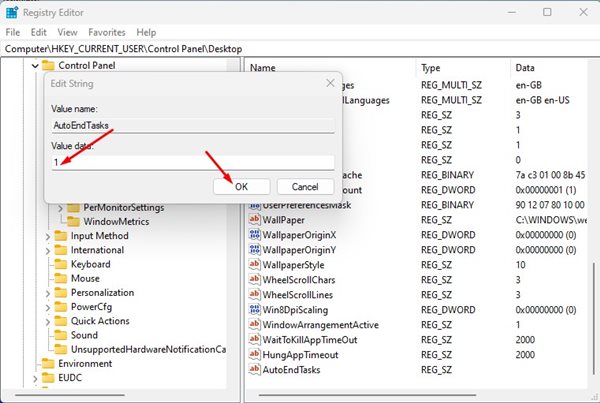
15. Double click on the AutoEndTasks and set 1 in the Value data field. Once done, click on the Ok button.
That’s it! After making the changes, restart your Windows 11 computer. After the restart, you will notice an increase in shutdown speed the next time you shut down your PC. If the changes made your PC unstable, tweak (increase or decrease) the millisecond values. Or else, you can delete the String key you have created and revert the millisecond values.
Also Read: 10 Best Free Video Players for Windows 11
So, that’s all about how to increase the shutdown speed on Windows 11. The process is lengthy, but it significantly increases the shutdown speed of your computer. If you need more help, let us know in the comments below.

