Although Google changed the plans of Google Photos that used to offer unlimited storage space, it hasn’t affected many users. Many Google Photos users were still happy with the 15GB of free space offered with every Google Account.
Within the 15GB limit, users can store their photos & videos on Google Photos. While using the Google Photos app, we recently discovered another best feature that was kept hidden from the users.
Google Photos has a slideshow feature that can have all of the photos from a specific album play one after another automatically. The feature is available for every Google Photos user on desktop & mobile.
So, if you are interested in creating and viewing the Google Photos slideshow, you are reading the right guide. In this article, we will share a step-by-step guide on how to create a Google Photos Slideshow on desktop & mobile.
Steps to Make a Slideshow on Google Photos (Desktop & Mobile)
Important: You can use Google Photos to view the Slideshow of the photos stored on the cloud. You can’t manually customize the slideshows. This simply means you can’t add your custom background, music, or transition effects.
Create & View Google Photos Slideshow on Desktop
Well, you can view the Google Photos slideshow on desktop & mobile. Here are some simple steps to create a Google Photos slideshow on a desktop.
1. First of all, launch your favorite web browser and open Google Photos.
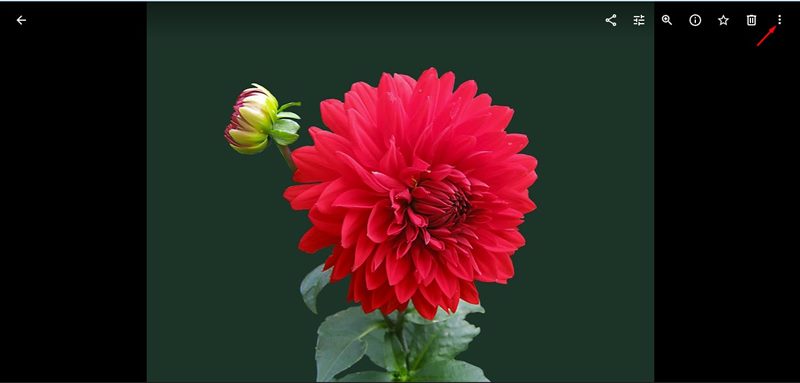
2. Now, simply open any photo and tap on the three dots as shown below.
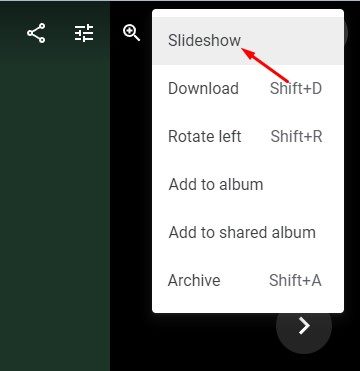
3. From the list of options that appears, click on the Slideshow.
4. Now, your browser will go full screen, and the photo slideshow will start. You just need to sit back and watch the Slideshow.

5. If you want to exit the Slideshow, simply press the ESC key on your keyboard. If you wish to create & view a slideshow of a specific album, open the album and select any photo. Next, click on the three dots and select the Slideshow option.
That’s it! You are done. Now Google Photos will create and start playing a slideshow of photos stored on that specific folder.
Create & View Google Photos Slideshow on Mobile
You can also create & view Google Photos slideshow on Android and iOS. Although we have used an Android device to demonstrate the process, you need to implement the same steps on your iOS device as well.
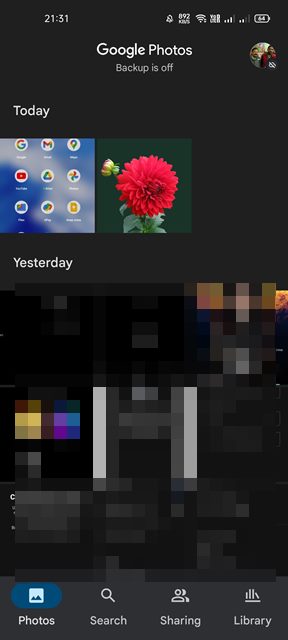
1. First of all, open the Google Photos app on your device and then tap on the first photo.
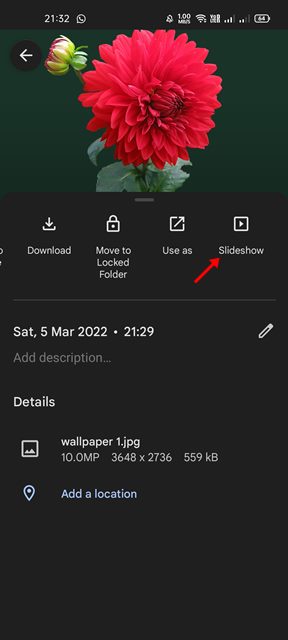
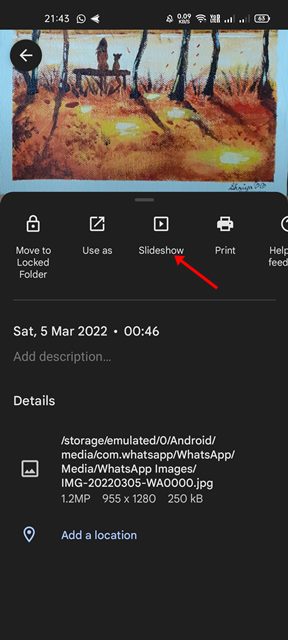
2. Next, tap on the three dots as shown in the screenshot below.

3. From the pop-up menu, tap on the Slideshow.
4. The Google Photos app for Android/iOS will start playing a slideshow for all photos. To exit the Slideshow, tap on the back arrow button.

5. To create a slideshow of pictures stored in a specific album, tap on the Library option as shown below.

6. Now, open the first photo stored on the specific album and tap on the three dots. From the pop-up menu, tap on the Slideshow option.

That’s it! You are done. Now Google Photos app will start playing photos stored in a specific album. To exit the Slideshow, just tap on the back arrow button.
Also Read: How to Enable & Use Locked Folder in Google Photos
It’s pretty easy to create and view a Slideshow on Google Photos for desktop & mobile. I hope this article helped you! Please share it with your friends also. If you have any doubts related to this, let us know in the comment box below.


